
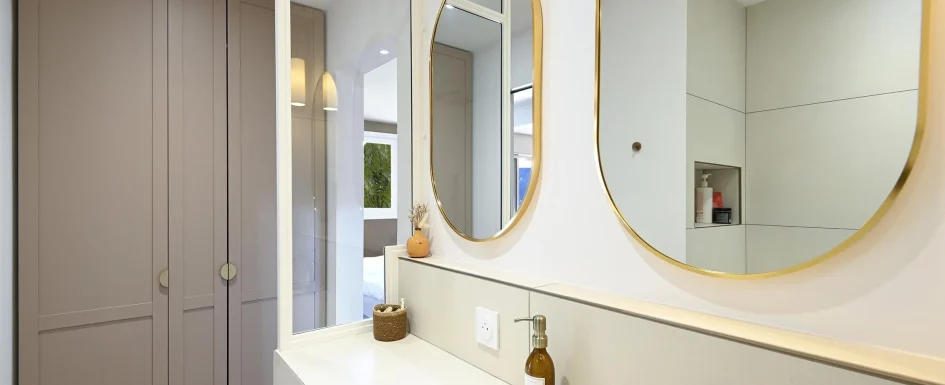
A useful bathroom estimate begins before tile, faucets and vanity fronts are selected. It needs a clear brief, a workable plan and an agreed approach to the services and concealed construction. Otherwise, two attractive-looking prices may describe very different jobs.
ArchiWorking’s seven-point method connects budget, circulation, plumbing, waterproofing, ventilation, the main fixture, materials and everyday comfort. The aim is not to specify a bathroom from an article, but to know what must be resolved before contractors price the work.
The examples include a small room under a roof slope and references from French project practice. Those technical and tax references are identified below rather than presented as American or Spanish rules.
1. Agree on the actual level of renovation
A cosmetic refresh and a complete bathroom rebuild are different scopes. A full renovation may involve removal, waste disposal, support repair, waterproofing, plumbing, electrical work, ventilation and finishes. Calling both “a new bathroom” makes meaningful comparison impossible.
Clarify the objective: a more contemporary appearance, better daily comfort, more usable space or a complete replacement. Then rank maintenance, access, storage and aesthetics. The budget should follow that level of change, not simply the visible equipment list.
An itemized estimate should separate removal and debris disposal, plumbing, electrical work, waterproofing, surfaces, supplies and installation. It should name equipment brands and references, identify timing and make the responsibility for each part clear.
Seek two or three comparable estimates based on the same plan and scope. Check the contractor’s relevant insurance and qualifications, and have the applicable tax treatment identified. The French insurance and VAT examples in this article are contextual, not substitutes for the requirements where the property stands.
Allow for discoveries such as damaged support or old pipework when the room is opened. Our guides to additional work during renovation and construction insurance and guarantees develop those preparation questions.
2. Test the plan through actual movements
A rendering can look convincing while hiding conflicts between a door, drawer and the person using the basin. Before pricing, test entry, shower or bath access, toilet use, drying and places to put belongings.
Even a simple measured sketch can reveal those relationships. The original guidance uses roughly 60 to 70 cm in front of a basin, toilet or shower entry as planning references. They are not universal accessibility or code minima. The actual users, fixtures, door swings and local requirements determine the necessary space.
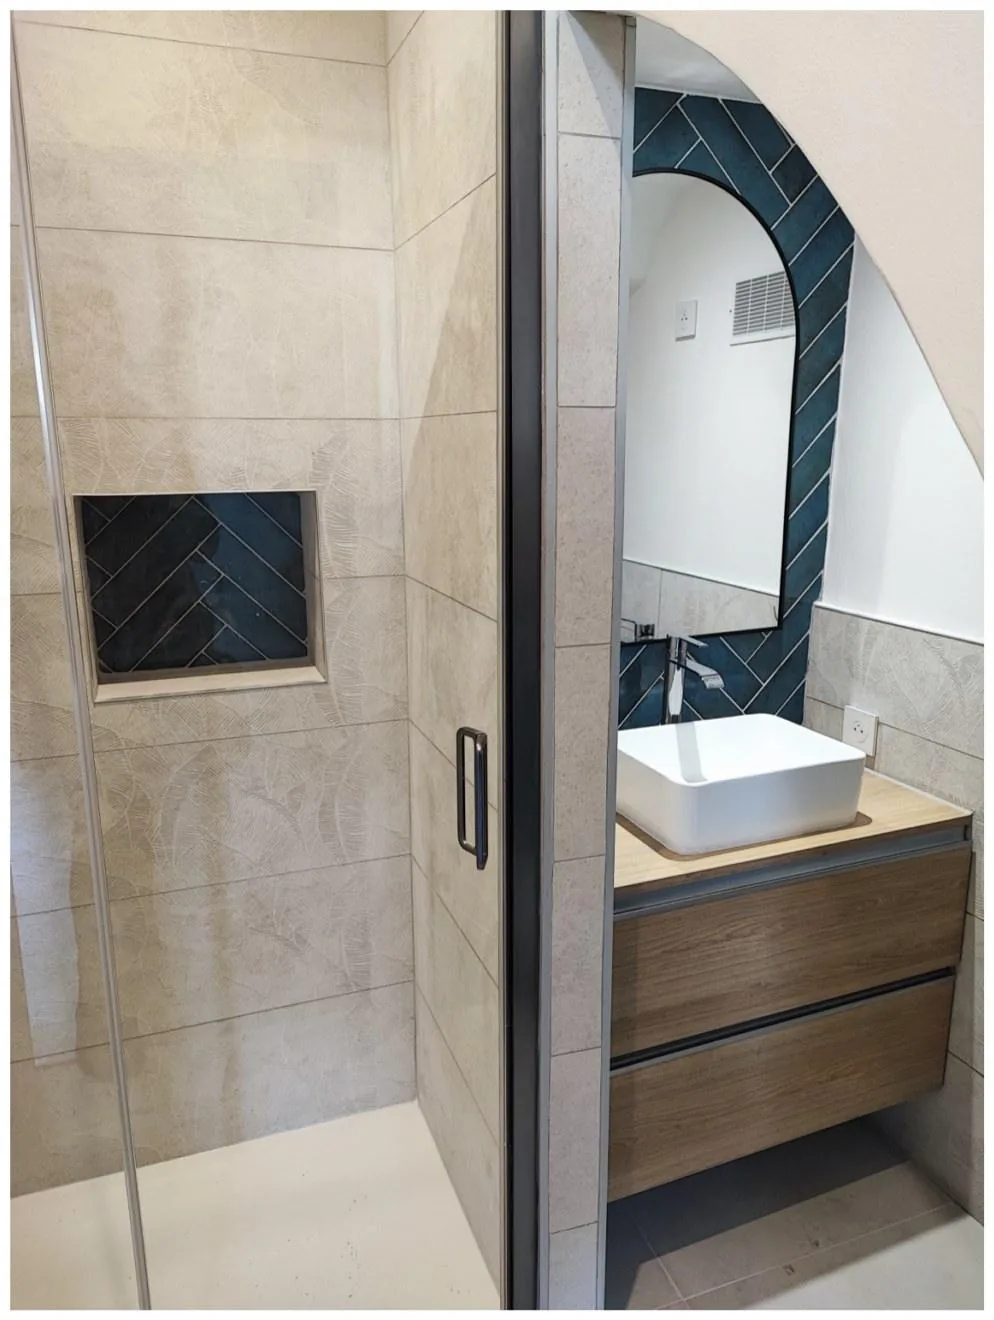
In a bathroom of about 4 m² under a roof slope, the existing shower was awkward to use and close. The design borrowed some area from the adjacent closet, reoriented the shower and enlarged it with an extra-flat 80 × 120 cm tray and suitable screens.
An existing niche was adapted for shower products, and ventilation improved. The completed arrangement combines the enlarged shower and niche with a wall-hung timber vanity, white vessel basin and rounded mirror beneath the slope.
This example shows why a few centimeters from a neighboring area can matter more than a more expensive fixture. The small-bathroom guide and former-closet bathroom under a roof slope offer related layouts to compare.
3. Resolve what happens behind the fixtures
Moving a shower, basin or toilet means checking routes, available heights, drainage and maintenance access. The farther equipment moves from an appropriate connection, the more carefully the route must be assessed.
Make three lists: what can stay, what should move and why, and what needs technical confirmation. That keeps a visually attractive relocation from reaching the estimate stage as an unexplained assumption.
The French planning examples mention a drain fall of around 1 to 3 cm per meter and a 100 mm toilet waste connection near the stack. These figures belong to that context, not a universal pipe specification. The actual system and applicable plumbing requirements govern size, fall and venting.
A flush-floor shower also needs room for its construction and drainage. It may require a suitable recess or a raised surrounding build-up; an extra-flat tray can be a more straightforward option in some apartments. Do not assume a tray can simply be removed to obtain a level floor.
Where a toilet cannot reasonably drain by gravity, a macerating pump may be a last-resort option rather than the first way to justify any desired position. The 3.8 m² bathroom with an added toilet and bathtub-to-large-shower renovation examine actual constraints.
See our projects in video
Real floor plans and renovations explained step by step on the ArchiWorking YouTube channel. Watch how spaces are reworked before the works begin.
4. Price waterproofing and ventilation explicitly
Tile alone does not make a bathroom watertight. Corners, junctions, penetrations and wet zones need a suitable continuous treatment, with details coordinated before finishes conceal the work.
The French discussion refers to an under-tile liquid protection system, often called SPEC, with corner bands and upstands. A walk-in shower floor needs the appropriate continuous waterproofing assembly; a product label alone does not establish suitability for every floor or wet-area use.
Have the system, brand and extent of work written into the estimate. It should be clear what happens at the shower, wall-floor junctions and pipe penetrations, not merely that “tiling” is included.
Ventilation also belongs in the early scope. The original French reference discusses extraction of about 15 to 30 m³/h depending on the dwelling, with replacement air entering beneath the door. Do not import those values as a universal local specification. The actual dwelling, extract route and applicable ventilation requirements must determine the design.
A bathroom that stays damp can deteriorate despite expensive new finishes. Our bathroom-floor preparation guide explains the importance of the support, which needs consideration alongside moisture control and the selected surface.
5. Choose the main fixture from the household’s use
Shower, bathtub or both will shape the plan, routes and budget. Decide whether the priorities are quick daily use, family bathing, accessibility, easy cleaning or preserving floor space.
The dimensional examples give a useful comparison rather than a universal minimum. An 80 × 80 cm shower may feel restricted; 90 × 90 cm or 120 × 80 cm can change its usability. The users and actual screen or door arrangement still matter.
The discussion suggests around 120 cm length as a starting point for studying a fixed screen without a door. That does not guarantee splash containment. Shower direction, enclosure geometry and the way it will be used need checking.
A bathtub about 160 to 170 cm long and 70 cm wide, fitted with a bath screen, can provide combined bathing and shower use for a family. Wanting both separate fixtures is reasonable only if the resulting room remains workable; the equipment count should not defeat circulation.
6. Select surfaces for water, cleaning and safe use
The floor should suit the expected wet, barefoot use, while wall finishes must match their exposure. Consider how joints and surfaces will look after repeated cleaning, not only on installation day.
Porcelain tile is a versatile choice, but its actual surface performance still needs checking. A visually matching tile is not automatically suitable on a wet shower floor. Request the product’s relevant test and application information.
The source discussion uses the DIN 51097 barefoot classification, with A, B and C representing different slip-resistance categories, and refers to class B for its shower-floor example. This is a classification reference, not a universal statutory minimum for every US or Spanish bathroom. Confirm the currently applicable test documentation and specification for the actual use.
Epoxy grout can offer useful stain resistance in a shower when correctly selected and installed. It does not replace the waterproofing beneath the tile, and no grout eliminates all cleaning. Our tile guide for small rooms brings format and appearance into that practical choice.
7. Plan comfort details before they become additions
Storage, niches, shelves, closed cabinets, useful mirror lighting, softer ambient light, outlets and heating all affect daily comfort. If they are omitted from the initial scope, they may become expensive or awkward additions once walls are finished.
A simple elevation helps locate niches, a bench and mirror equipment at suitable heights. Lighting can combine a practical layer for everyday tasks and a softer layer for atmosphere. A mirror light should illuminate the face usefully rather than be chosen solely for a decorative halo.
Electrical items must be positioned and protected for the actual wet-room zones. The French article refers to NF C 15-100 bathroom volumes and appropriate equipment protection; those references are not an American or Spanish wiring instruction. A qualified local installer must establish the applicable requirements.
Plan the towel-warmer supply and controls as part of the same work. The basin and faucet guide considers another closely connected fixture decision. Our nine checks before kitchen renovation applies a similar preparation method to a different room.
Keep the French tax and insurance example in context
For the French renovation context, the article discusses eligible work in a dwelling completed more than 2 years earlier, with a 10% VAT rate in relevant contractor-supplied and installed cases. Materials bought directly by the homeowner generally remain at 20%, while eligible installation may be treated differently.
Eligibility, scope and exclusions must be checked rather than assuming every bathroom item qualifies. These French figures do not determine US sales tax or Spanish VAT. Have the actual tax treatment confirmed for the project and location before comparing totals.
The French reference to assurance décennale is likewise a jurisdiction-specific insurance check. Ask for the insurance and professional documentation applicable to the actual contractor and work, rather than treating one country’s terminology as a universal warranty package.
Before accepting an estimate
A stronger estimate starts with a clear objective, tested circulation, verified services, specified moisture control and a fixture choice the room can support. Appropriate materials and comfort details then belong to the same coordinated scope.
The bathroom should not merely look complete at handover. It needs to remain usable, maintainable and able to manage moisture over time. That is why preparation precedes the final finish selection.
Questions about bathroom estimates
What should the estimate identify?
Separate work items, equipment references, installation, timing and the relevant contractor documentation. Waterproofing and ventilation should be explicit rather than hidden within a general finish allowance.
Should ventilation wait until the room is finished?
No. The extract route, replacement air and equipment need coordination before construction closes them in. Persistent humidity can undermine the result.
Is a shower always better than a bathtub?
No. The household’s actual use, available area and access needs should determine the choice. Neither a trend nor the number of fixtures is a substitute for a workable plan.
Can two prices be compared without the same drawing?
Not reliably. A shared plan and written scope make differences visible; otherwise, a lower total may simply exclude work the other contractor included.