
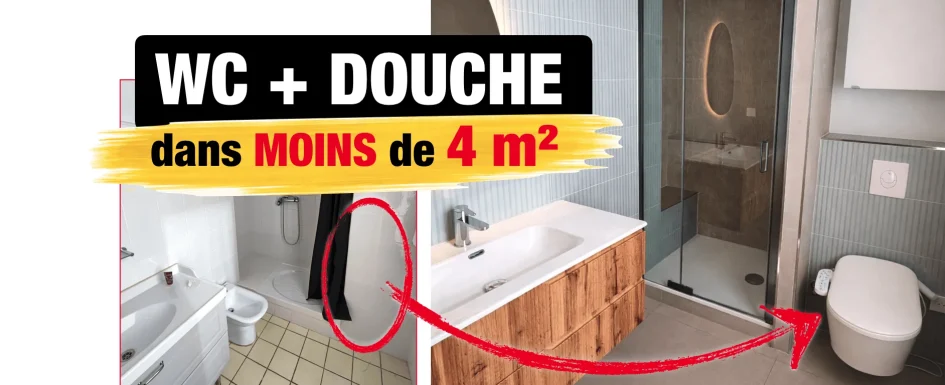
Adding a toilet to a bathroom of only 3.8 m² did not begin with choosing a smaller bowl. It began with reading the service enclosure, the existing waste routes and the window’s opening movement. Those fixed conditions determined whether the new arrangement could work.
The room belonged to a primary suite. It already contained a raised shower tray, bidet and small basin, but the owners wanted a complete renovation, a more accessible walk-in shower arrangement and a private toilet. The challenge was to add that function without blocking the window or sacrificing a useful shower.
Our seven checks before bathroom renovation provide the wider preparation framework. This case shows why a room’s stated floor area is not the same as the space available for equipment, enclosures and actual movement.
Establish what can remain in place
The main service routes could not be relocated. The plan had to use the existing drainage while keeping comfortable circulation and preserving the window. It was not a blank 3.8 m² rectangle ready for any arrangement.
Before demolition, identify openings, fixed connections and the space needed to stand, turn and use fixtures. A drawing should be tested against those actions, not only against the outlines of the products.
This was also a privacy brief. A toilet within the suite would let the bedroom have its own complete sanitary arrangement. The desired improvement was therefore practical as well as decorative.
Adjust removal to the actual wall construction
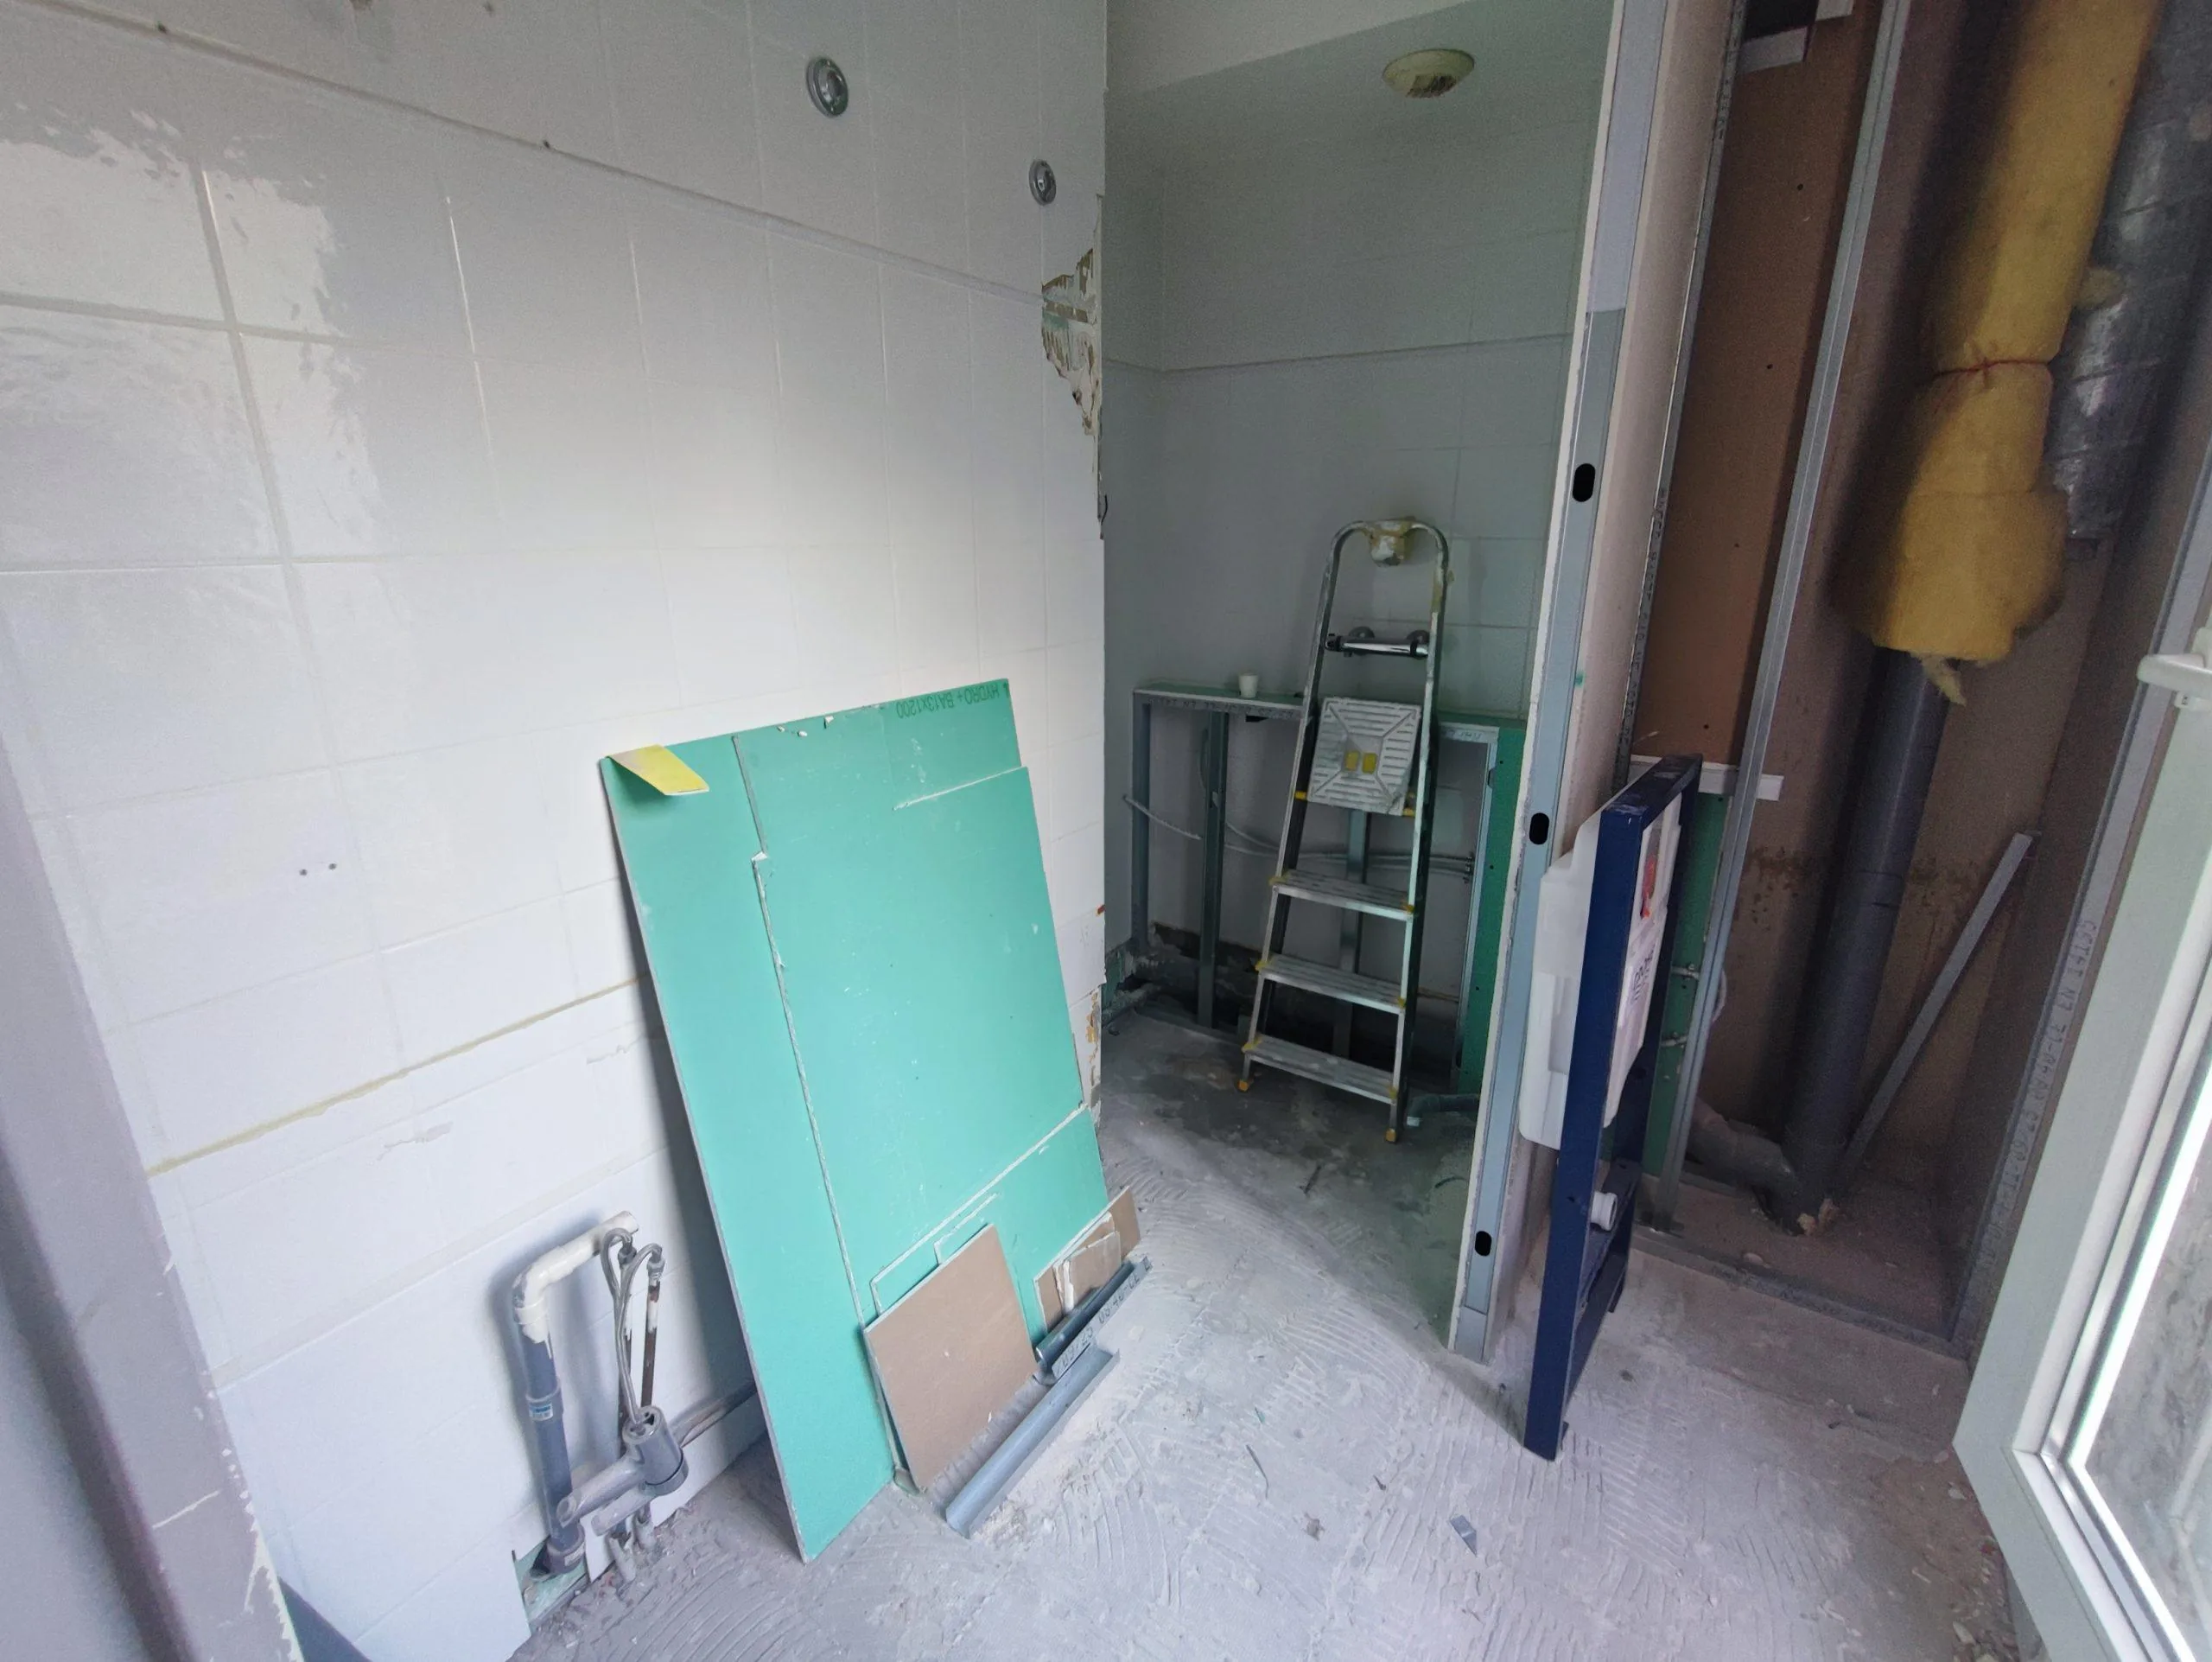
The floor and sanitary fixtures were removed. Wall removal revealed a complication: pulling the finish from a lightweight honeycomb partition risked taking its support with it.
Continuing indiscriminately could have required rebuilding surrounding partitions and damaging separations to other rooms. The team avoided that unnecessary extension of the work rather than assuming that stripping everything was automatically the best method.

The existing wall tiles were well bonded, so suitable areas were retained and prepared with an adhesion treatment. Retention was a response to sound material and the support condition, not a recommendation to tile over loose or damaged layers without inspection.
Find useful depth within the service enclosure
The original plans showed a service column larger than a basic enclosure would suggest. That prompted a closer look at the rear volume rather than forcing the toilet farther into the room.
An existing waste pipe was known to run there: the raised shower step accommodated drainage from another toilet on that level. This helped explain the enclosure’s geometry before it was opened.
The design recovered available depth to recess the wall-hung toilet assembly into the technical zone. Existing pipes still had to keep functioning; an apparently oversized box should not be treated as empty or safe to remove without checking.
The lesson applies to other primary-suite layouts: levels and boxed volumes often reveal where services are. Reading them can identify opportunities that a simple floor-area total misses.
Lower the shower without pretending the old drainage disappears
The revised shower includes a tiled bench in a small recess, as requested by the owner. Its position uses an existing nook rather than placing an additional freestanding item in the circulation.
The shower is lowered, while a raised technical enclosure conceals the original waste route and forms a useful ledge. The constraint is incorporated into the shower instead of being hidden by keeping the whole tray unnecessarily high.
The room also gains three tiled niches within the available service-column depth. They provide places for toiletries without projecting a separate storage unit into the floor area. Check the real thickness and the pipes before fixing niche positions.

See our projects in video
Real floor plans and renovations explained step by step on the ArchiWorking YouTube channel. Watch how spaces are reworked before the works begin.
Shape the enclosure around verified connections
After removal and support preparation, the service-column arrangement proved consistent with the planned approach. The new toilet zone was formed using gypsum board suitable for humid-room construction.
That description is not a complete waterproofing specification. The shower bench, niches, board junctions and tiled surfaces need appropriate wet-area detailing. A moisture-resistant board alone does not establish that the finished assembly is watertight.
The installation retains the main drainage layout while coordinating the new fixtures around it. “No relocation of the existing routes” should not be confused with “no new connection of any kind,” particularly once the final equipment choice changed.
Allow for the late bidet-function toilet request
The vanity was assembled, secured and connected. The wall-hung toilet also received a Japanese-style bidet-function unit, an addition not included in the original brief.
That choice required an additional water supply and a dedicated electrical outlet. It was integrated because wiring had been anticipated during enclosure work. Where possible, deciding this equipment early is simpler than reopening a finished wall.
The necessary electrical protection and positioning must match the actual product and wet-room requirements. The case does not establish that any nearby general-purpose outlet is suitable for such an addition.
Test the window in the finished arrangement
The window was opened to check that it touched neither toilet nor vanity. This was an actual use check, not an assumption from the clear rectangle shown on a plan.
A window that works before tile and fittings are installed may still need checking against the final depths. The same practical approach applies to the room door and the positions from which people use the basin, shower and toilet.
A wall-hung bowl exposes more floor for cleaning, but it does not make its projection disappear. Circulation comes from the complete arrangement and real movement, not from the fixture category alone.
Finish the small details and commission the room
Floor and wall tiles were installed, the furniture completed and the fittings secured. The mirror and its lighting control were fitted. Minor mechanical-ventilation work and plaster touch-ups were also required before water testing and completion.
The aluminum trim was coordinated with the faucets. In a small room, mismatched edges can be as visually prominent as a much larger surface. The cutouts for the planned electrical points were also made carefully rather than treated as rough openings to disguise later.
Painting and wallpaper elsewhere in the suite progressed alongside the bathroom. Corners and final junctions received the remaining touch-ups so the whole arrangement could read as one finished interior.
What the completed 3.8 m² room demonstrates
The project added a wall-hung bidet-function toilet, retained a useful shower with a bench and kept the window operational. It also strengthened the suite’s privacy, without relocating the main existing service routes.
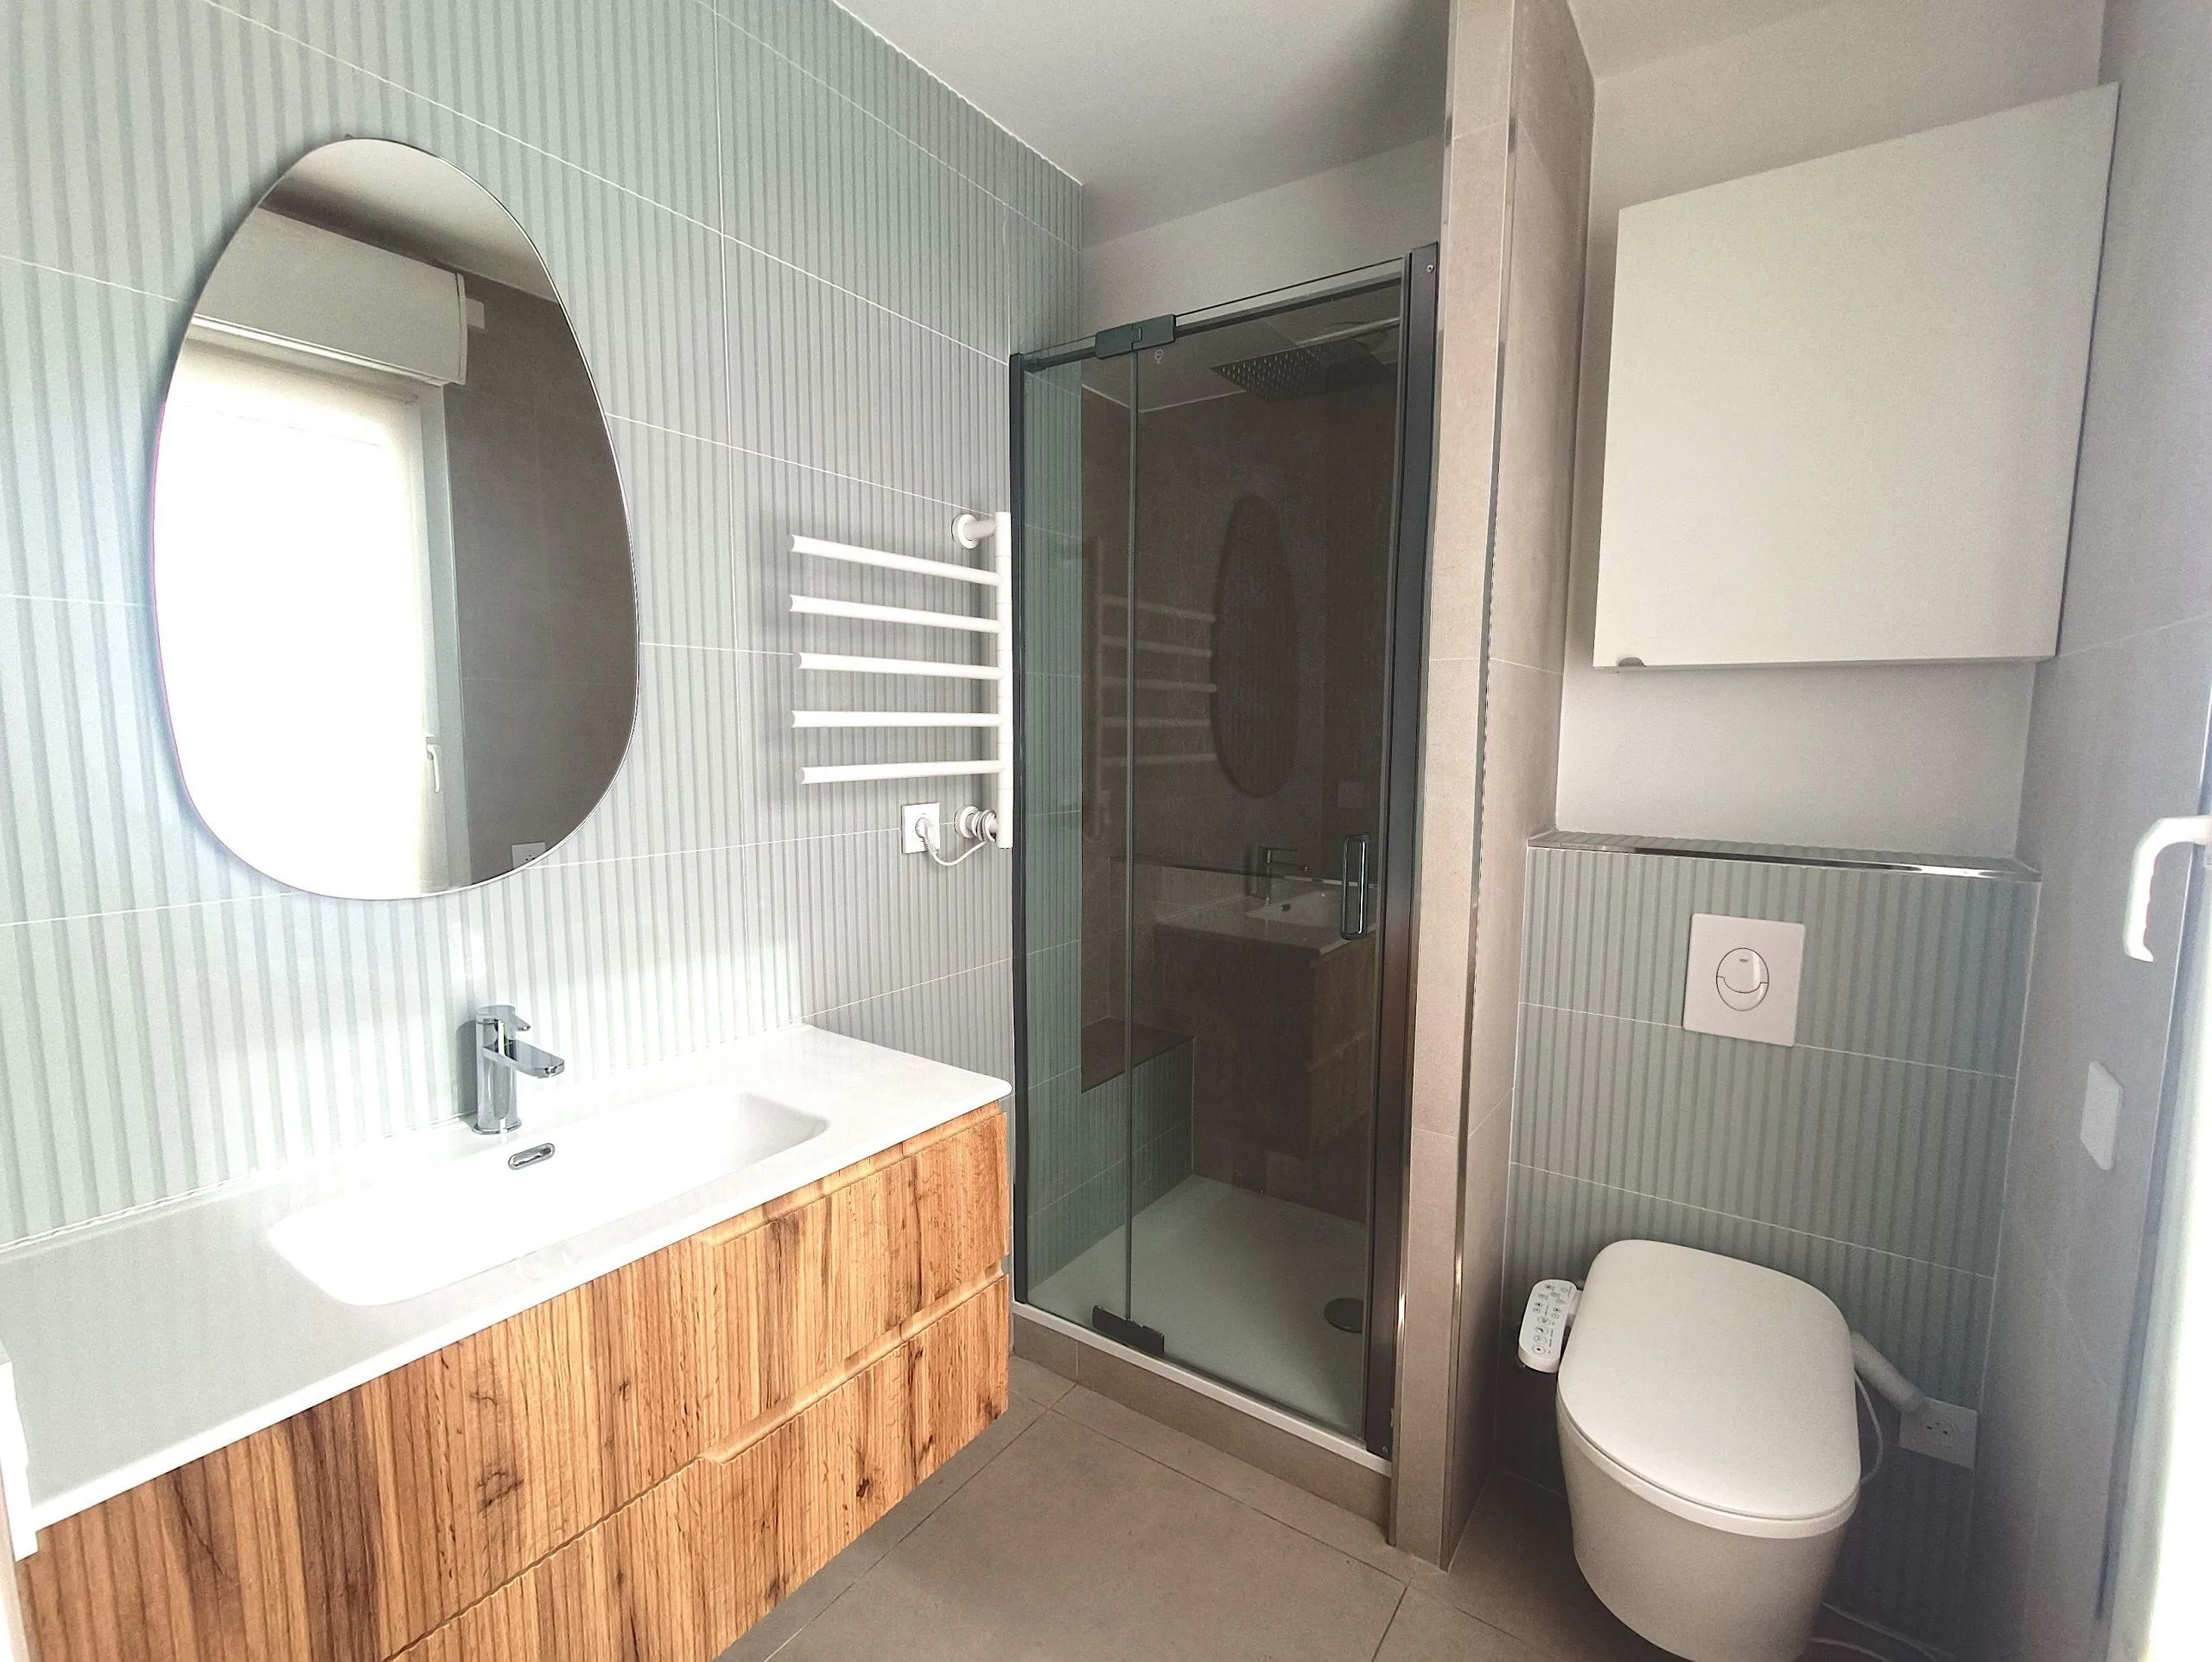
The result did not come from forcing more products into the same floor outline. It came from understanding the real enclosure depth and converting a technical constraint into a ledge, niches and an integrated toilet zone.
Questions about a bathroom below 4 m²
Is adding a toilet always possible?
No automatic guarantee follows from this example. Here, the available technical depth and existing drainage made it feasible while the window and shower remained usable.
Must every service route be moved?
Not necessarily. The existing waste route was retained, although the late bidet-function choice needed an extra supply and electrical point.
How should circulation be checked?
Test actual standing positions, door and window movement, and fixture use. A product fitting within the drawn area is only one part of the assessment.
Is a bidet-function unit appropriate in a small room?
It can add comfort if its water and electrical needs are planned correctly. The final product, safe installation and available space must be assessed together.