
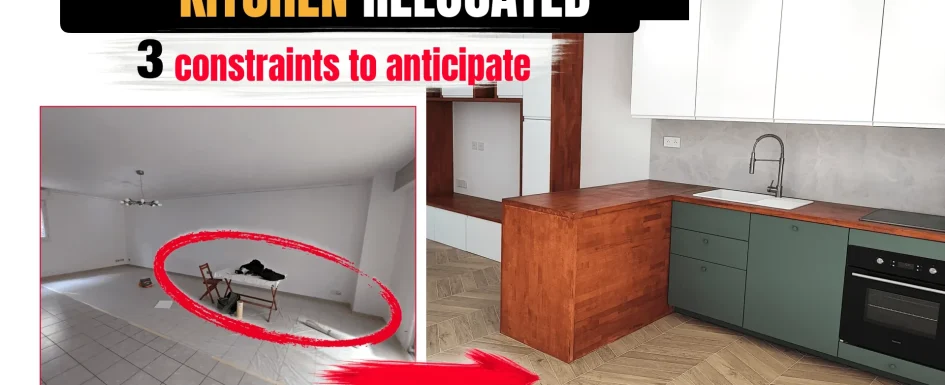
Moving a kitchen can create an additional room without enlarging the home. In this renovation, the former kitchen became an office and occasional guest bedroom of more than 10 m². The kitchen moved elsewhere, with its new position determined by water connections, electrical routes and the proportions of the shared space.
Those three subjects are connected. A location that looks attractive for furniture may be impractical for drainage. A technically convenient location may still leave an awkward living area. The project therefore began with a plan and a coordinated sequence, rather than removing the old kitchen and deciding the replacement position afterward.
The recorded work follows the process from removal through completion. It illustrates a way to gain a flexible room, not a guaranteed financial return for every kitchen move. The nine checks before a kitchen renovation provide a related framework for the early decisions.
Confirm what the extra room will do
The brief was to recover the existing kitchen area and use it as one flexible room: a home office when needed, and a guest bedroom at other times. It was not a proposal to fit two separate new rooms into that area.
That distinction matters because the new room’s enclosure, light and privacy have to support both uses. The kitchen’s new position also has to remain connected to the home’s daily life, rather than becoming a purely technical installation wherever a pipe is easiest to reach.
Design and layout came first. Removal followed in a planned order, then plumbing, electrical work, partitions, floor preparation, painting and kitchen assembly. Each trade depended on the previous decisions. Sequencing was part of the design’s feasibility, not an administrative task added after the equipment was ordered.
Find an existing water route before creating a new one
Water was the first technical constraint. The team identified service risers, supplies and drainage before approving the new kitchen position. An existing service column connected with a bathroom on the floor above offered a possible route.
An exploratory investigation and opening established whether that column was actually usable from the proposed location. Only after confirming it did the project bring hot and cold water supplies from upstairs and connect the kitchen waste to the existing gray-water sections.
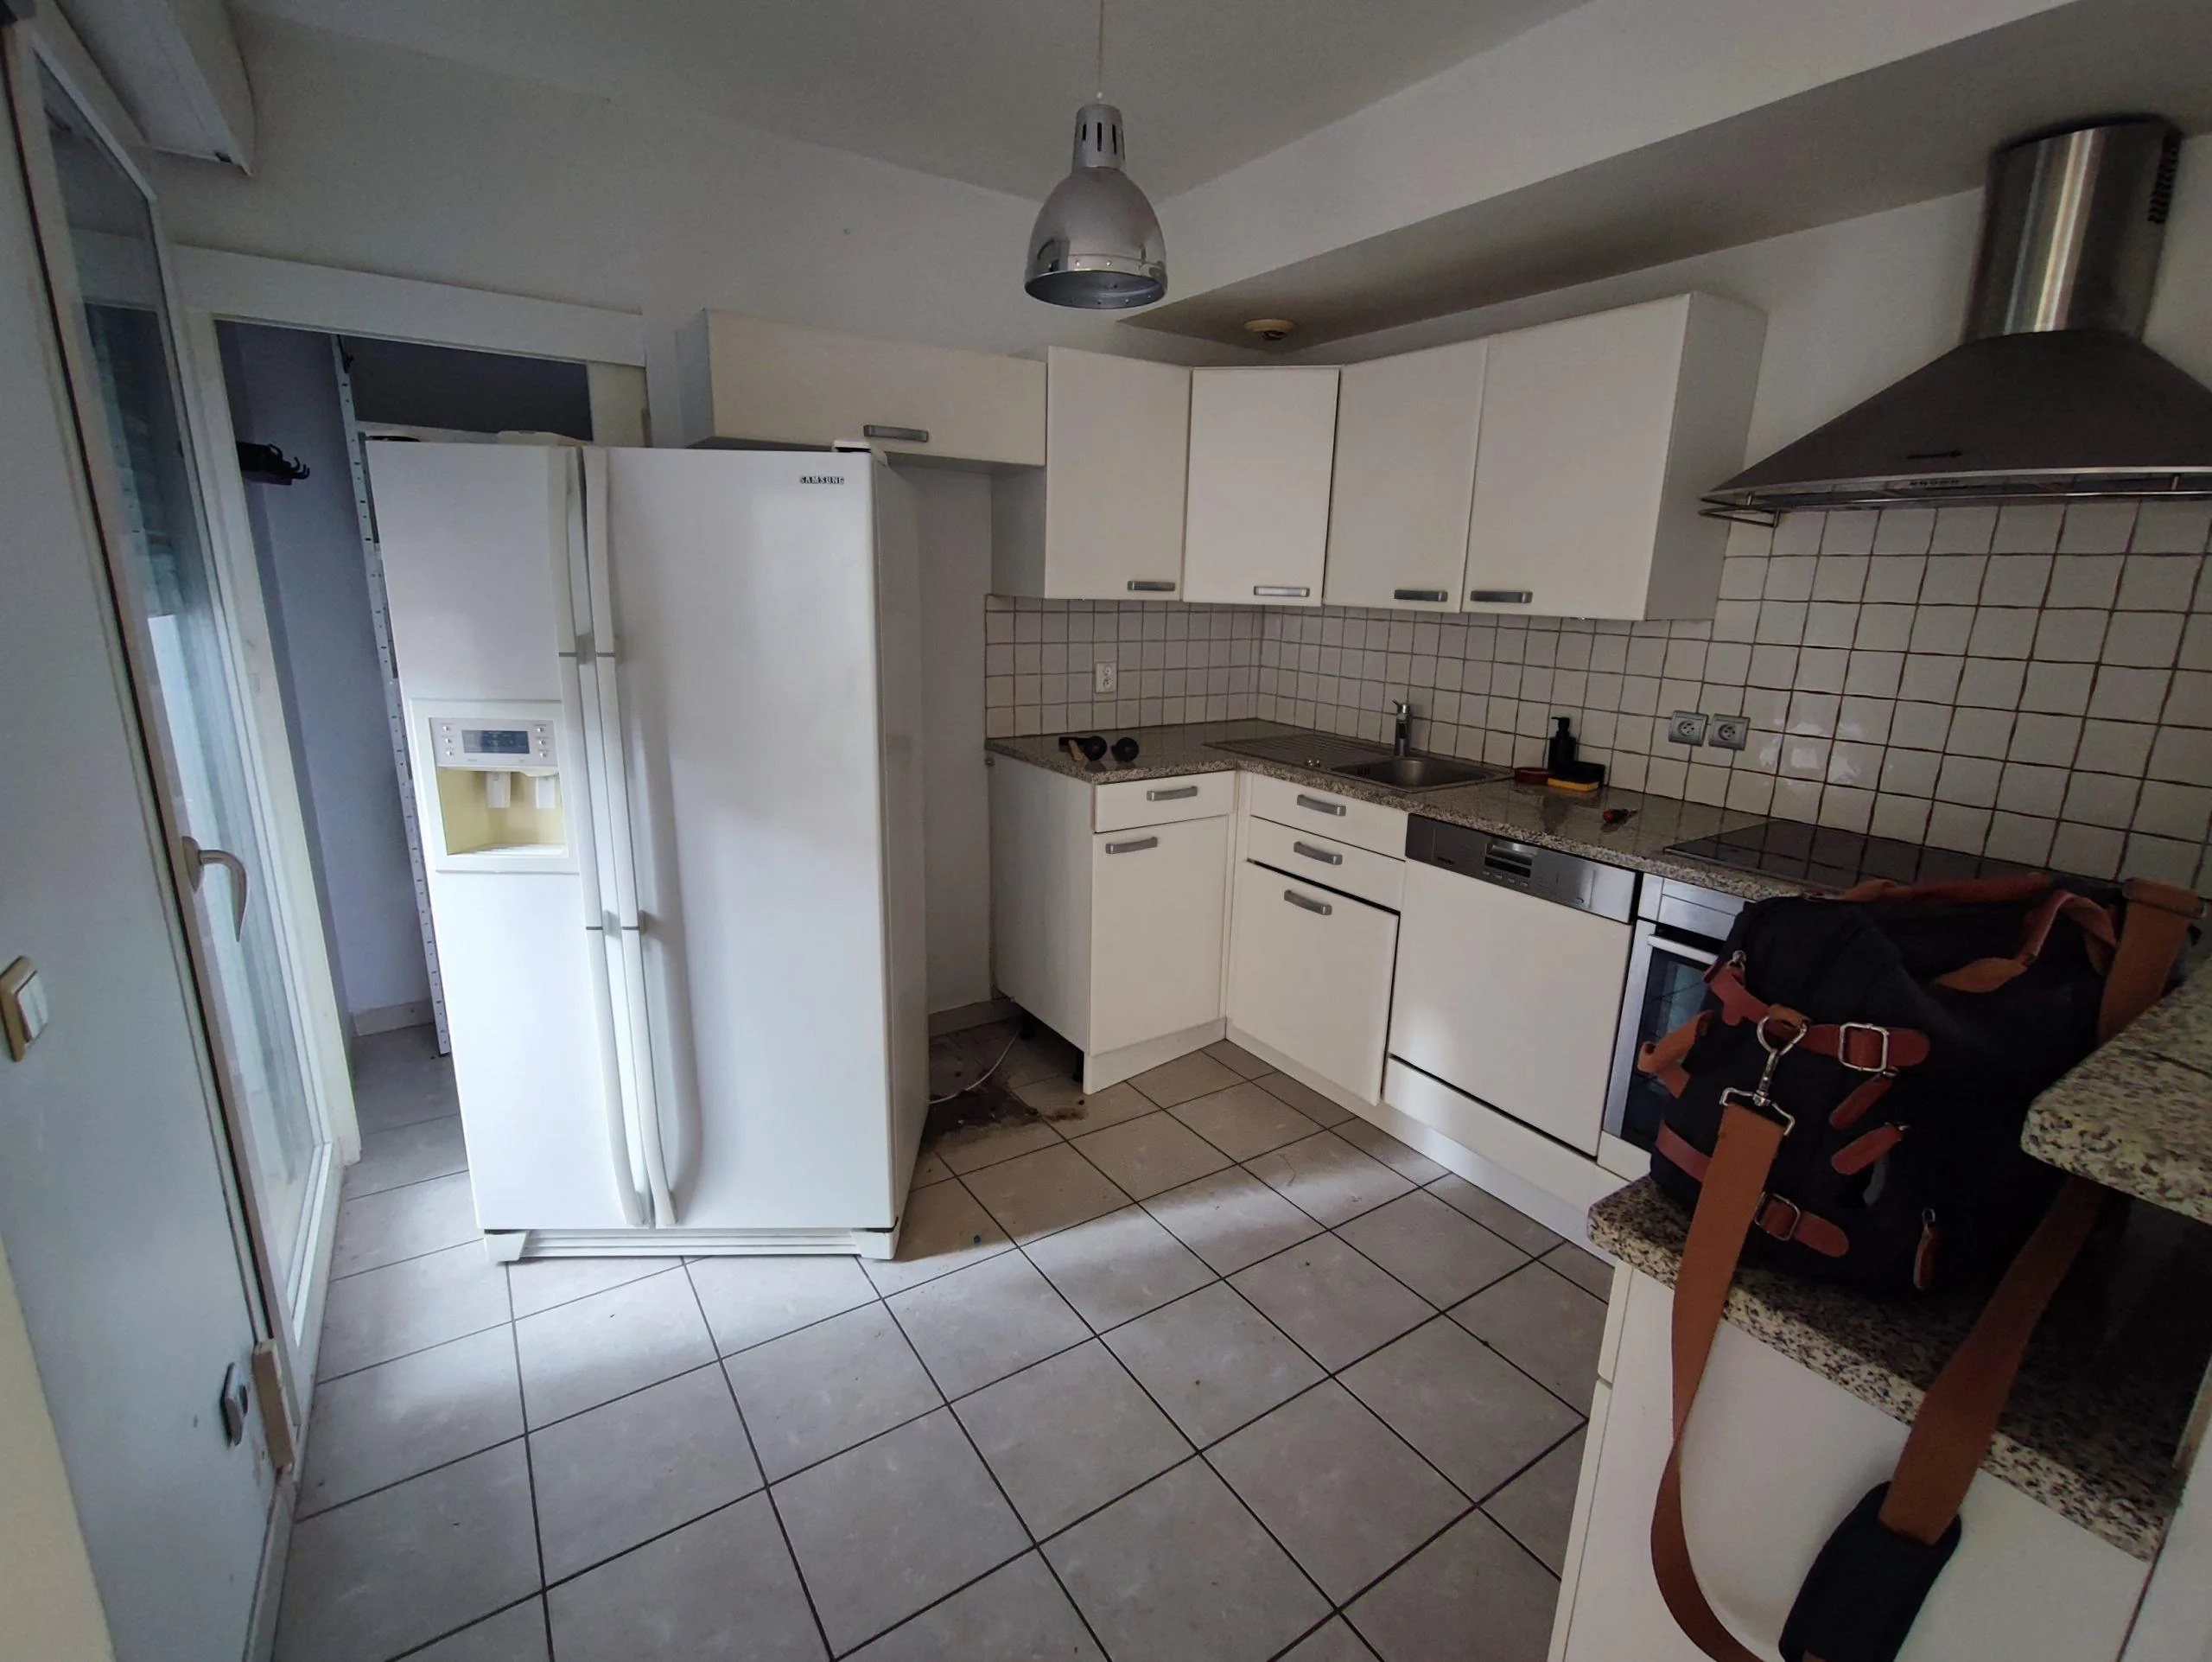
Using those services avoided creating an entirely new long route with the associated fall and construction requirements. The important step was not simply spotting a riser on a drawing, but checking its actual condition and accessibility before committing to it.
An apparently useful connection may reveal inadequate pipe size, aging material or an unsuitable slope once opened. An early investigation can therefore change the layout for good reasons. Closing the design before this information is known risks making the finished cabinetry depend on an unverified assumption.
Treat distance as a planning warning, not a universal limit
The project guidance recommends trying to remain within 5 m of a suitable existing service column. That is a practical way to limit route length and complexity, not a regulation guaranteeing feasibility inside that radius or prohibiting every longer run.
Where no close connection exists, a shelf-like enclosure or technical box may sometimes conceal the route toward a suitable drain. The available fall, pipework, access and effect on the room still need checking. Longer distances can increase both work and cost quickly.
The original planning notes also mention 1 cm of fall per meter for gray-water drainage. That figure must be checked against the actual system and applicable requirements; it is not a universal design specification. Route length alone does not establish whether the drain will work.
In an apartment building, shared risers may belong to common property. The relevant owners’ approval and any applicable permissions must be resolved before relying on a modification. A technically possible connection is not automatically one the individual owner is authorized to change.
Bring the electrical route from the entry overhead
The electrical panel was at the entry, and the floor could not be chased to bring new feeds to the relocated kitchen. The project used the partitions already being constructed to establish an overhead route.
A suspended ceiling extended from the entry toward the kitchen, carrying the dedicated feeds for equipment such as the oven, hood and cooktop. The cables could then drop to the required connection positions without cutting a long route through the floor.
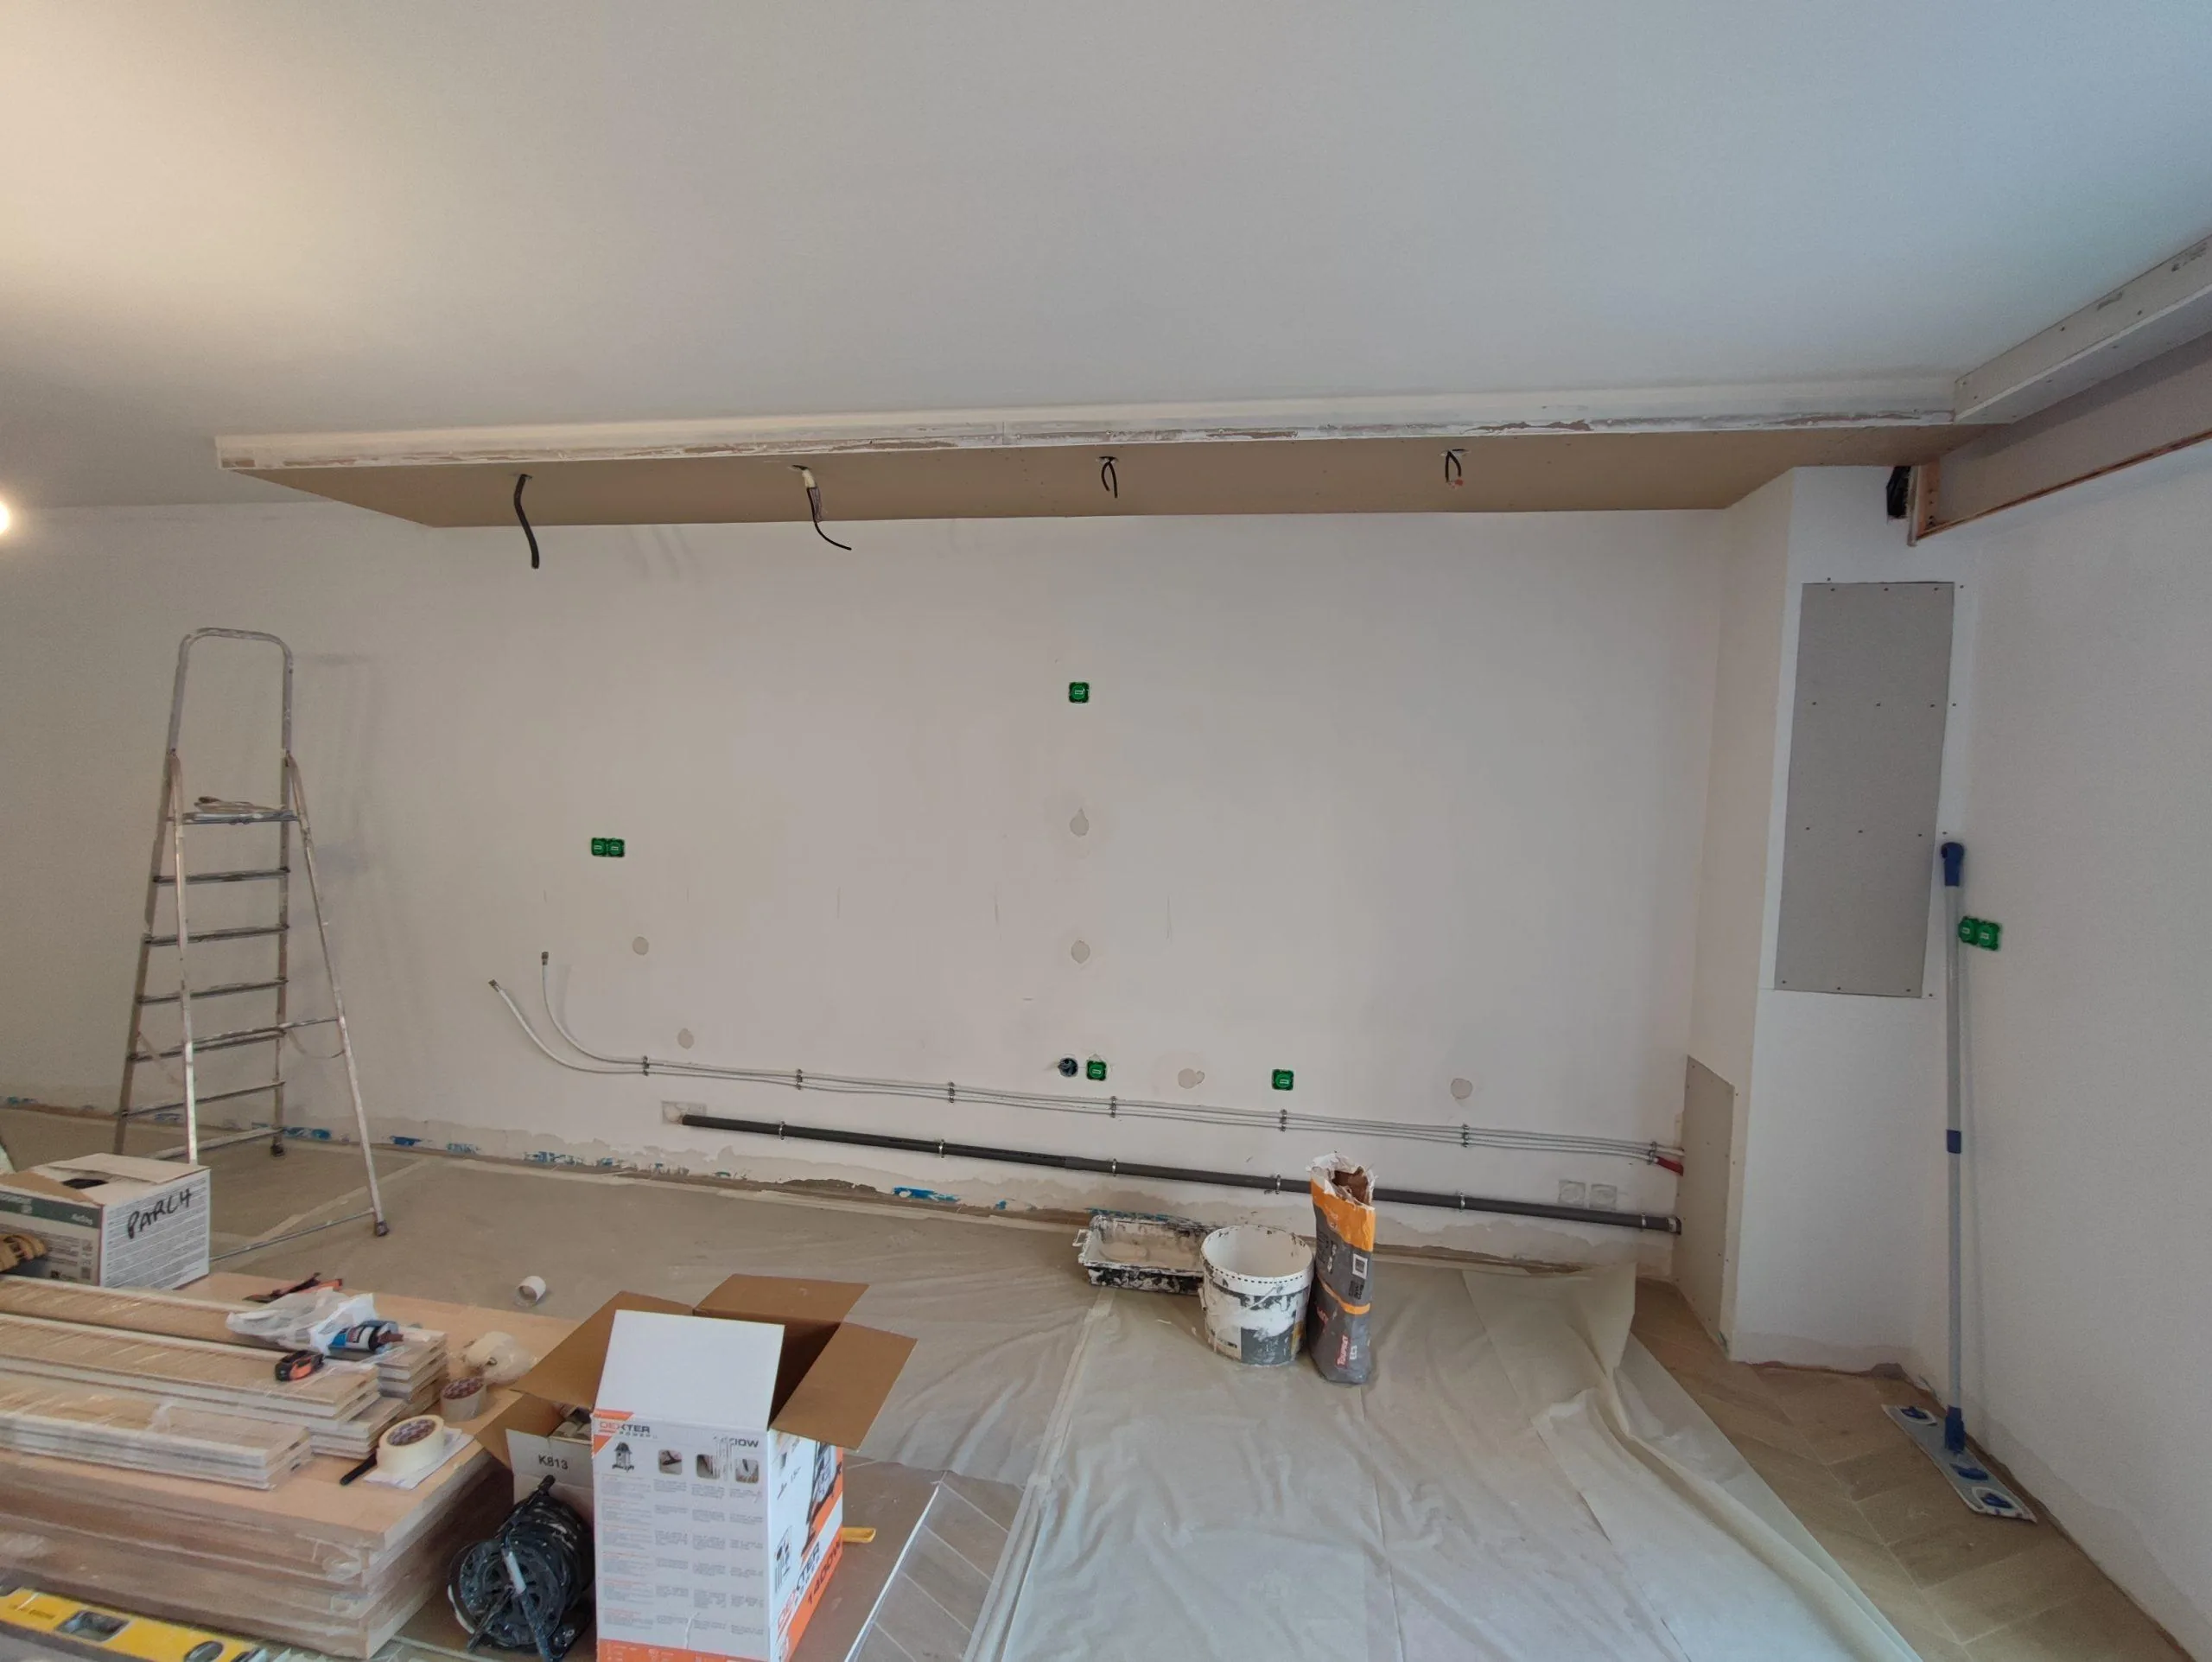
The ceiling was widened where useful to incorporate recessed lights. One coordinated intervention therefore answered the service route and kitchen lighting together. It was not necessary to treat lighting as an unrelated task after the electrical distribution had been fixed.
That benefit still depends on coordination. The final positions of lights, equipment and access must agree with the cabinetry and the remaining ceiling height. An overhead route does not make technical detailing unnecessary.
See our projects in video
Real floor plans and renovations explained step by step on the ArchiWorking YouTube channel. Watch how spaces are reworked before the works begin.
Understand what the 30 mA reference means
This project was described in a French electrical context, with references to NF C 15-100 and 30 mA residual-current protection. Its equipment feeds were planned from the distribution panel, rather than casually added to an existing general-use circuit.
A 30 mA residual-current value is not an appliance’s operating-current rating. Nor should an article be read as a blanket instruction that every kitchen appliance in every country needs its own individual 30 mA device. Circuit allocation, overcurrent protection and residual-current protection are related but distinct design questions.
For an American installation, a qualified electrician must establish the applicable local requirements instead of importing the French reference mechanically. The same principle applies in Spain or any other jurisdiction. Confirm the actual design for oven, cooktop, hood, dishwasher and other equipment before the routes are enclosed.
The transferable lesson is early coordination of appropriate equipment circuits and protection. It is not permission to improvise shared connections simply because the new kitchen is close to an existing outlet.
Recover circulation through cabinet depth
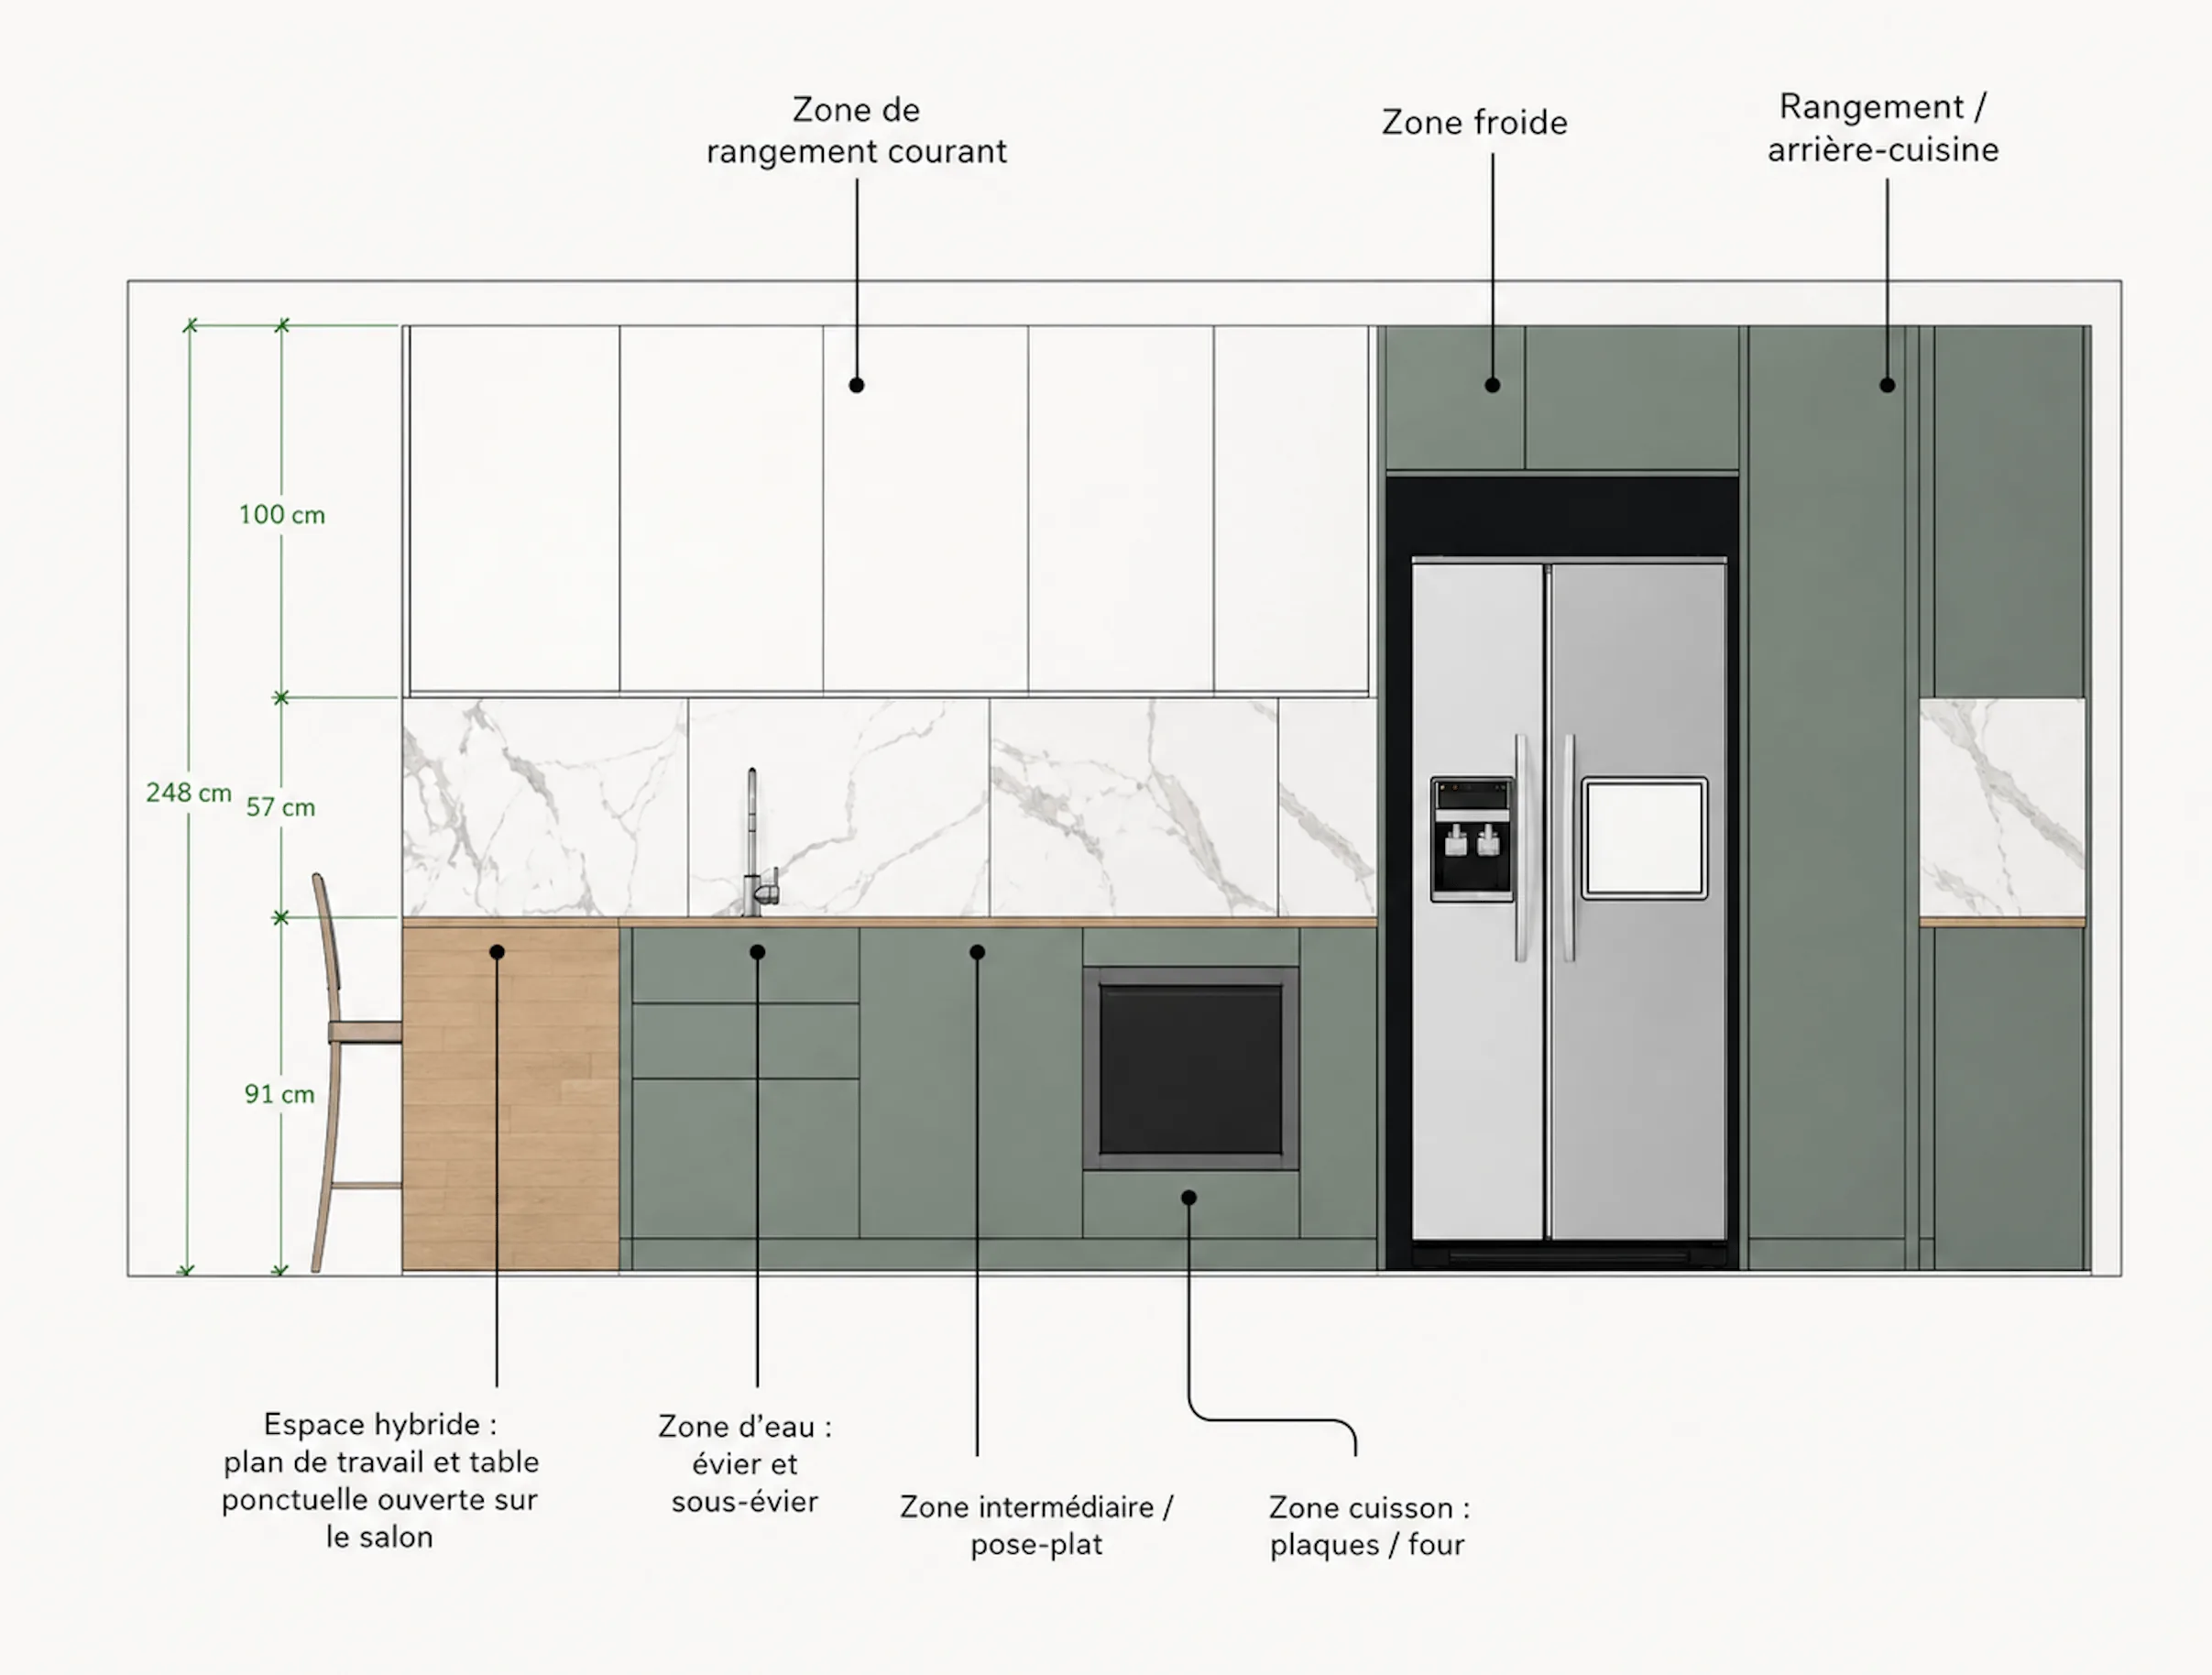
Around the service column, the design uses 40 cm-deep cabinets instead of the more usual 60 cm depth. In the relevant sections, that recovers 20 cm of circulation without removing the kitchen’s principal equipment.
Reduced depth belongs where the intended contents and functions can use it. Applying the same reduction indiscriminately to a sink, appliance or work area would not reproduce this layout’s logic. The benefit comes from assigning different depths to appropriate positions.
The wider arrangement gives roughly 2/3 of the available area to the main kitchen run and worktop return, with 1/3 for the complementary living arrangement, storage and bench. This is the project’s compositional hierarchy, not a mandatory mathematical formula for all kitchens.
Full-height storage uses the available height and helps distinguish the two zones without a new partition. The kitchen-island guide considers clearances, functions and services where an island or return is part of the composition.
Give the kitchen clear working zones
The layout identifies a cold-storage zone around the refrigerator, a water zone with sink and under-sink storage, a cooking zone with cooktop and oven, and everyday storage that remains easy to reach.
On the right, additional storage and a back-of-kitchen area hold less visible or less frequently used items behind a consistent front. The intention is to retain useful capacity without allowing the service and storage side to dominate the shared room.
On the left, a hybrid worktop and occasional table keeps a direct relationship with the lounge. Family members can remain nearby while playing, watching television or doing homework on high seating, without that activity taking over the preparation zone.
The design therefore addresses preparing, cooking, storing and sharing as connected routines. Its success depends on how the family uses the room, not simply on the length of installed cabinets.
Convert the former kitchen into a flexible private room
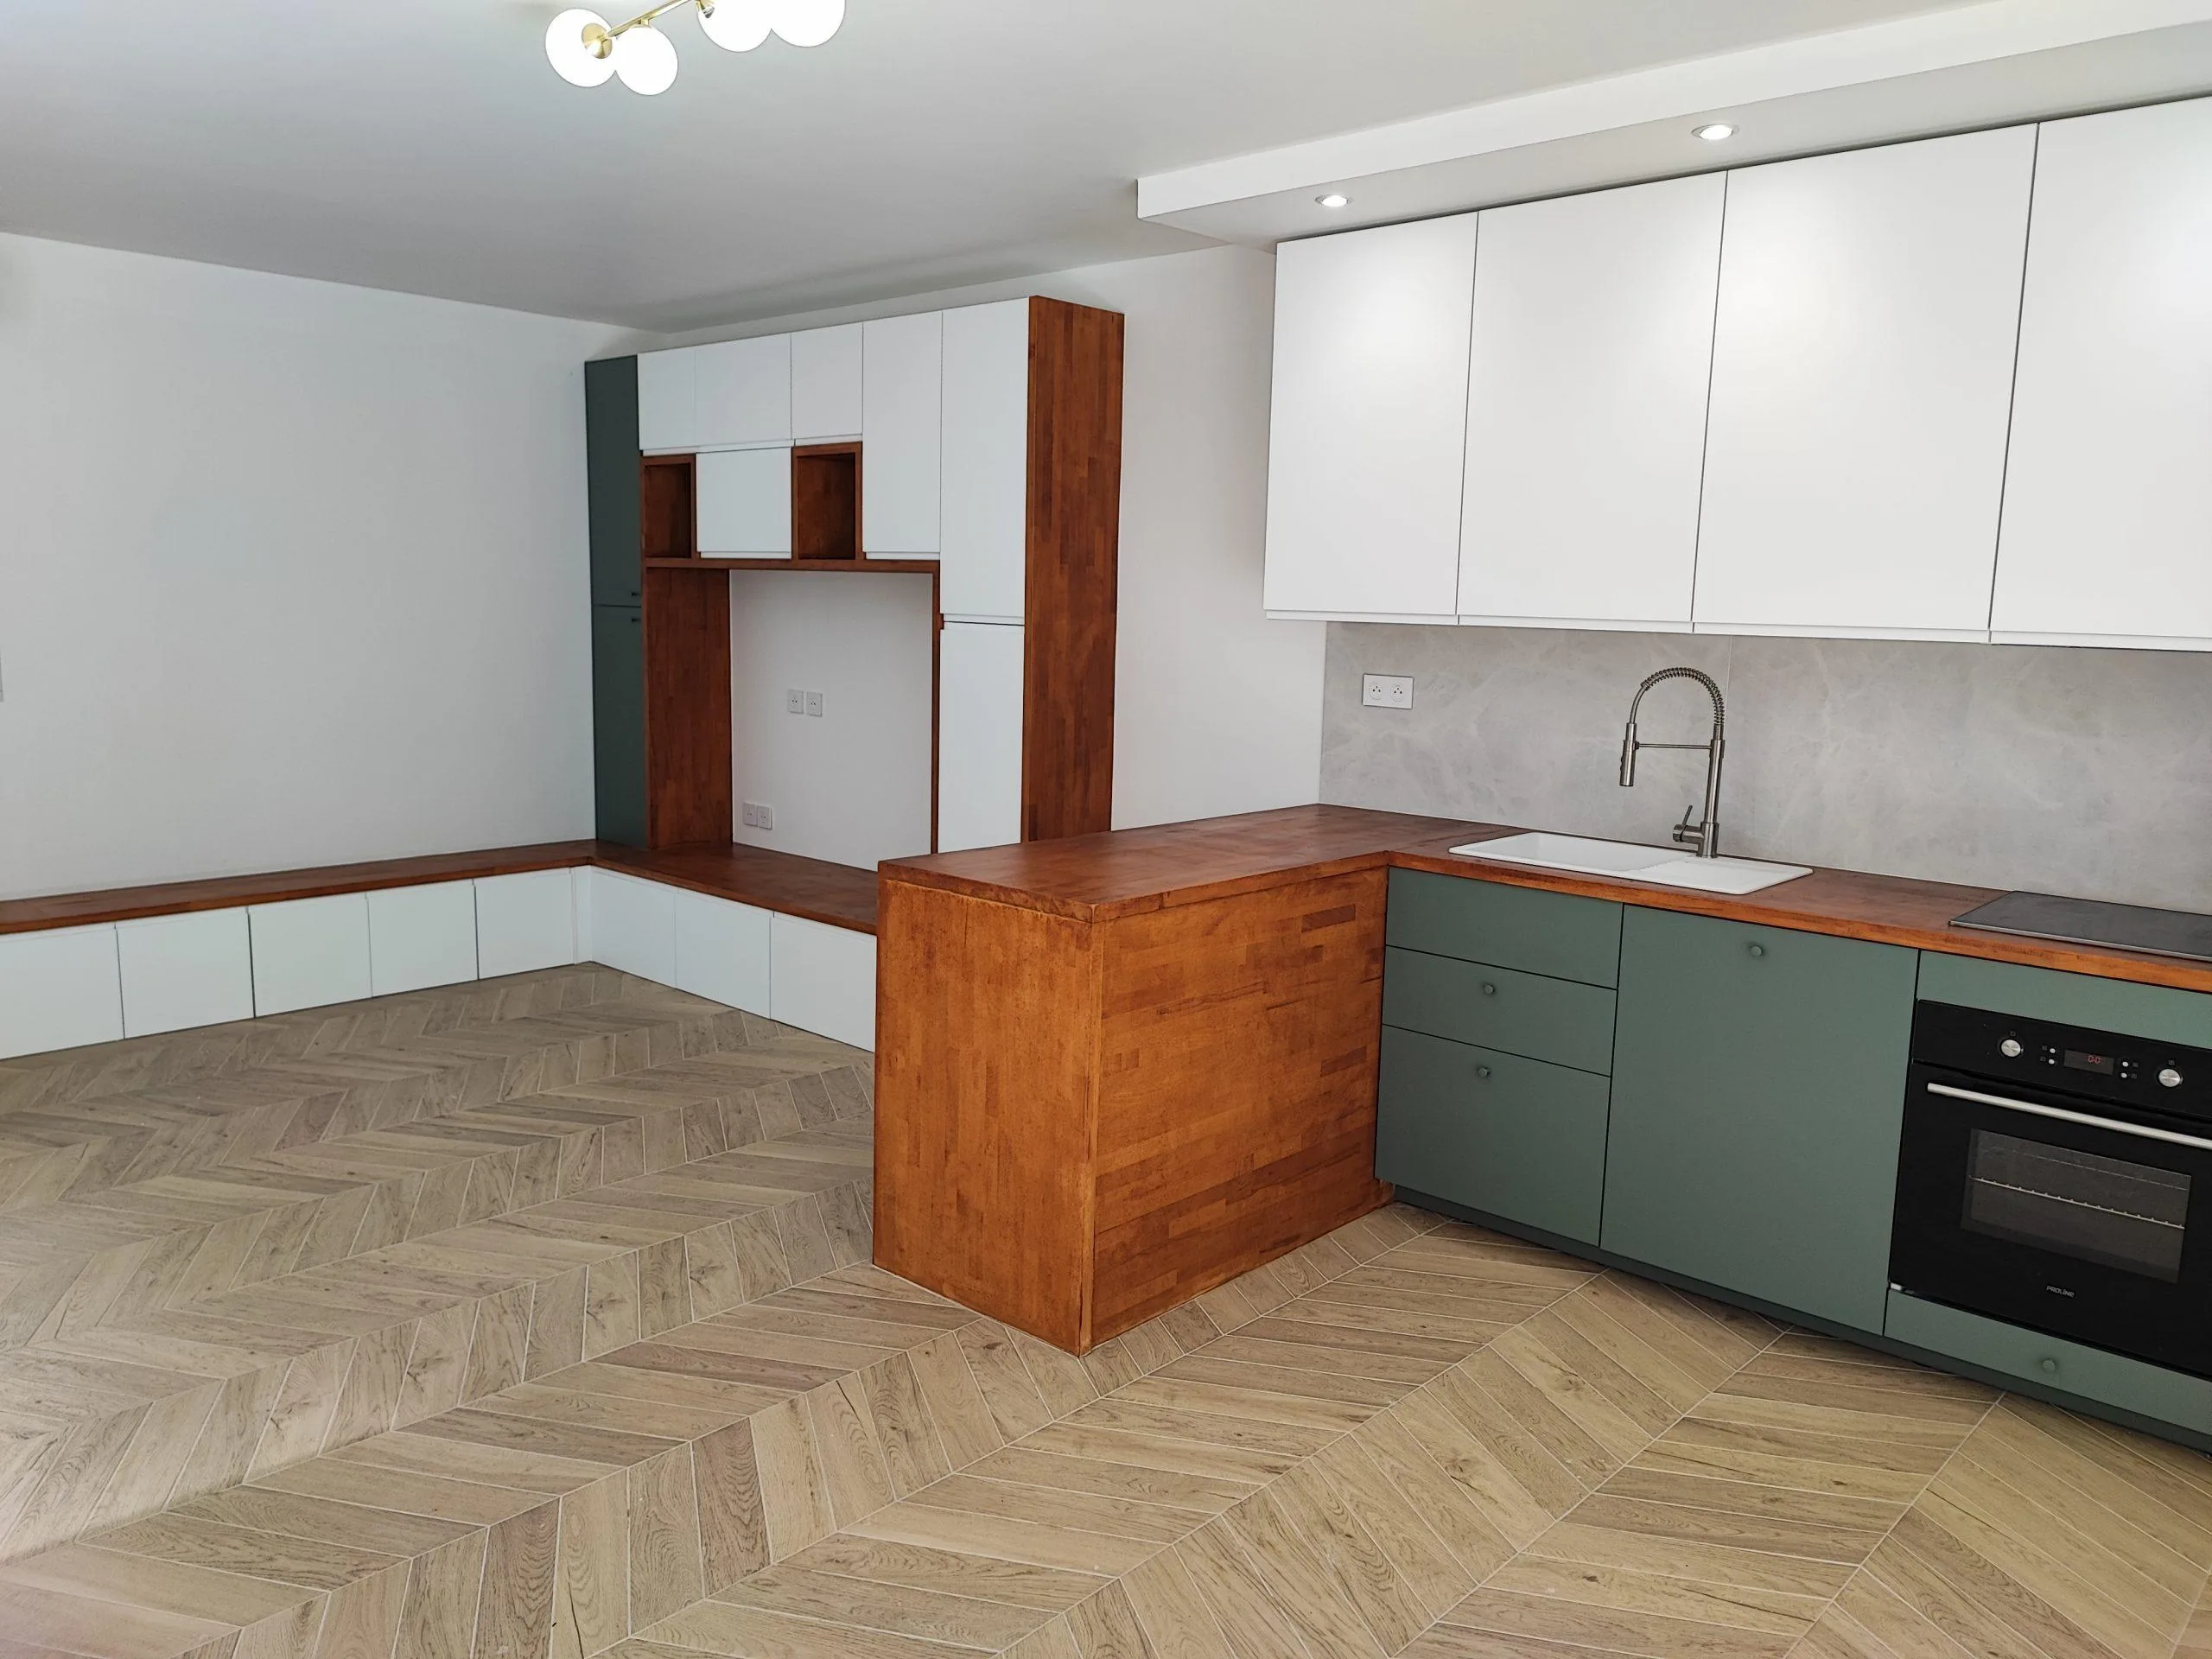
Once the former services were disconnected and the supports repaired, the old kitchen became the office and guest room of more than 10 m². A glazed door and internal glazing maintain the relationship with daylight from the adjoining circulation.
An internal blackout blind provides privacy when the room is used for sleeping. The glazing and blind answer different needs: light and connection during office use, enclosure and darkness when guests stay.
That flexibility should not be confused with a formal determination that any room labeled “guest bedroom” automatically meets every local requirement for sleeping accommodation. The actual openings, ventilation, access and intended use still require the appropriate checks.
Prepare the floor before relying on the finish
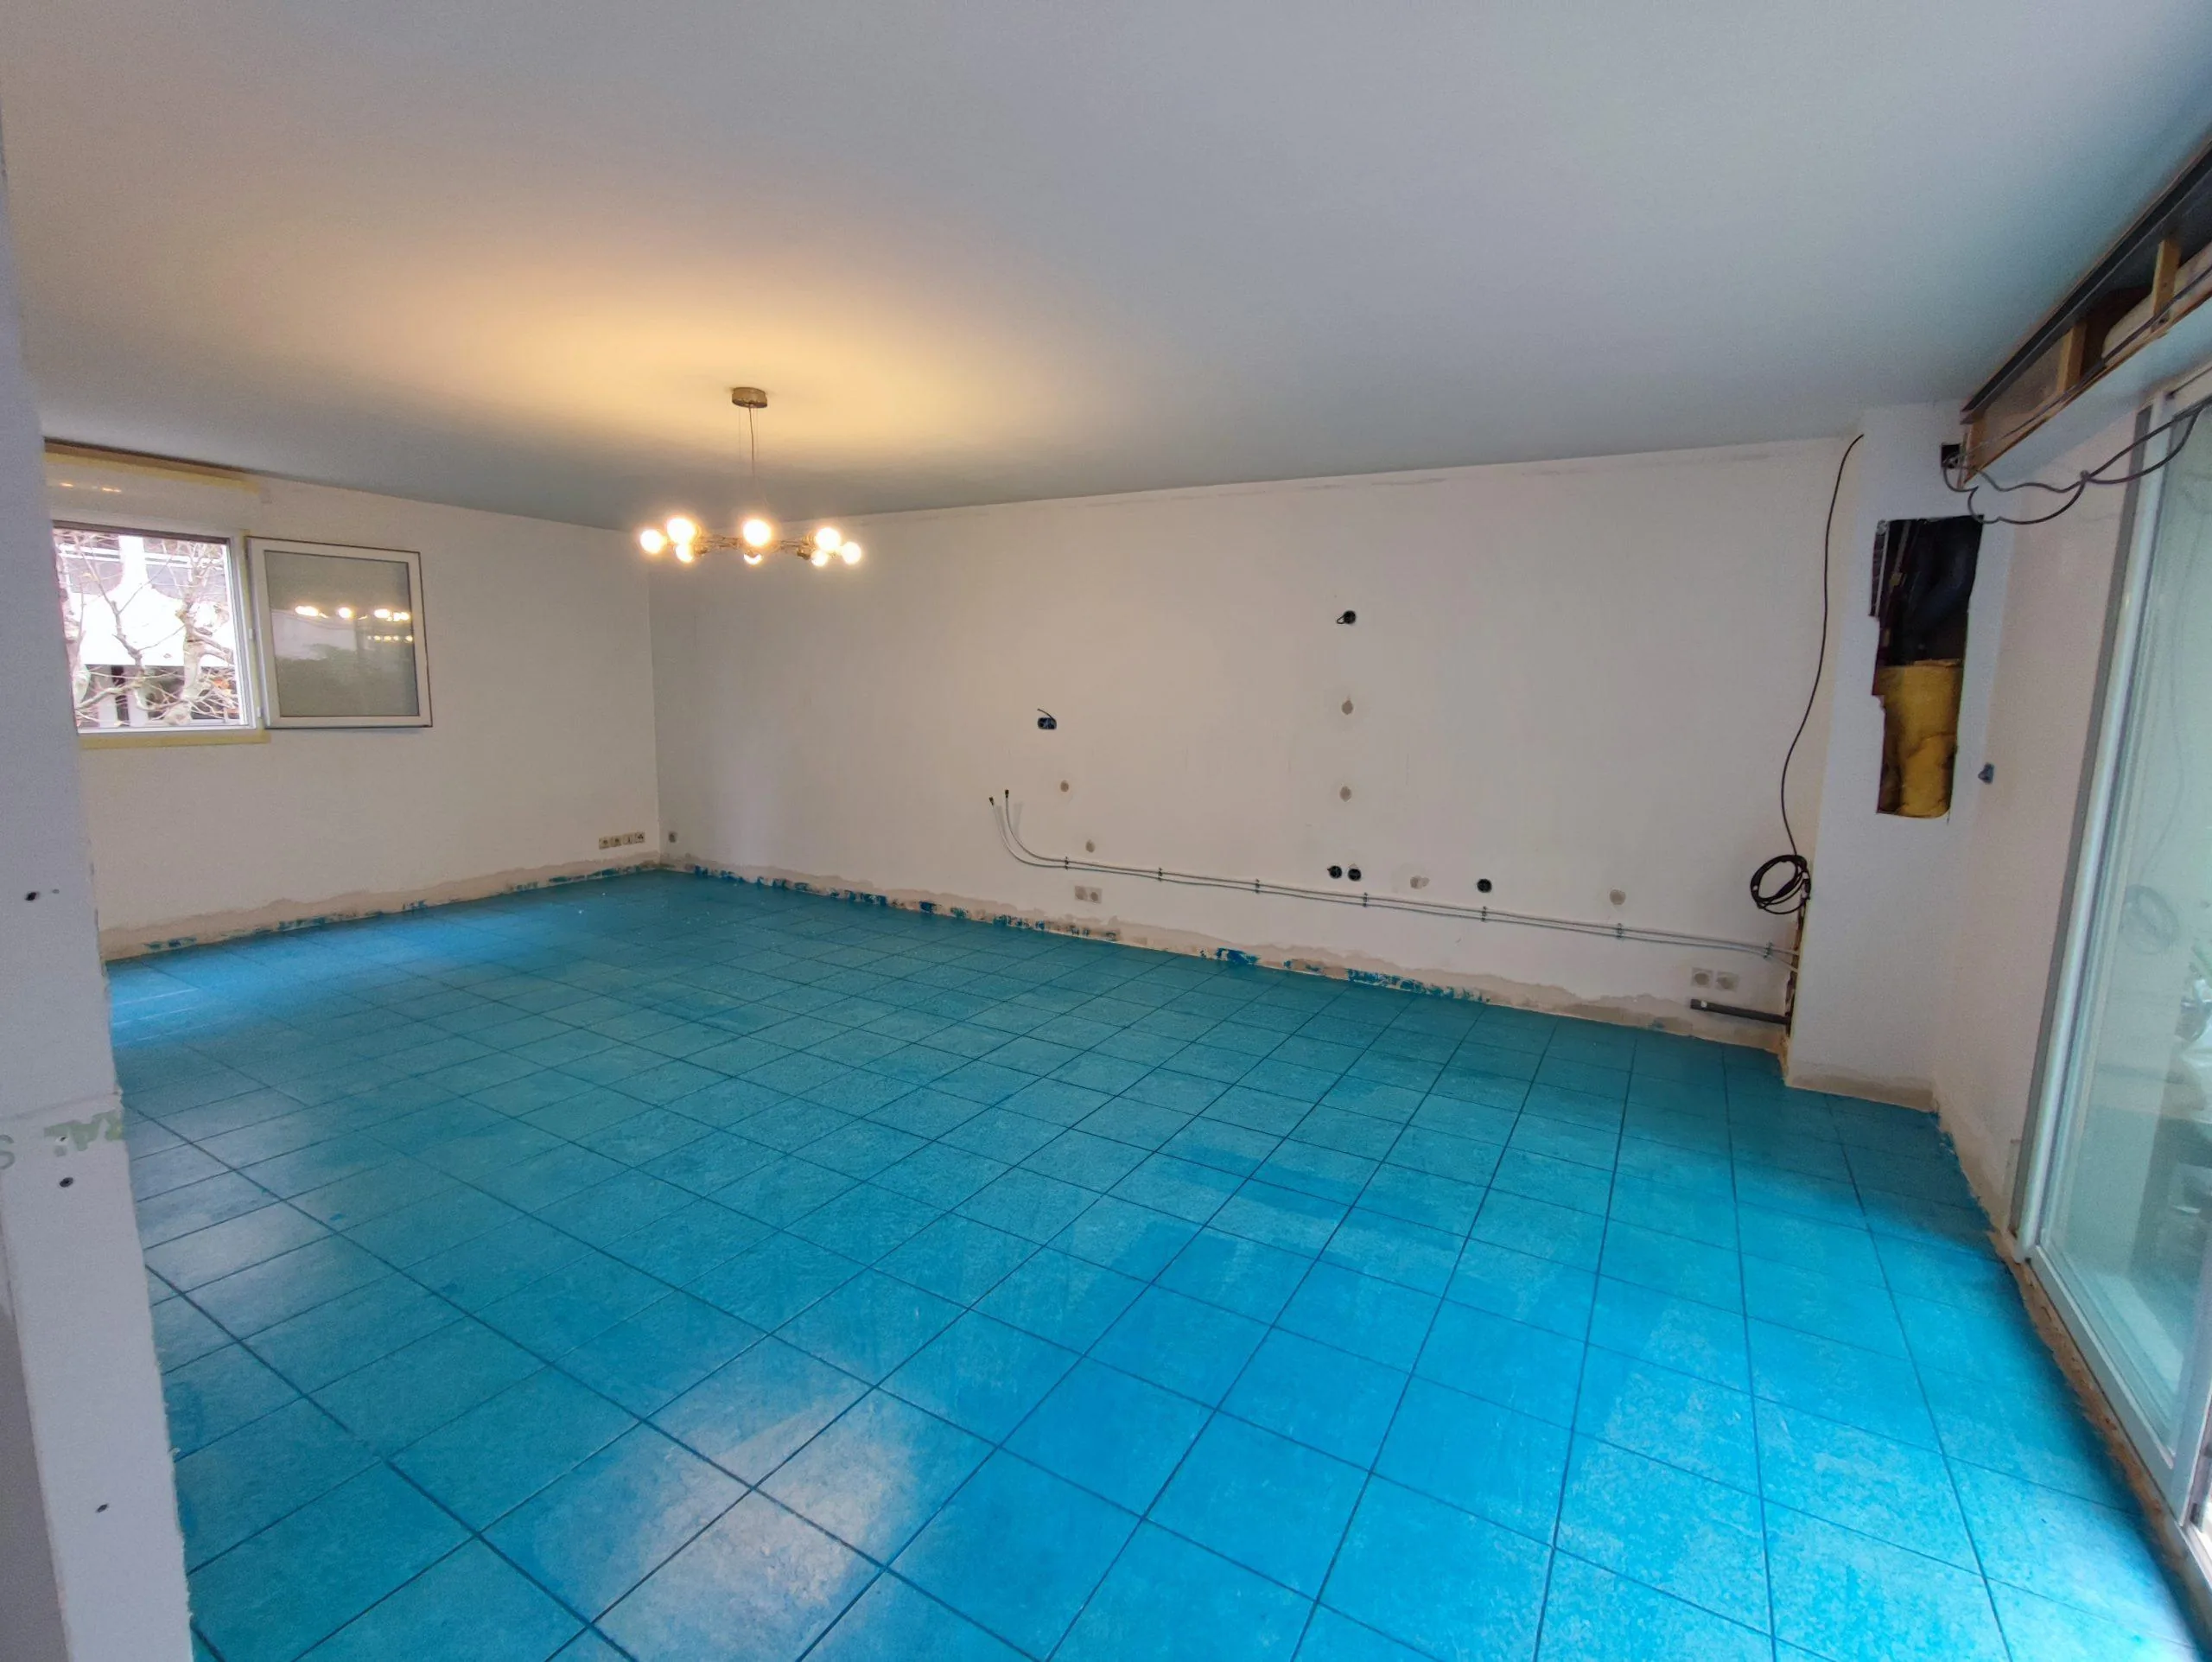
The relocated kitchen uses wood-look tile in a chevron, or point de Hongrie, pattern. The work included a bonding primer and fiber-reinforced leveling compound to obtain a suitable flat support before laying the tile.
The substrate preparation mattered as much as the chosen pattern. A good finish material cannot compensate for an unsuitable or uneven base. Product compatibility and application conditions belong in the work sequence, not just the decorative selection.
Painting began alongside cabinet assembly to maintain the schedule recorded for this project. That overlap required coordination between the trades; it should not be treated as a universal sequence regardless of drying, protection and access needs.
Three decisions explain the whole move
The existing water route was checked before it was adopted. New electrical distribution traveled through a coordinated ceiling zone. Cabinet depths and a 2/3-to-1/3 hierarchy preserved a deliberate balance between kitchen and complementary living space.
These were design decisions made before the finished walls concealed the services. They reduced the risk of expensive late changes and allowed the former kitchen to become a useful additional room. The wider principle is to resolve connections and use together, rather than fitting furniture first and hoping the networks will follow.
Questions about relocating a kitchen
Is the move possible in an apartment?
It may be, after checking structure, connections, drainage and approvals for any common services. The 5 m proximity guide helps planning but is not a guarantee.
Which networks need investigation?
Hot and cold supplies, gray-water drainage with an appropriate fall, and electrical distribution and protection for the actual appliances. All should be resolved before the final location is approved.
What if the floor cannot be chased?
This project used a technical ceiling from the entry panel to the kitchen, with drops to the required points and recessed lights in the same coordinated zone.
Must every layout follow the same proportions?
No. The 40 cm versus 60 cm cabinets and the 2/3 and 1/3 relationship answer this project. They demonstrate an approach to circulation and hierarchy, not universal dimensions to copy.