
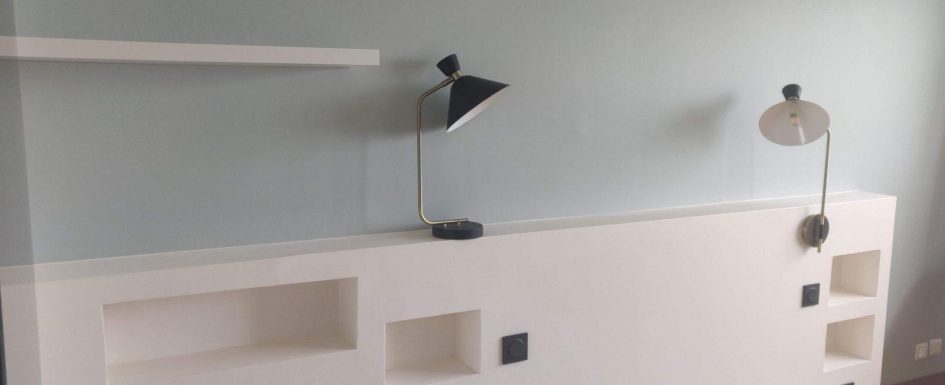
A custom headboard can be more than a decorative panel. It can establish a straight line in an irregular room, accommodate bedside storage and lighting, and bring services together without adding separate pieces of furniture.
The useful starting point is the room, not a catalog silhouette. The headboard composition and built examples offer the wider design perspective; here the emphasis is on construction, dimensions and technical coordination.
A lower-level suite shows the principle
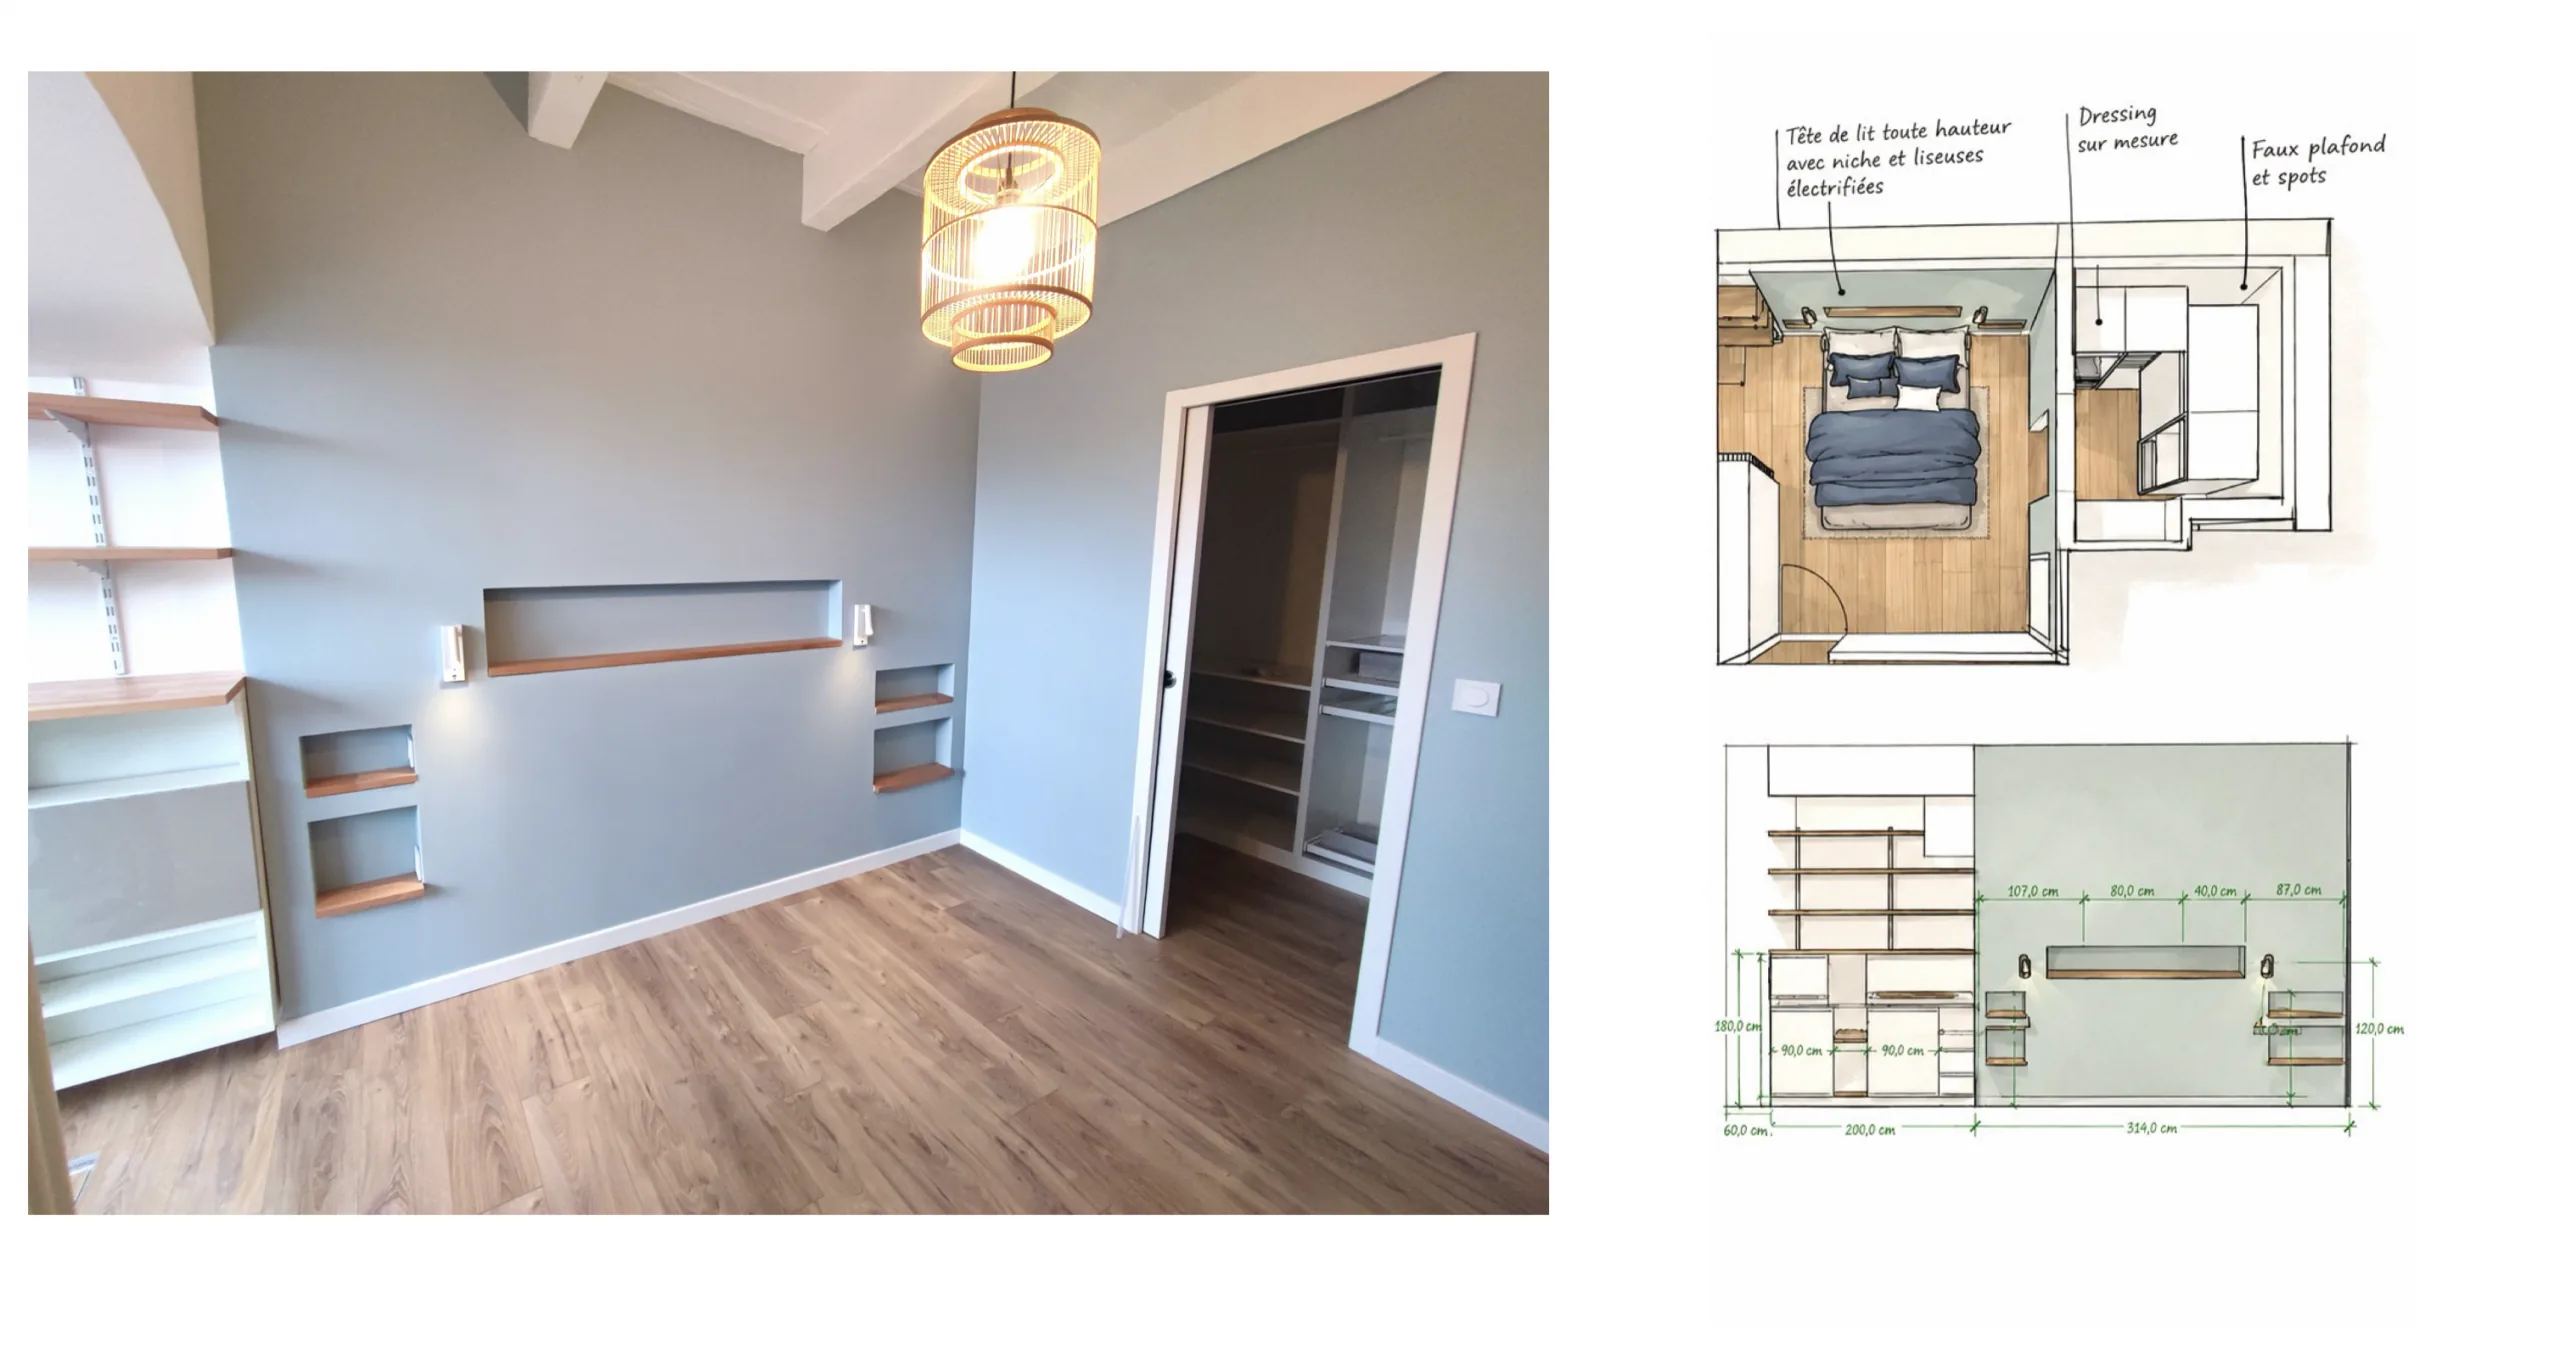
The accompanying video follows a 25 m² primary suite in a lower-level space. Its full-height headboard is a separated wall lining with niches, integrated reading lights and wood shelves instead of conventional bedside tables.
The existing wall had experienced water infiltration. The case includes an air gap between wall and lining, but a headboard is not a remedy for active water entry. Investigate and treat the moisture source first, then design the lining and any ventilation or insulation for the actual wall conditions.
The 25 m² suite with dressing area, shower room and desk explains the larger project. The photograph and measured drawing show how the headboard connects with the dressing arrangement rather than functioning as an isolated decoration.
Set the dimensions around the bed and daily use
For a 160 cm bed, the source proposes an overall headboard width around 2.60 to 3 m to include shelves or bedside elements of 40 to 50 cm on each side. For a 140 cm bed, around 2.40 m is another reference.
These are starting proportions, not requirements for every room. Check the actual bed frame, circulation and contents of the bedside storage before settling on the width.
A partial-height version rising roughly 60 to 80 cm above the mattress, around 1.10 to 1.30 m from the floor in the reference arrangement, can provide a comfortable backdrop. A full-height lining instead organizes the entire wall.
Useful niches generally need around 12 to 20 cm of depth in the source examples. Their contents and construction determine the final build-up. A niche that looks generous in an elevation may not be useful if its internal depth has not been checked.
Create a straight reference in front of an irregular wall
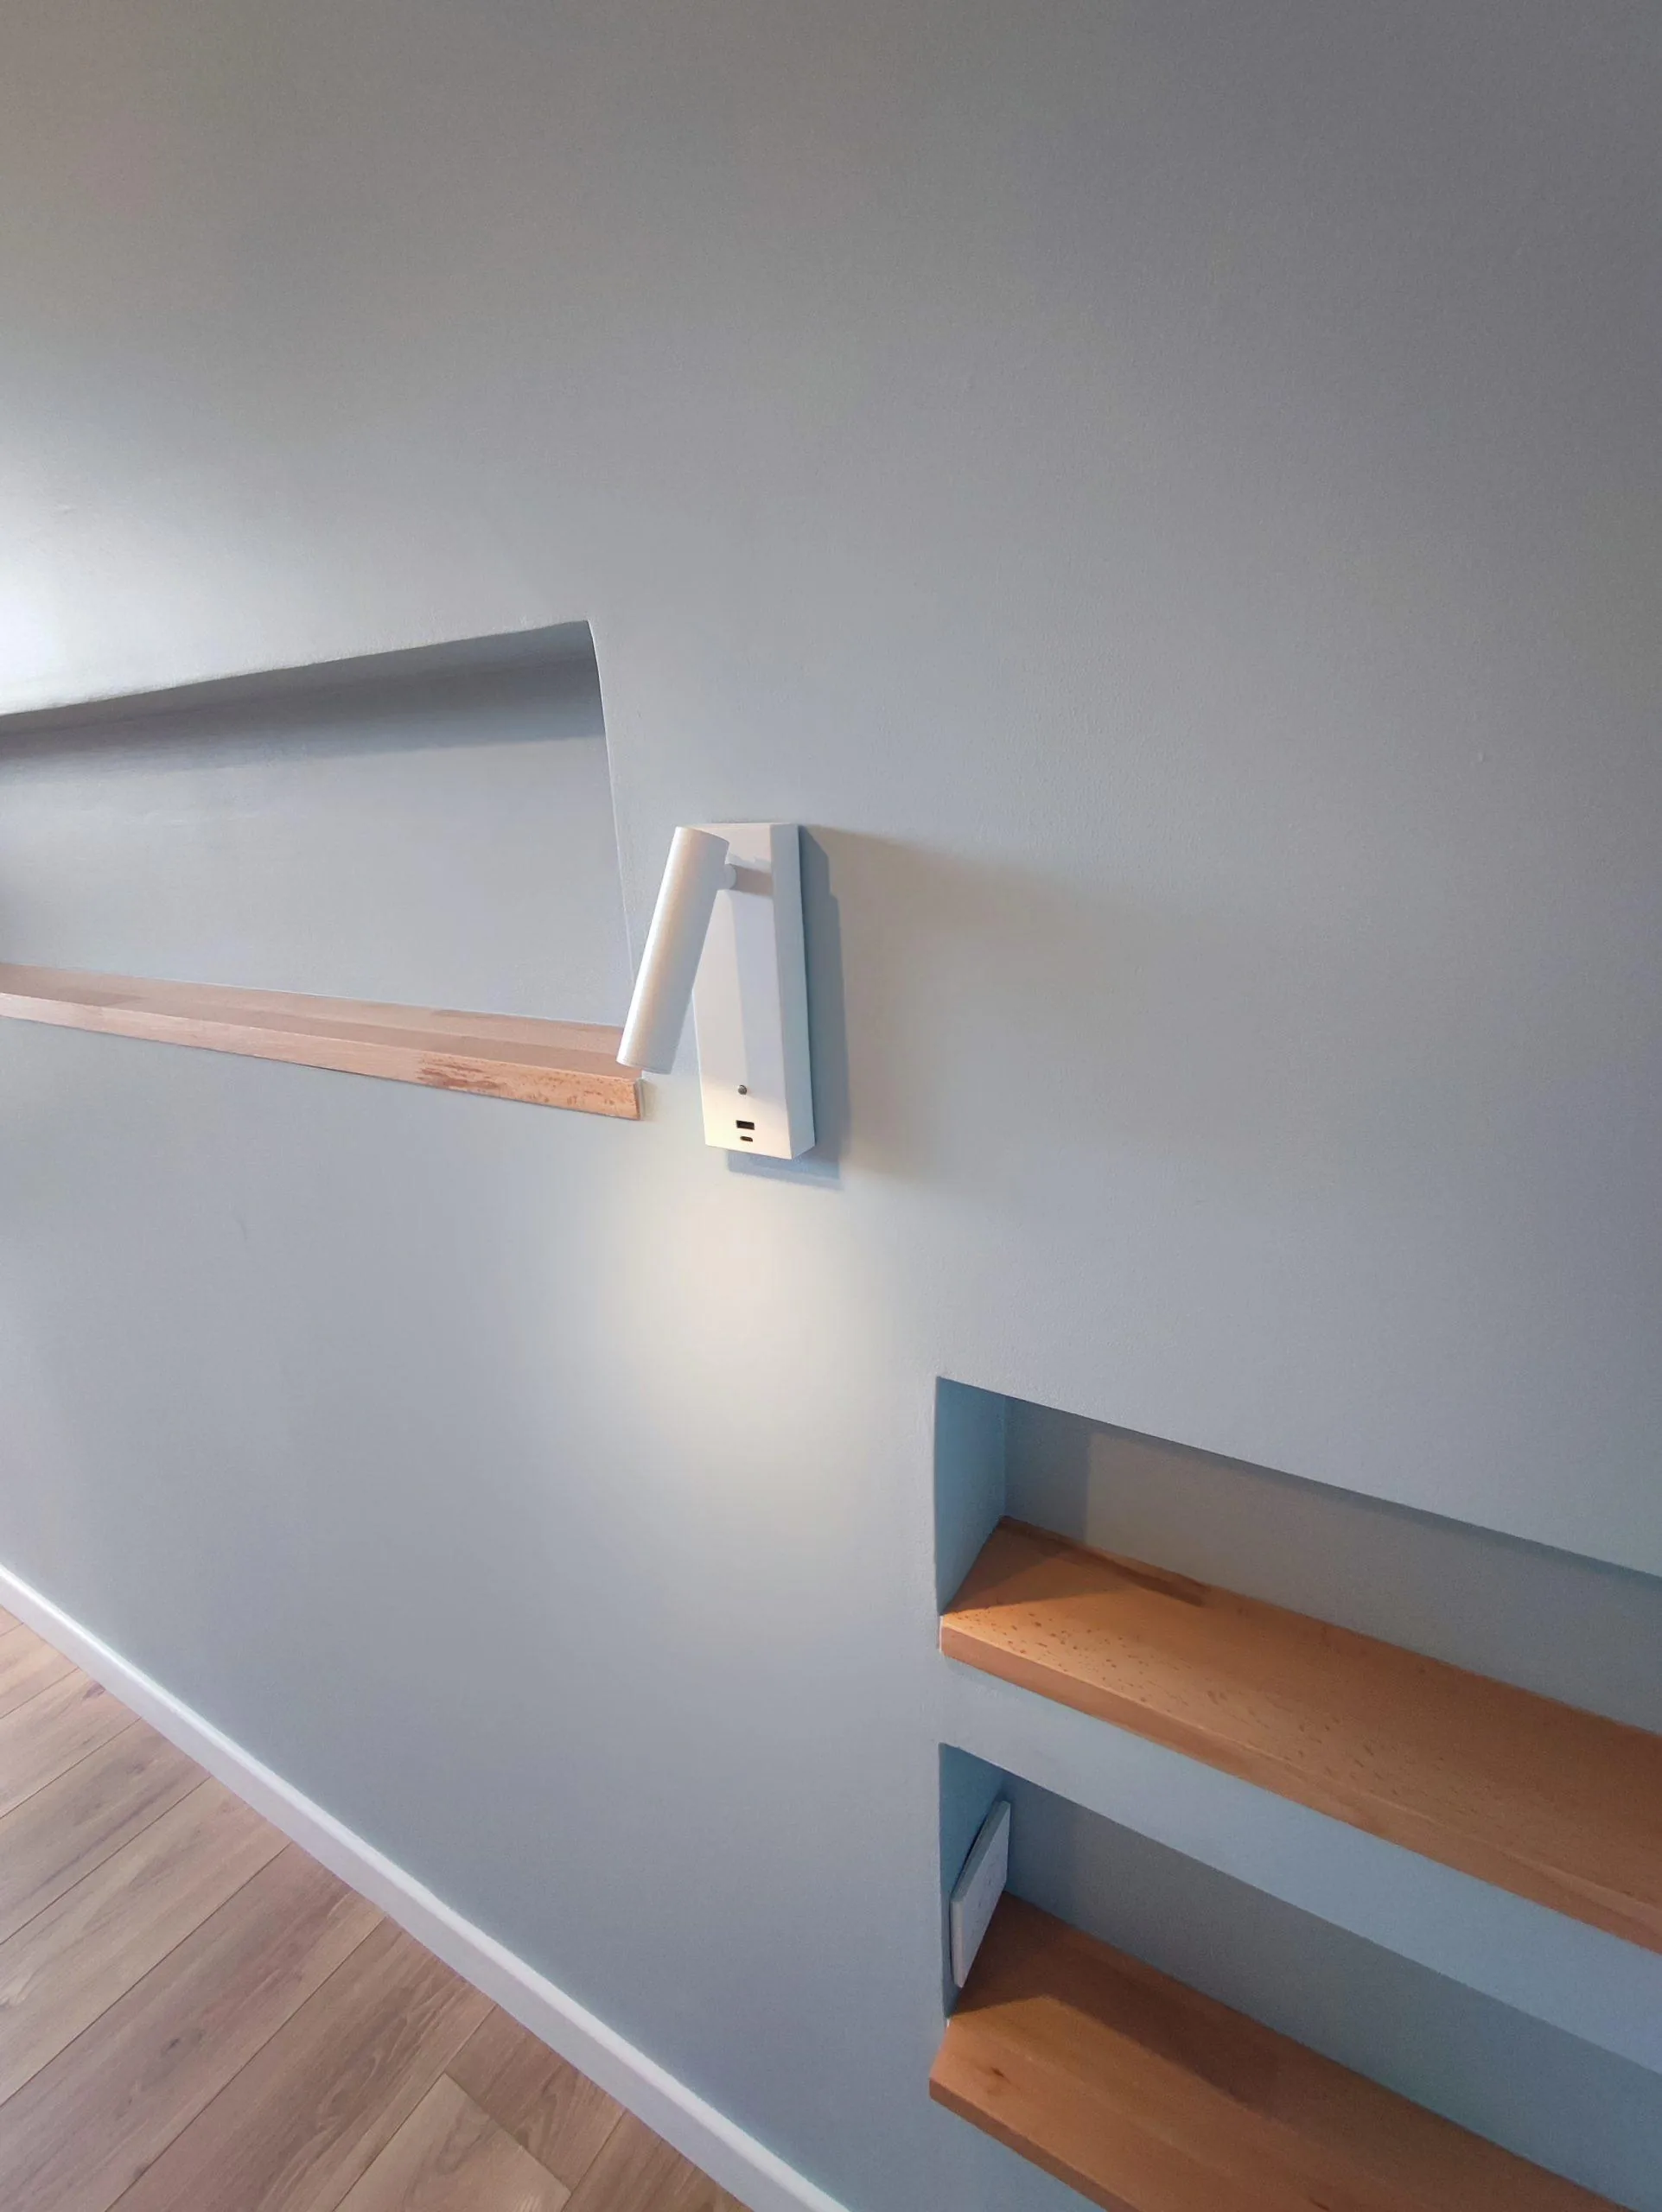
Older walls are rarely perfectly square or plumb. A lining can provide an independent, straight face, align the bed and create level niches without awkward gaps against an uneven surface.
A common construction uses metal tracks and studs with gypsum board. The framing is set independently of the wall’s irregularities, while the resulting zone accommodates wiring and recesses.
Provide designed wood or metal reinforcement at shelf, wall-light and decorative-panel fixing points. A high-hardness board can be appropriate where impacts are expected. Mineral wool within an appropriate assembly can improve acoustic comfort toward an adjacent room, though the complete construction determines performance.
Keep some allowance for discoveries during demolition. The source recalls a concealed element that required adjustment; a reserved margin prevented the headboard detail from blocking the work. Do not make every dimension so tight that the first unexpected condition defeats the design.
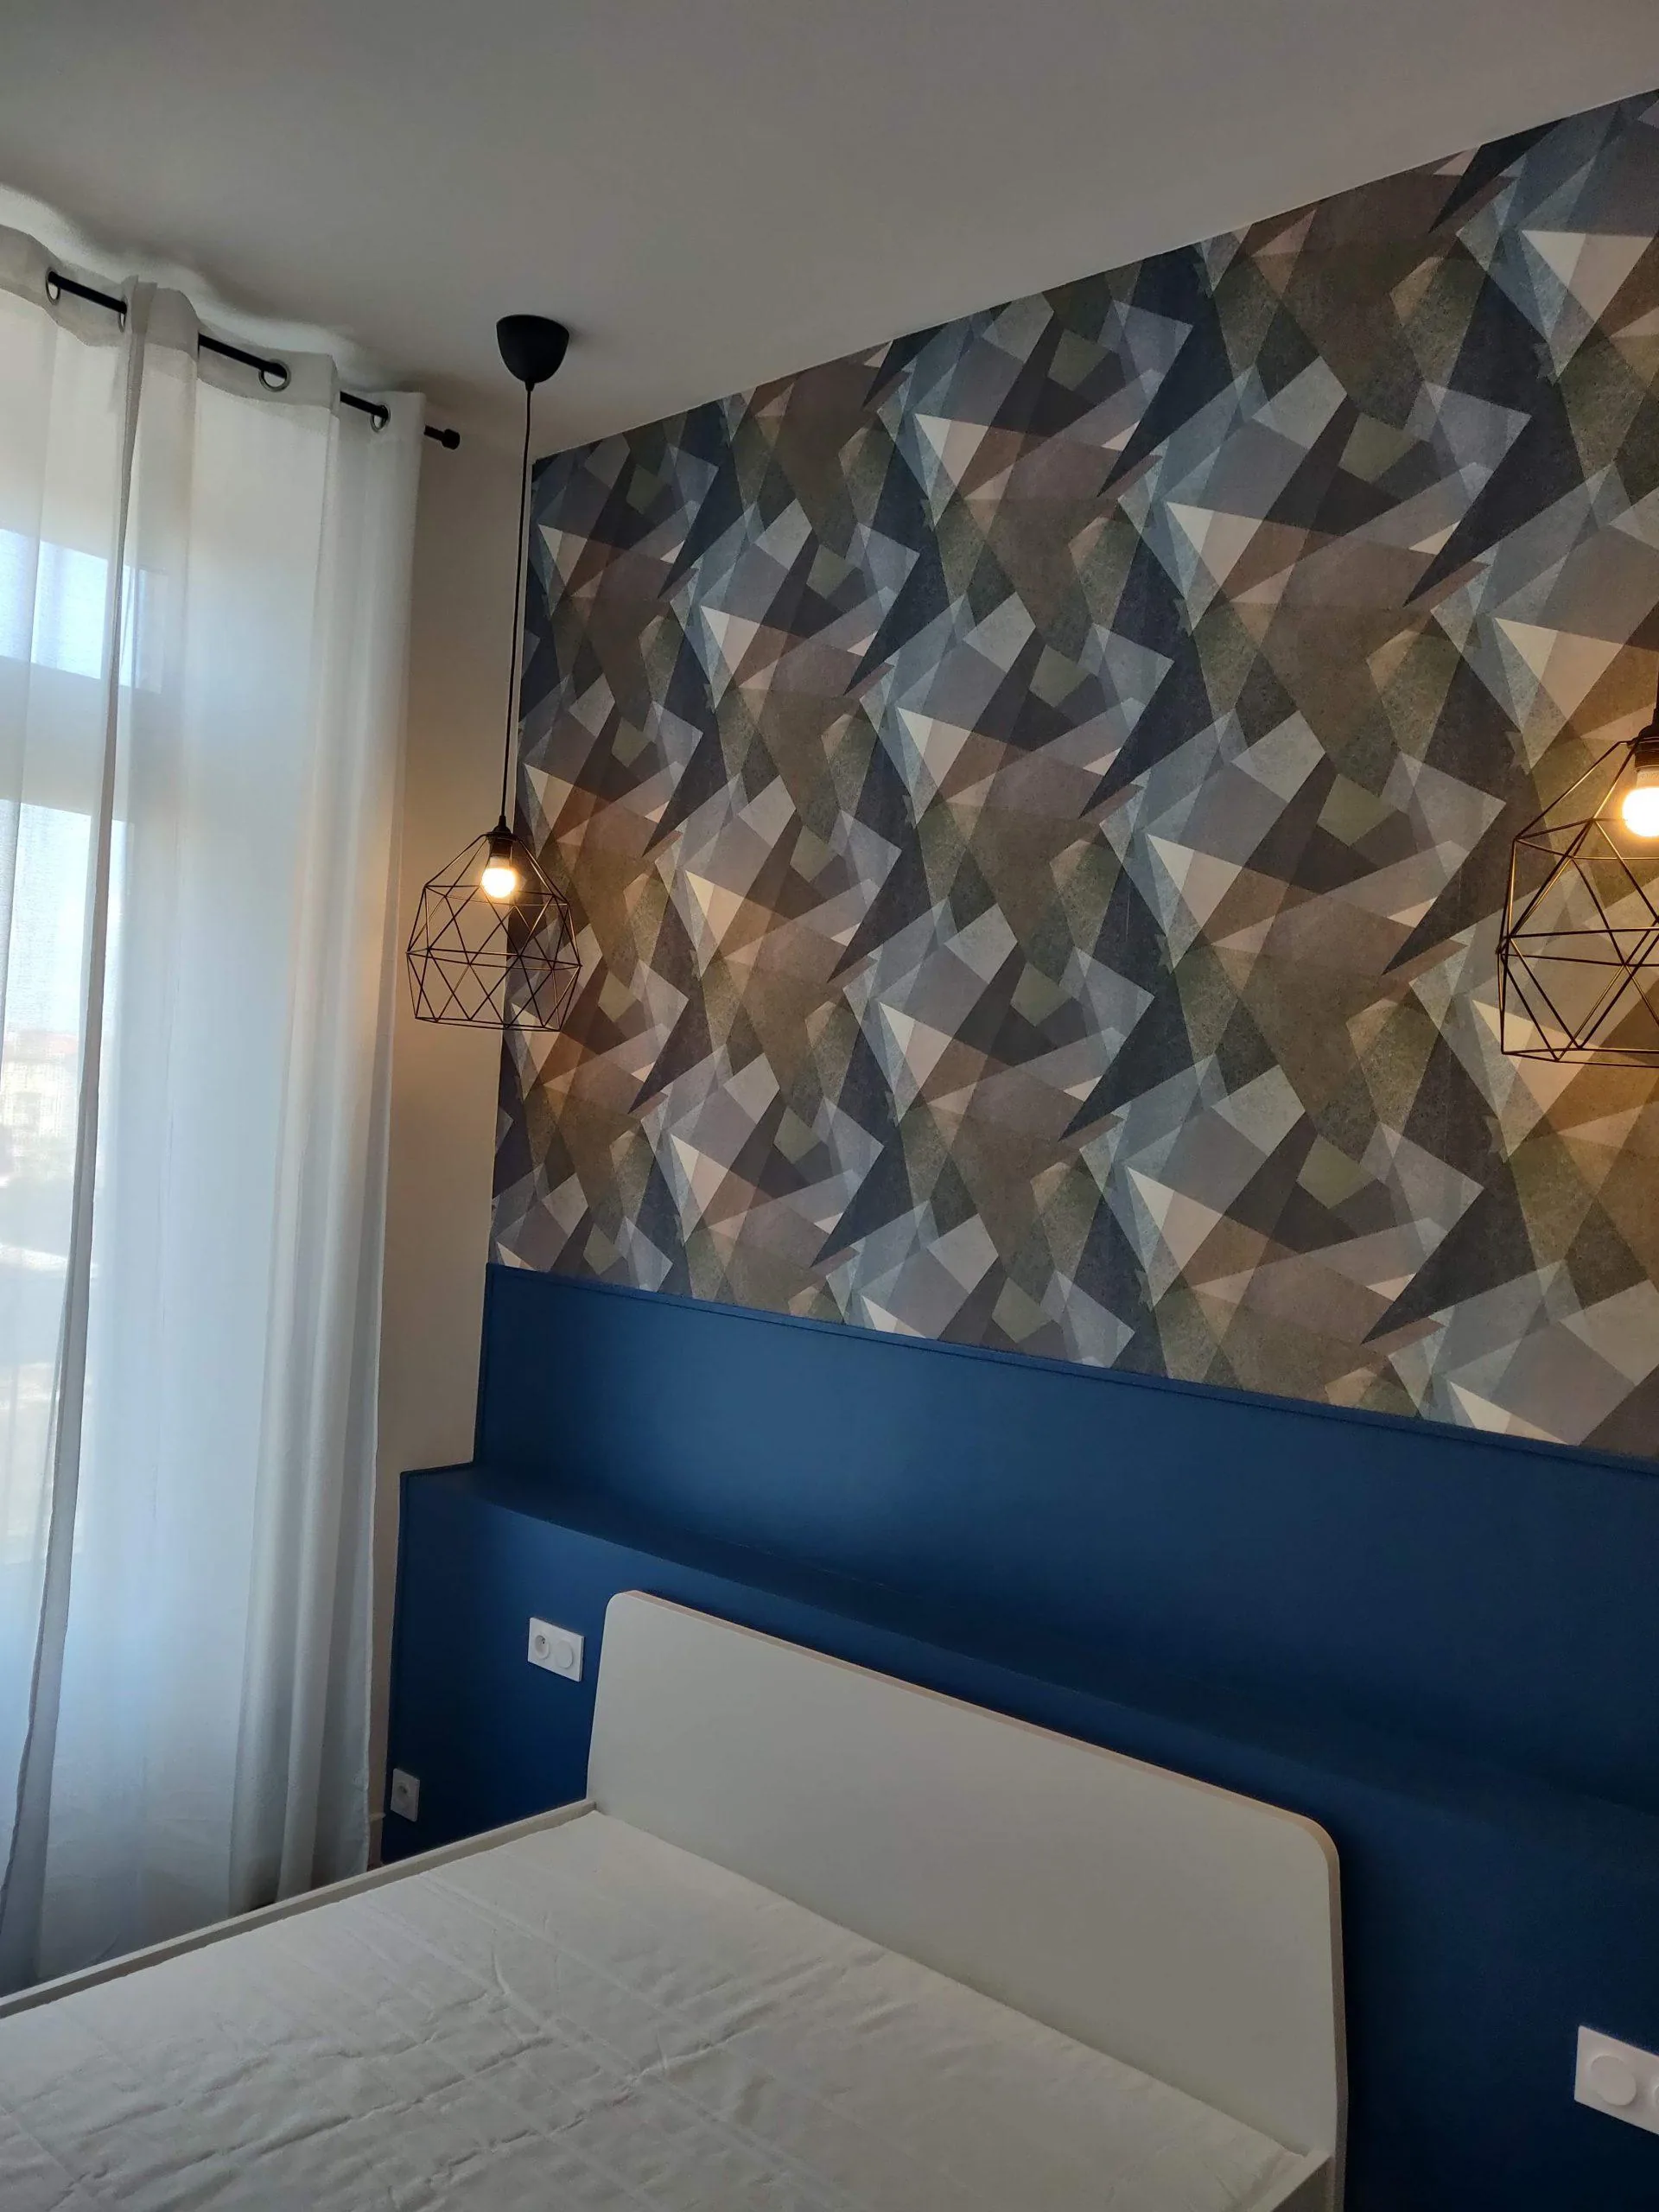
A second photograph shows another way to organize the bed wall: a navy lower section with geometric triangular wallpaper above and suspended lights on either side. Not every architectural effect requires the same full-height build-up.
See our projects in video
Real floor plans and renovations explained step by step on the ArchiWorking YouTube channel. Watch how spaces are reworked before the works begin.
Plan outlets and controls before closing the lining
Bedside needs quickly multiply: phone charger, lamp and other regularly used items. The source recommends doubling the power outlets at each side rather than discovering after completion that a single socket is insufficient.
It also suggests considering lighting control from three useful locations where appropriate, such as the doorway and the bedsides. This is about matching controls to use, not adding switches without a purpose.
In the French source context, NF C 15-100 includes a minimum of three bedroom power outlets in the relevant installation framework. Applicable edition and work scope must be checked; it is not a US electrical rule or a complete specification for every renovation.
The practical proposal is a double outlet by each bedside shelf, potentially including suitable USB charging. Position it relative to the finished shelf and bed rather than from an uncoordinated floor measurement.
Switching should allow light to be turned on at the door and off from bed, with a separate convenient control for each reading light. Use boxes suitable for the wall assembly and record conduit locations before closing it.
In the suite case, reading-light and socket boxes were installed before the full-height gypsum lining was completed. The combination groups lighting and storage, while the wood shelves replace freestanding bedside units.
Use materials where they do useful work
A gypsum-board and wood combination brings different strengths together. The board forms the volume; wood protects contact areas and niche edges that can be more vulnerable when simply painted.
Stone or tile can also line selected areas. The source describes using tile in niches in a rental project to resist repeated wear. That is a project choice, not proof that one material is always the most durable in every assembly.
For a cold or moisture-affected wall, the source discusses moisture-resistant H1-type board and a separated, ventilated air gap after the cause has been treated. Neither board nor a hidden cavity waterproofs an unresolved leak. The wall and indoor moisture conditions need an appropriate design, with no insulation pressed against a wet surface.
For wood elements, birch plywood or oak-veneered panels around 18 to 22 mm are cited. Select the actual product, support and finish for the span and use. Oiled or varnished surfaces allow maintenance appropriate to the material.
An upholstered or fabric-covered panel can add softness and acoustic absorption. Check relevant reaction-to-fire requirements and whether the cover can be removed for cleaning.
Tile on gypsum board requires compatible adhesive and a board assembly that accepts the total load. Material weight and substrate suitability matter as much as the finish seen from the bed.
The bedroom layout and lighting guide helps connect these choices with the rest of the room, while the primary-suite planning guide places the headboard within the wider layout.
Check the total depth, not just the drawing
The source gives approximately 7 to 10 cm for a basic framing-and-board lining and around 12 to 20 cm as a useful niche-depth reference. Actual total thickness must reconcile framing, boards, recesses, services and any required separated air space.
Do not simply hide dampness behind a deeper panel. Resolve the cause and specify the assembly before enclosing the wall. Equally, do not gain a thin profile by removing the reinforcement or maintenance access the detail needs.
Frequently asked questions
What does an architectural headboard add?
It can combine room alignment, bedside storage, lighting and service routes in one coordinated element. Its value comes from responding to circulation and technical conditions, not from making a generic panel larger.
How many outlets should be planned?
Inventory the actual devices. The source recommends double outlets on each side and considered lighting controls, potentially at three locations. Final electrical design follows the rules and needs of the installation location.
Can it be built against a damp wall?
Only after investigating and treating the cause and designing a suitable assembly. The filmed project’s separated lining is a case-specific response, not permission to conceal active infiltration.
Which materials suit intensive use?
Wood can protect contact edges, and tile may suit selected niches if substrate, adhesive and load are compatible. Choose by wear, cleaning and construction requirements rather than a blanket ranking of finishes.