
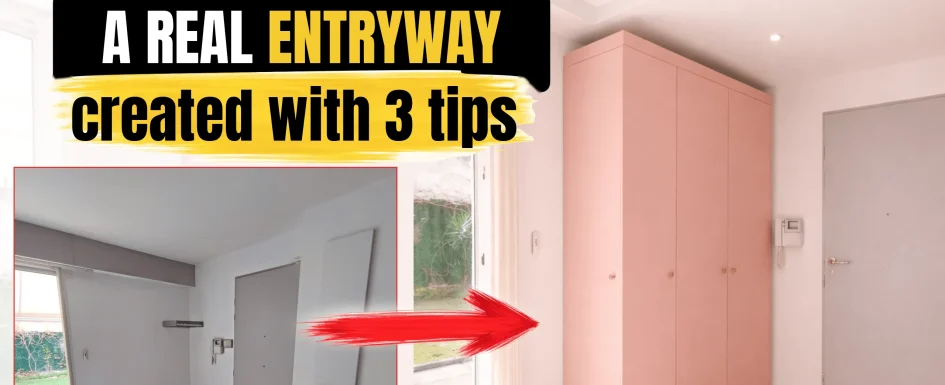
An apartment can have a front door without having a useful entry. If arrival happens directly in the kitchen or lounge, coats, shoes and bags have no clear destination, and the transition from outside to private living space disappears.
This renovation created that missing transition through three coordinated moves: furniture that acts as a partial divider, a localized ceiling drop with its own light, and a distinct area of flooring. Together they establish an entry without a new full-height room partition.
The central furniture combines clothing storage, a bench and places for daily belongings. The method is about a complete arrival routine, not simply adding a decorative console beside the door. Our apartment-entry guide considers that wider role.
Return to the original entrance
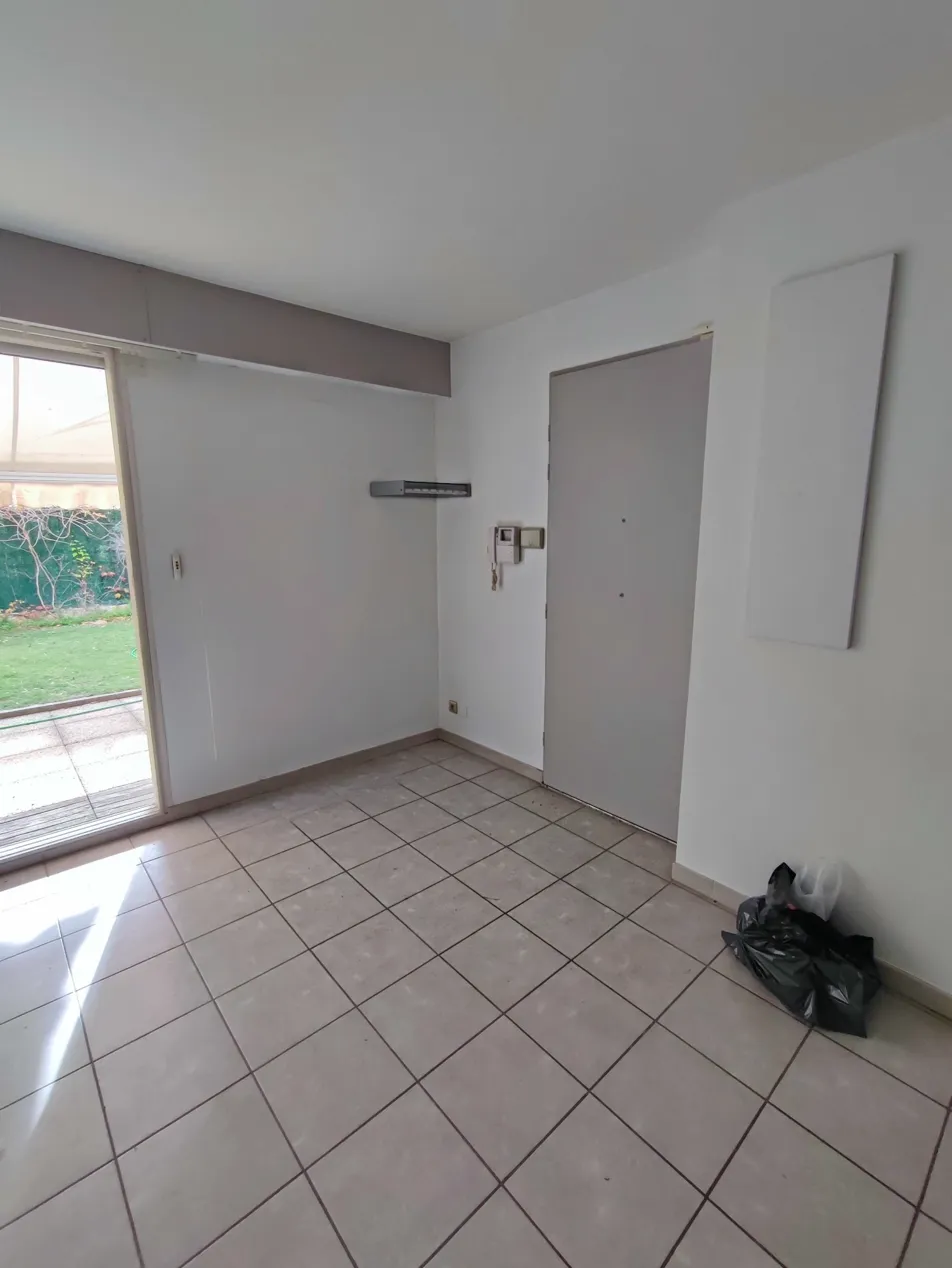
Before the renovation, people mainly entered through a glazed door beside the kitchen and then crossed the living room. The original front door still existed but was rarely used, opening straight into the large common room without a defined arrival zone.
The wider apartment renovation removed the kitchen-side glazed-door arrangement and brought the original entry back into use. The kitchen was also being relocated, so the arrival design had to work with a changing common room rather than a fixed furniture plan.
The principal constraint was to avoid reducing the perceived living volume. A solid partition would occupy area and obstruct daylight arriving from the window on the entry side. The design needed a clear boundary without losing that light.
Use furniture as a partial boundary
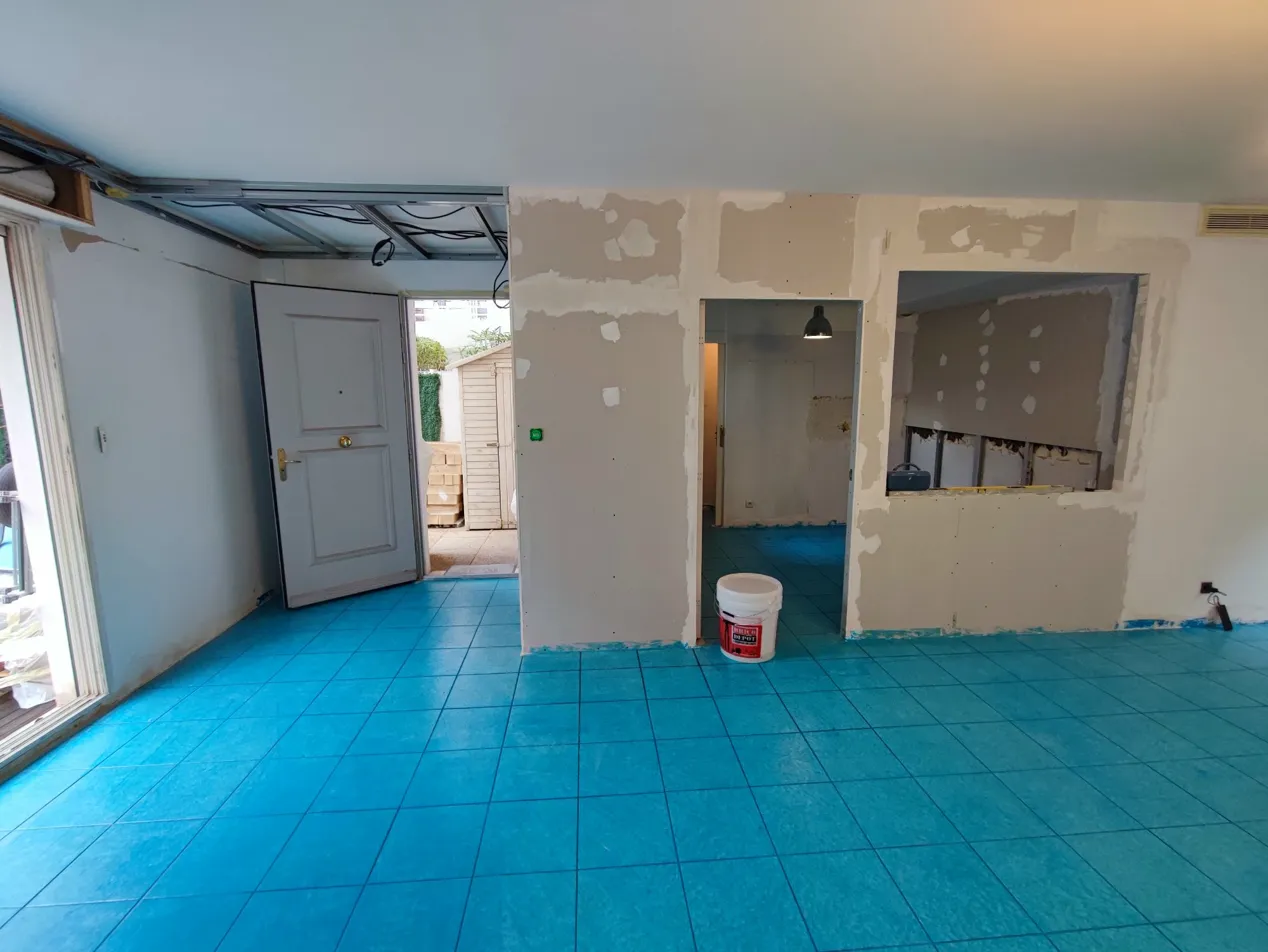
The first move was a custom composition that separates visually while remaining open above. It establishes where the entry ends and living space begins without enclosing a new room.
Its framework uses galvanized steel and BA13 gypsum board. The housing continues the language of the apartment’s other integrated elements, so the entry reads as part of the interior rather than a freestanding obstacle.
As soon as the first framing was installed, the intended arrival volume became legible. The useful distinction is not between “construction” and “no construction”: there is framed work here. It is between an integrated partial divider and a new wall cutting the whole room apart.
Renovation dimensions also need tolerance. Existing corners and floors may not be perfectly square or level. An accurately finished unit should accommodate the actual surveyed conditions, not rely on ideal dimensions copied from a sketch.
Keep the roller-shutter mechanism accessible
The existing roller shutter required access for maintenance. The team opened the relevant area to see the real available space before fixing the technical enclosure and new service routes.
That investigation affected the furniture and ceiling composition. A neat housing that blocks the shutter mechanism would turn a future repair into unnecessary demolition, so access had to be designed rather than remembered after finishing.
The completed route retained access to the shutter. This is an important practical requirement to verify in the actual detail, not a promise that every possible future fault will be repairable without any disruption.
Draw the entry with a lower ceiling and independent light
The second move is a soffit, a localized dropped ceiling over the entry. Its lower level marks the arrival volume while the rest of the common room remains more open.
Recessed lights reinforce the distinction. The entry has its own lighting zone and control instead of relying on the lounge light to perform every task. Two-way switching positions were coordinated throughout the work.
The soffit also solves a technical problem created by the kitchen relocation. New electrical feeds travel overhead in an enclosure continuing along the roller-shutter area toward a second soffit at the kitchen, which has its own recessed lights.
Two zones and two ceiling levels are therefore organized through one planned enclosure strategy. The lighting effect and the service route are related decisions, not separate decorative and technical layers forced together later.
See our projects in video
Real floor plans and renovations explained step by step on the ArchiWorking YouTube channel. Watch how spaces are reworked before the works begin.
Make a tiled threshold without adding a wall
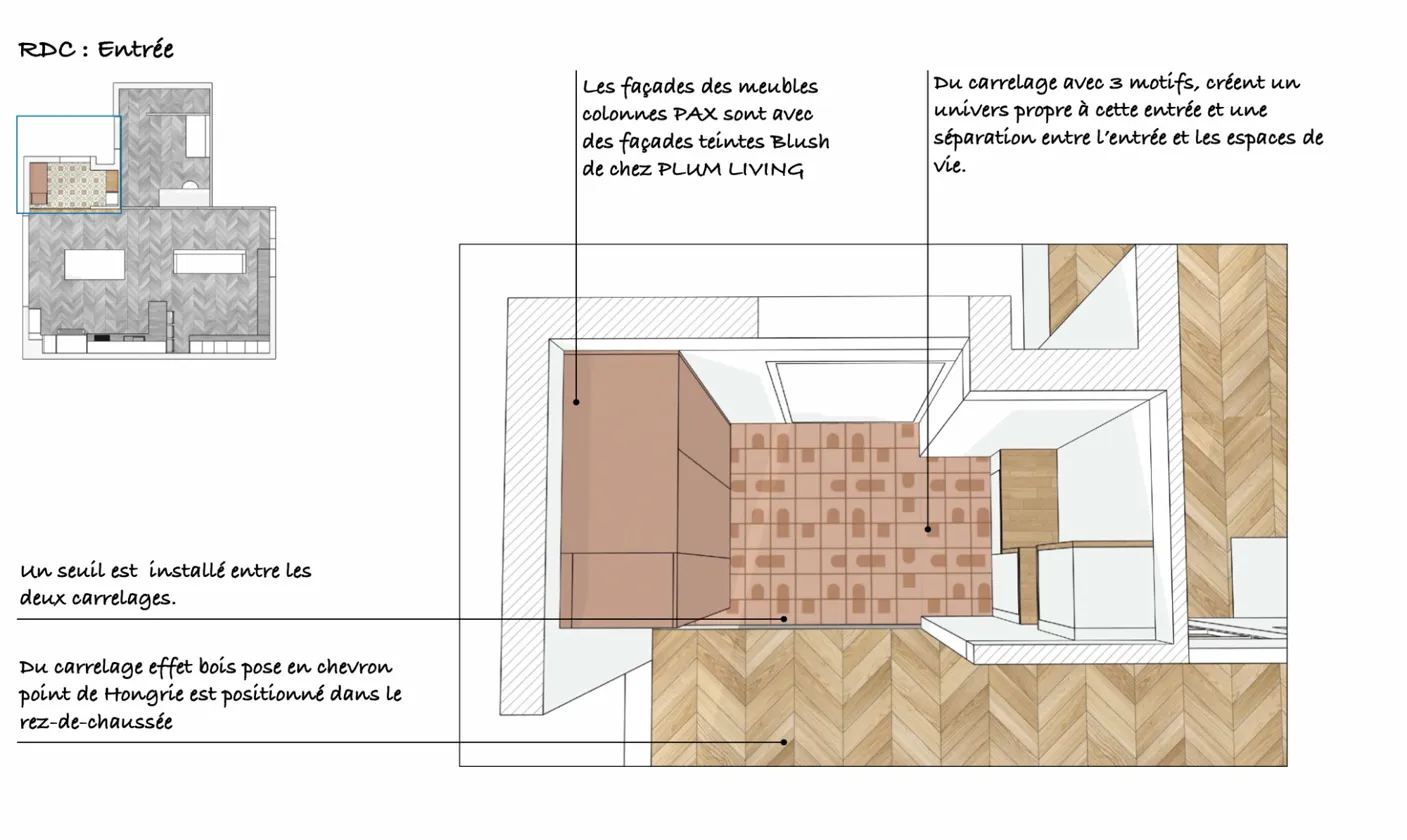
The third move is a flooring change limited to the entry. In the rest of the apartment, wood-look tile is laid in a chevron, or point de Hongrie, pattern. The entry receives a colored patterned tile area described as a tiled rug.
Because the strong graphic treatment occupies a limited zone, it gives arrival a distinct identity without taking over the whole kitchen-living room. The boundary is visible underfoot while the larger volume and its daylight remain shared.
The owner wanted a personal and colorful result. Several stylistic directions were considered through samples; one was selected and then refined alongside the furniture fronts. The final combination came from comparing the actual materials, not choosing the floor and doors independently.
A fiber-reinforced leveling compound and bonding treatment prepared the floor. The build-up and priming stages must follow the specified product system. This project account should not replace the manufacturer’s sequence for another support or adhesive.
Compare tile thicknesses before laying. A difference between the two finishes can create an unwanted threshold or uneven junction that is difficult to correct neatly afterward. Using the same grout color in both areas helps connect their different patterns visually.
Plan the bench, storage and closet as one composition
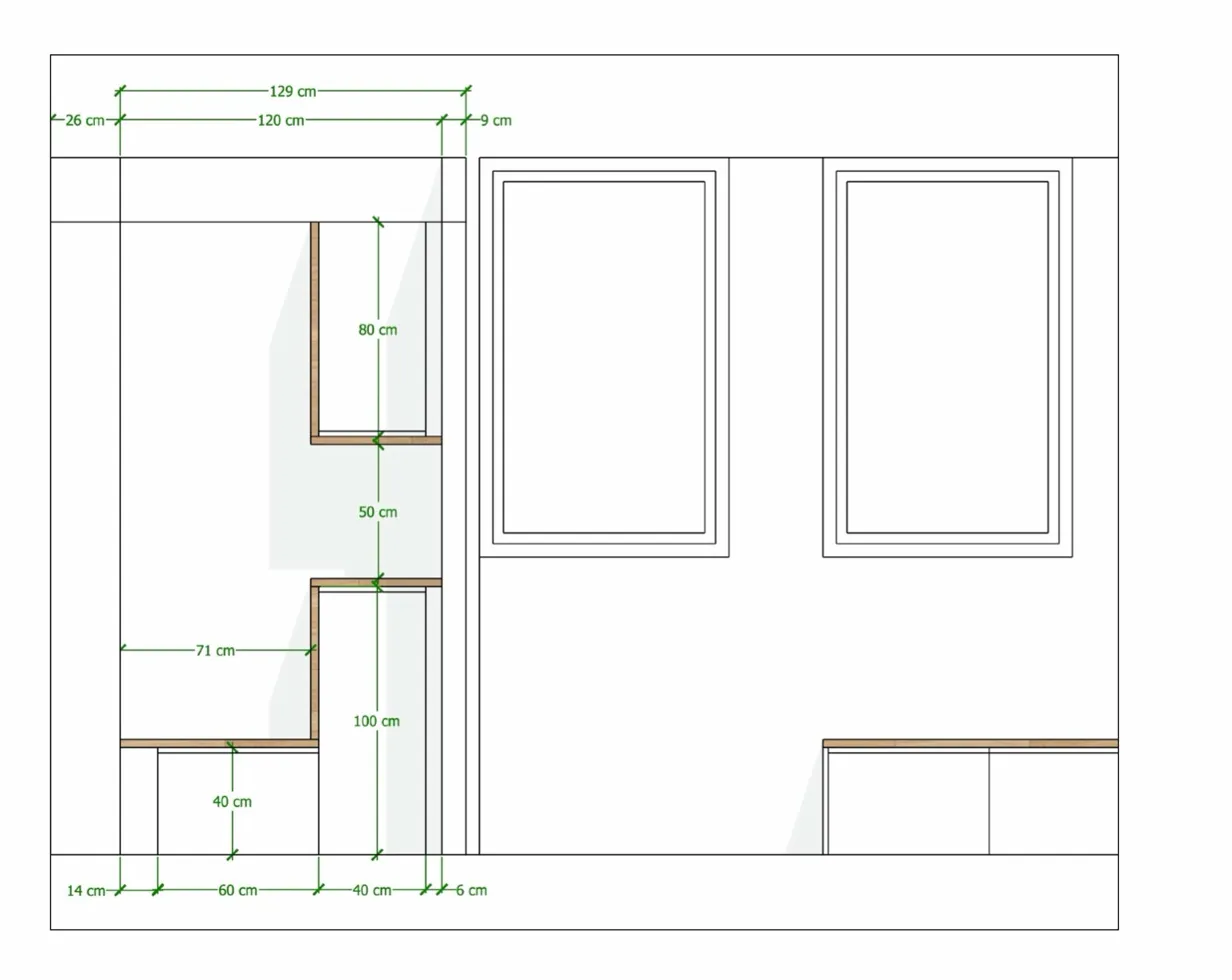
The entry unit has three roles: a visual divider, storage and seating. Its elevation was drawn to fit the actual constraints rather than assembled from unrelated furniture pieces.
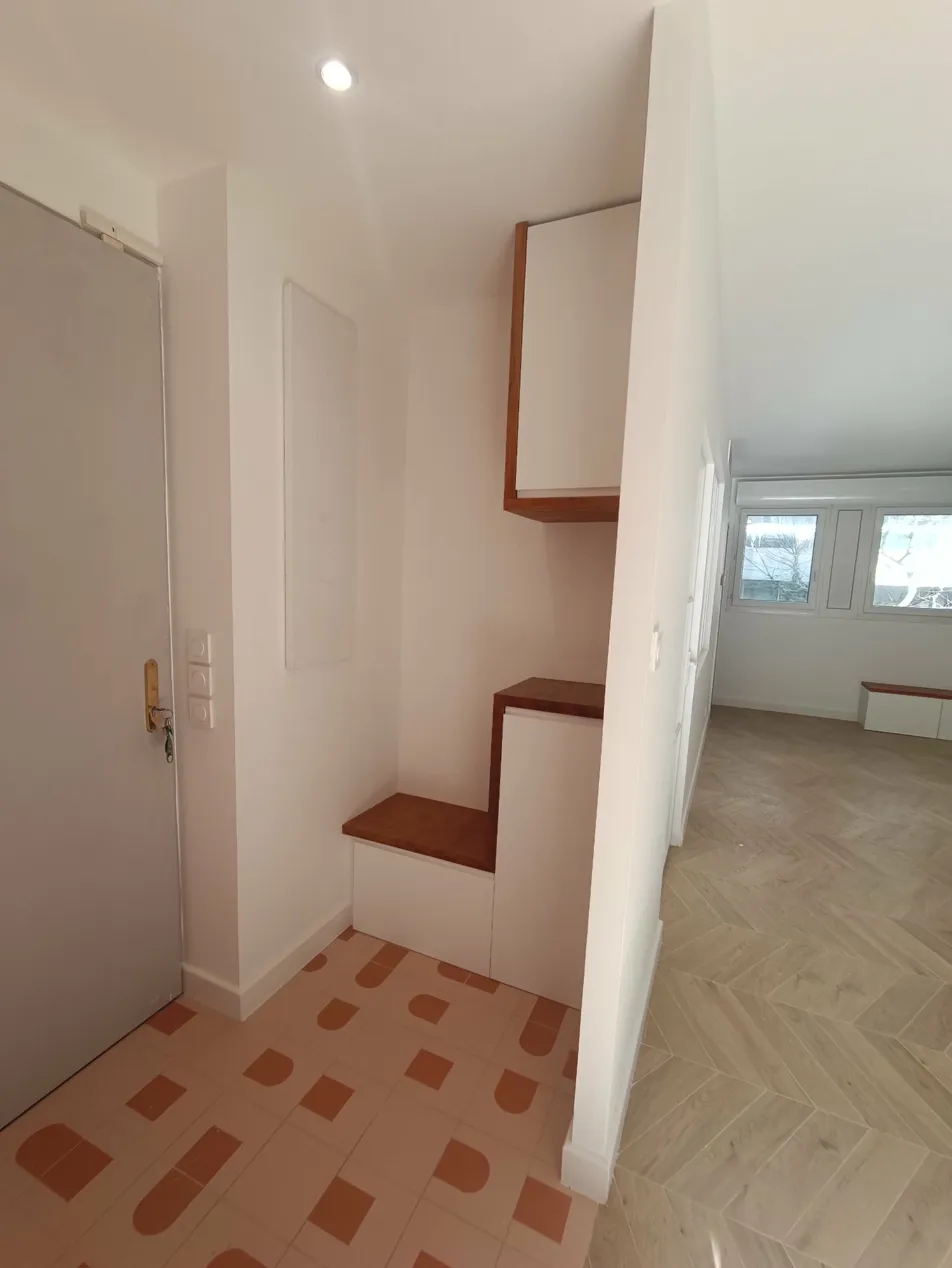
The bench is 40 cm high and contains storage beneath. The design notes also identify a 50 cm open-storage element and an 80 cm column element. Their dimension directions must be read on the elevation before ordering; those figures should not be assumed to describe the height of every component.
The bench side is 60 cm deep, while the column side is 40 cm deep. These differing depths answer different uses. They are project dimensions, not a claim that all entry furniture should have a uniform standard depth.
Opposite, PAX closet columns receive blush-colored Plum Living fronts. The color relates to the entry tiles. The cabinet bodies are installed with varnished solid-wood side panels, echoing other timber elements in the apartment.
That connection between tile, fronts and wood turns practical storage into part of the overall interior. The finish detail matters, but it remains attached to a clear use: sit, put away shoes, hang clothing and leave small daily items where they can be found.
Understand the indicative budget, not a universal price
The original project guidance gives approximately 3,000 to 8,000 euros for a complete entry composition with closet, bench and enclosure, depending on complexity, material and finish level.
Note: prices are indicative, based on projects in France in 2026, and vary by project, region and finish.
This is an indicative range from the project’s French context, not a current quote or a promised cost in another market. A fully bespoke joinery package and standard closet modules with selected fronts involve different scopes of work.

The useful comparison includes the whole assembly: cabinets, enclosing details, fitting and finish requirements. Comparing only the price of the visible doors would not establish the budget for a finished entry.
Combine the three moves only where they help
Furniture, ceiling and floor can be used together or separately depending on the existing apartment. Here, their coordination makes the entry readable without a new full-height partition.
The result preserves the daylight relationship while giving arrival its own storage, seat and lighting. The door no longer opens into an undifferentiated room with nowhere to put the objects that come home every day.
Not every entry needs a ceiling drop or a strong floor pattern. The principle is to choose the smallest coordinated set of changes that establishes the required use without harming the rest of the home.
Questions about an entry without a corridor
Can furniture establish the boundary on its own?
It can mark a useful transition where its dimensions, stability and position suit the room. This case combines it with floor and ceiling changes for a stronger but still open arrival zone.
Is a custom cabinet always necessary?
Not every component must be bespoke. This project integrates standard PAX storage with selected fronts and tailored framing. The measured fit matters more than the furniture label.
Which changes avoid major structural work?
A partial furniture divider and a distinct floor treatment can define an entry without altering the load-bearing structure. Actual fixing, floor preparation and services still need appropriate planning.
Why check the shutter before closing the enclosure?
Its maintenance access is a fixed requirement. Planning the housing without seeing the mechanism can create a conflict that only appears when a repair is needed.