
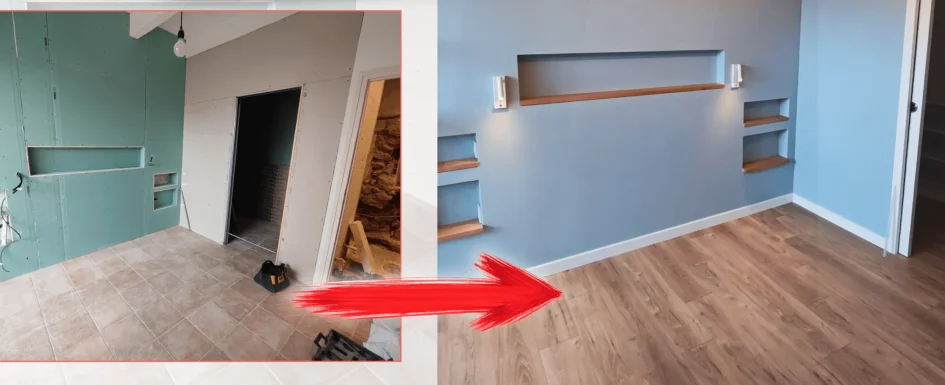
A primary suite is a coordinated program, not simply a bedroom with a shower added beside it. In this 30 m² renovation, sleeping, clothing storage and a private shower room had to work together within the existing area. The project also had to deal with old services, a history of moisture and details that could not be resolved by choosing finishes alone.
The work lasted 8 weeks from initial removal to handover. Its value as a case study lies in the decisions made before and during those weeks: identifying a workable minimum program, checking services, coordinating partitions and ventilation, then handling adjustments without losing the overall sequence.
The same approach applies across our bedroom and primary-suite studies. Define the complete use before demolition, and distinguish what the household needs from the extras that the available area may or may not support.
Establish the essentials without inventing a universal definition
For this project, the suite program consists of a sleeping area, functional clothing storage and a private shower room with a shower and basin. A bathtub, second basin, integrated toilet or desk may add comfort where the plan allows, but they should not undermine those basic functions.
That is a design brief, not a universal legal definition of the word “suite.” The useful question is whether the three parts work for the occupants. A large bathroom cannot compensate for a bed that is awkward to reach or clothing storage that has nowhere to open.
The project guidance uses around 70 cm beside accessible bed edges as a planning reference, with access on three sides. It should not be presented as an absolute habitability or accessibility standard. Actual users, furniture, doors and applicable requirements determine the needed clearances.
Similarly, 25 to 30 m² is an indicative range discussed for this type of complete arrangement, not a guaranteed minimum area. This scheme works within 30 m² because of its distribution and technical choices, not because every room of that size automatically accepts the same program.
Verify the wet-room services and moisture conditions
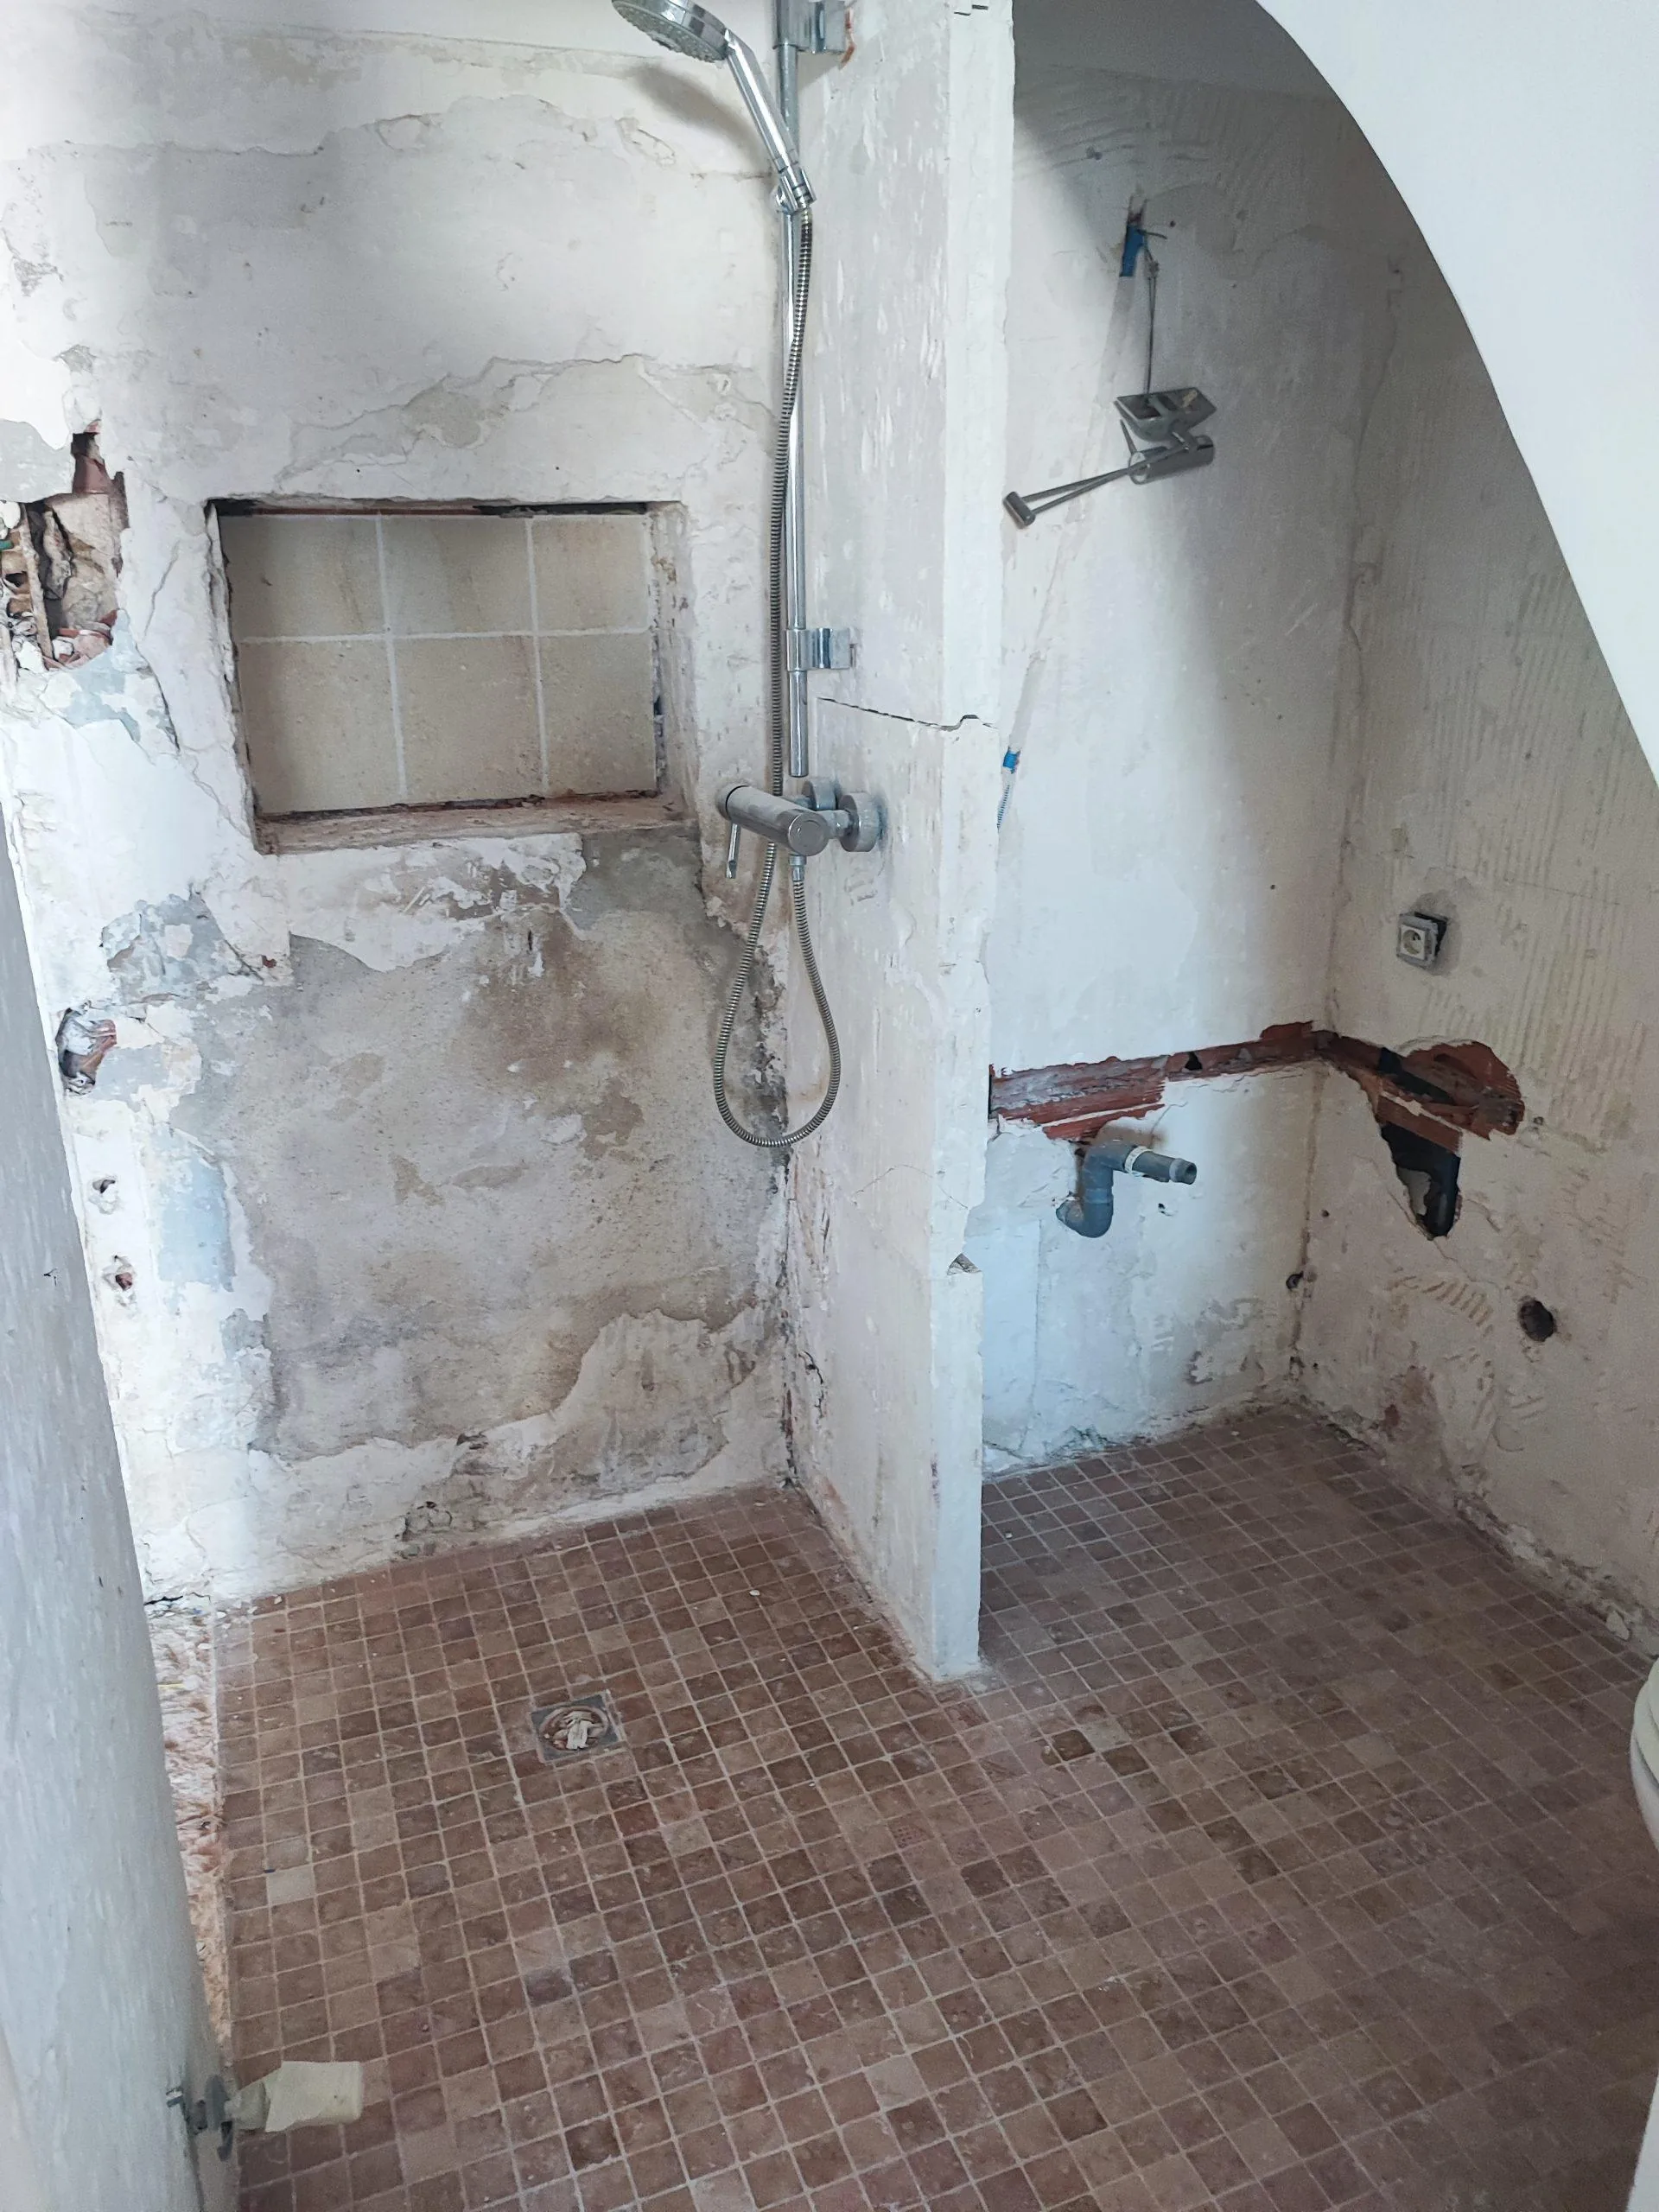
The existing drainage, water supplies and electrical feeds all needed reworking on this job. That is not inevitable in every renovation, but old networks should not be assumed reusable without investigation.
Open and inspect before making the final layout depend on a connection. Some projects reuse, others create or substantially restructure services. Here, the condition behind the former vanity became one of the issues requiring a complete service intervention.
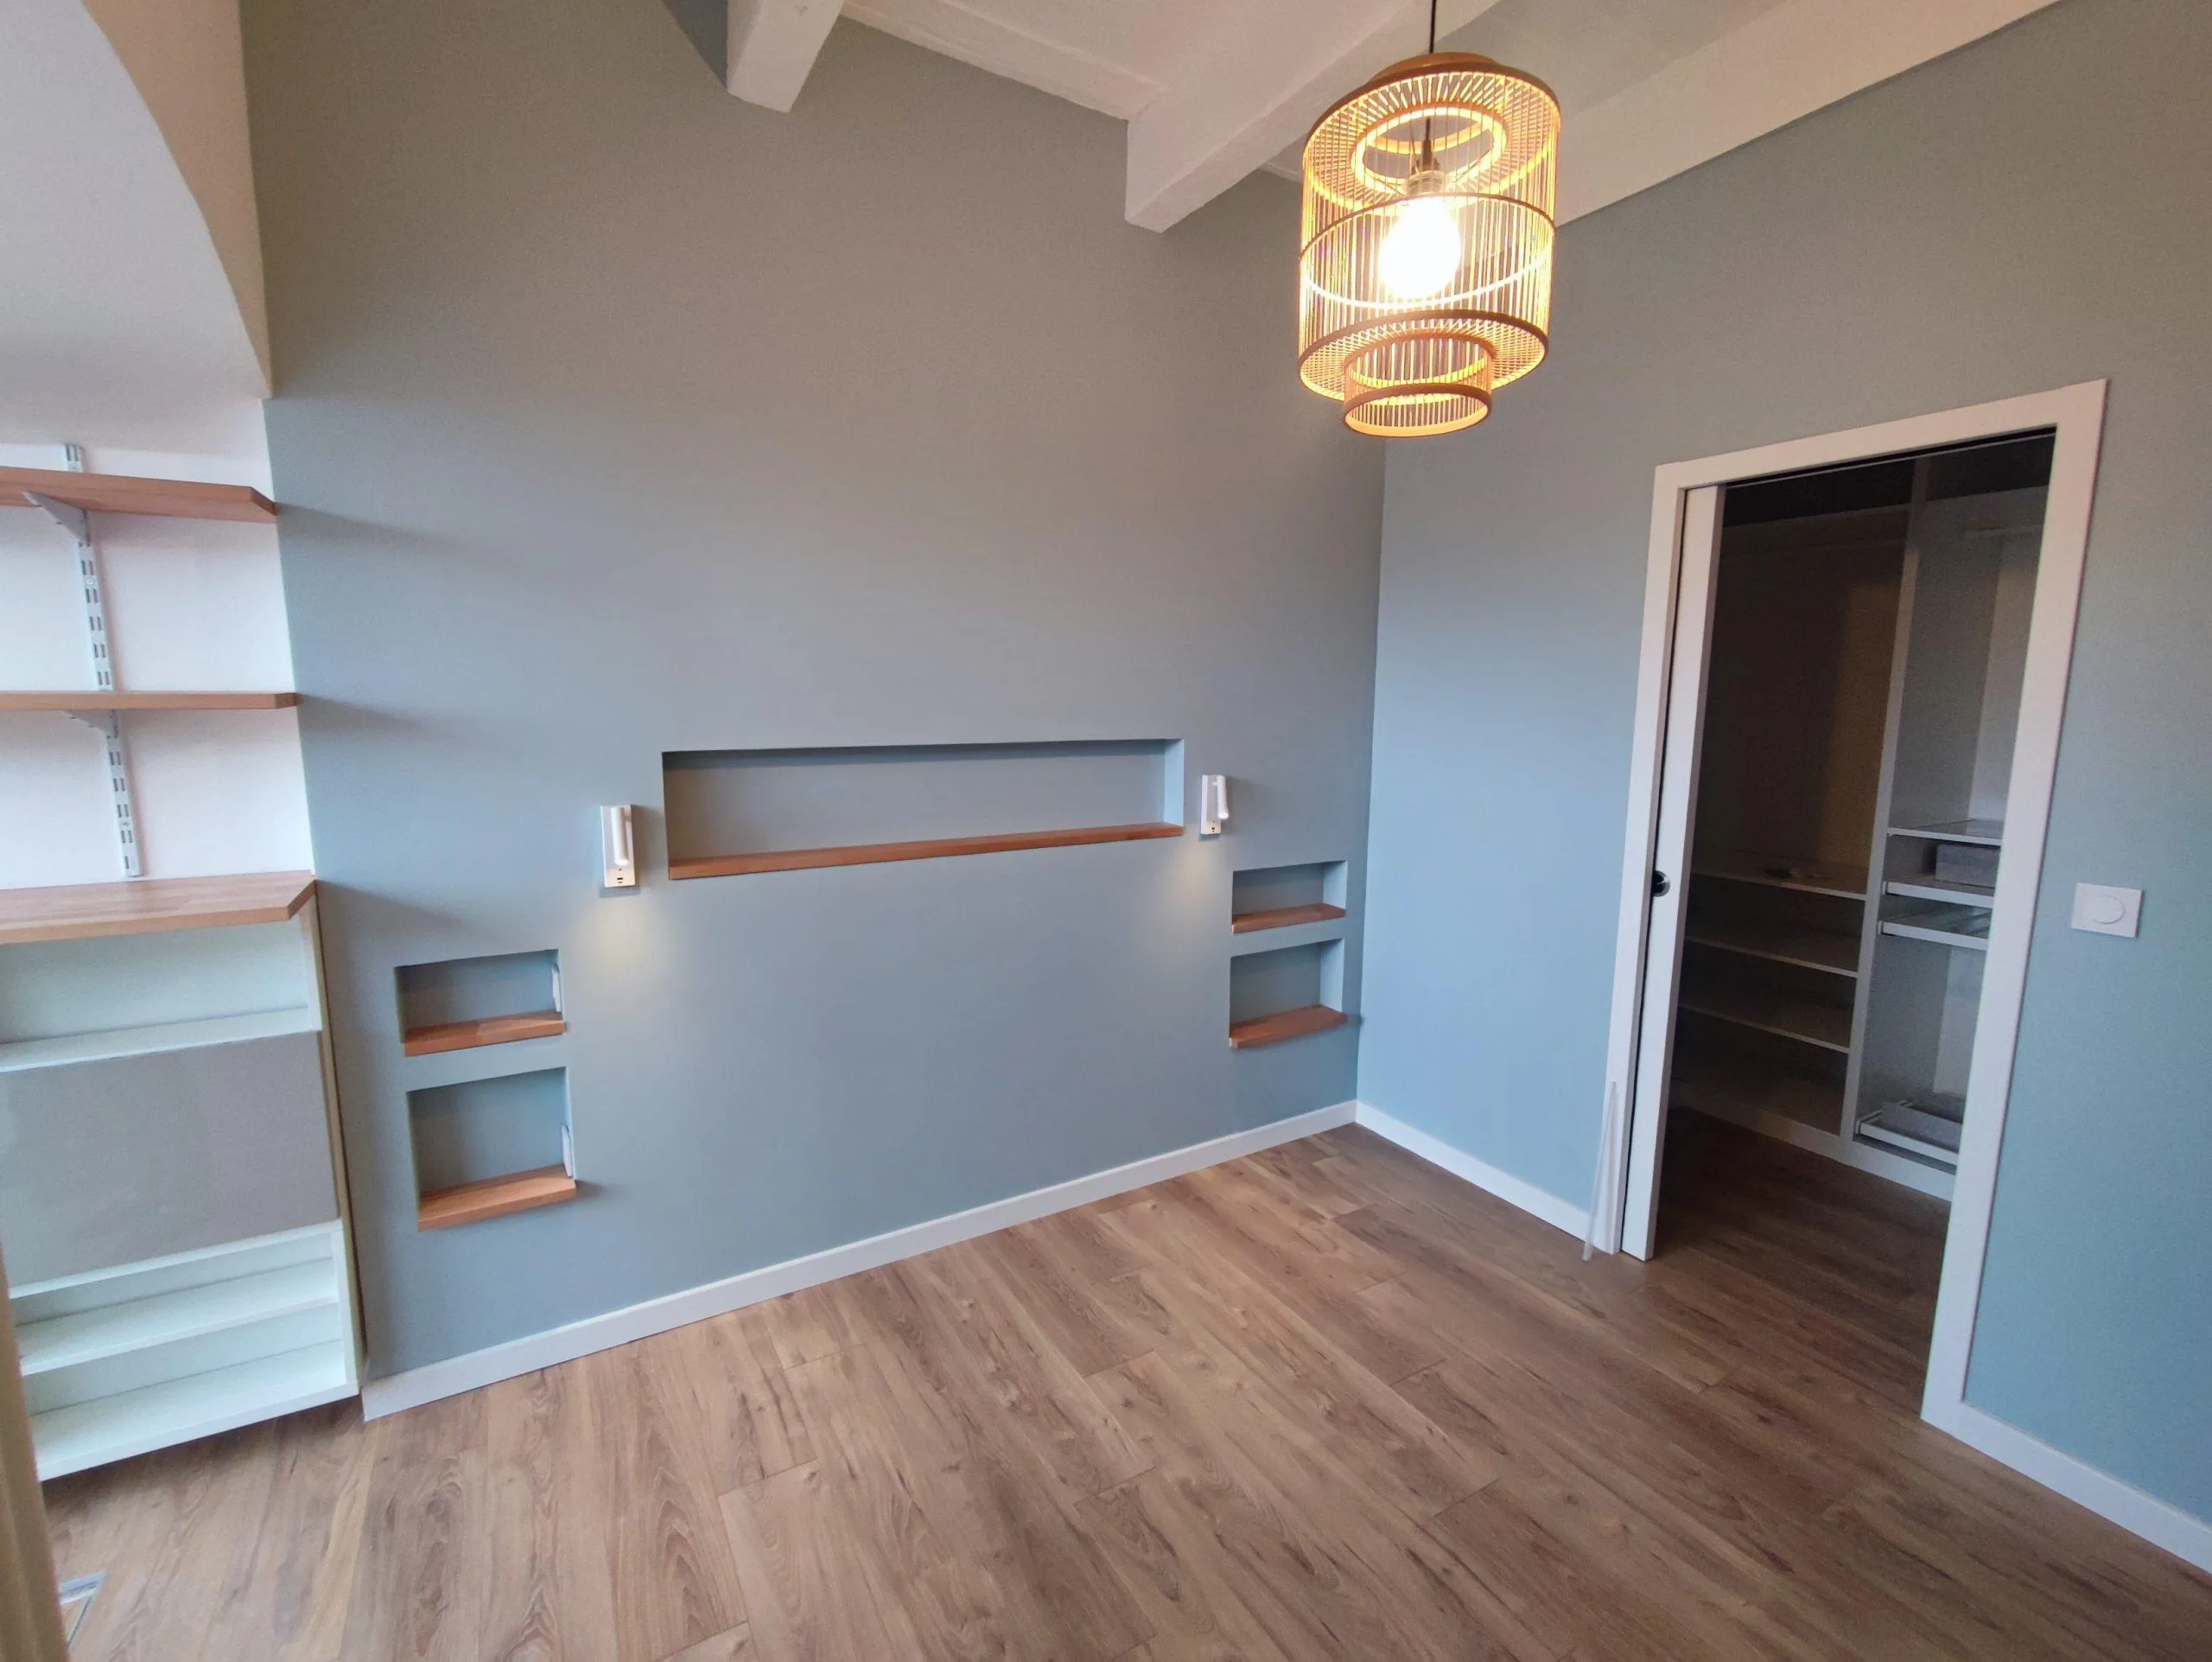
The house also had a history of moisture associated with neighboring conditions and old walls. The design included a ventilated air gap behind the headboard and mechanical extract connected directly to the shower room through an overhead route above the partition.
Those details belong to this particular response. An air gap or an extractor is not a substitute for diagnosing the cause of damp or resolving ongoing water entry. The intention was to manage the project’s actual conditions over time rather than conceal them behind a new decorative headboard.
Coordinate the closet enclosure and ceiling work
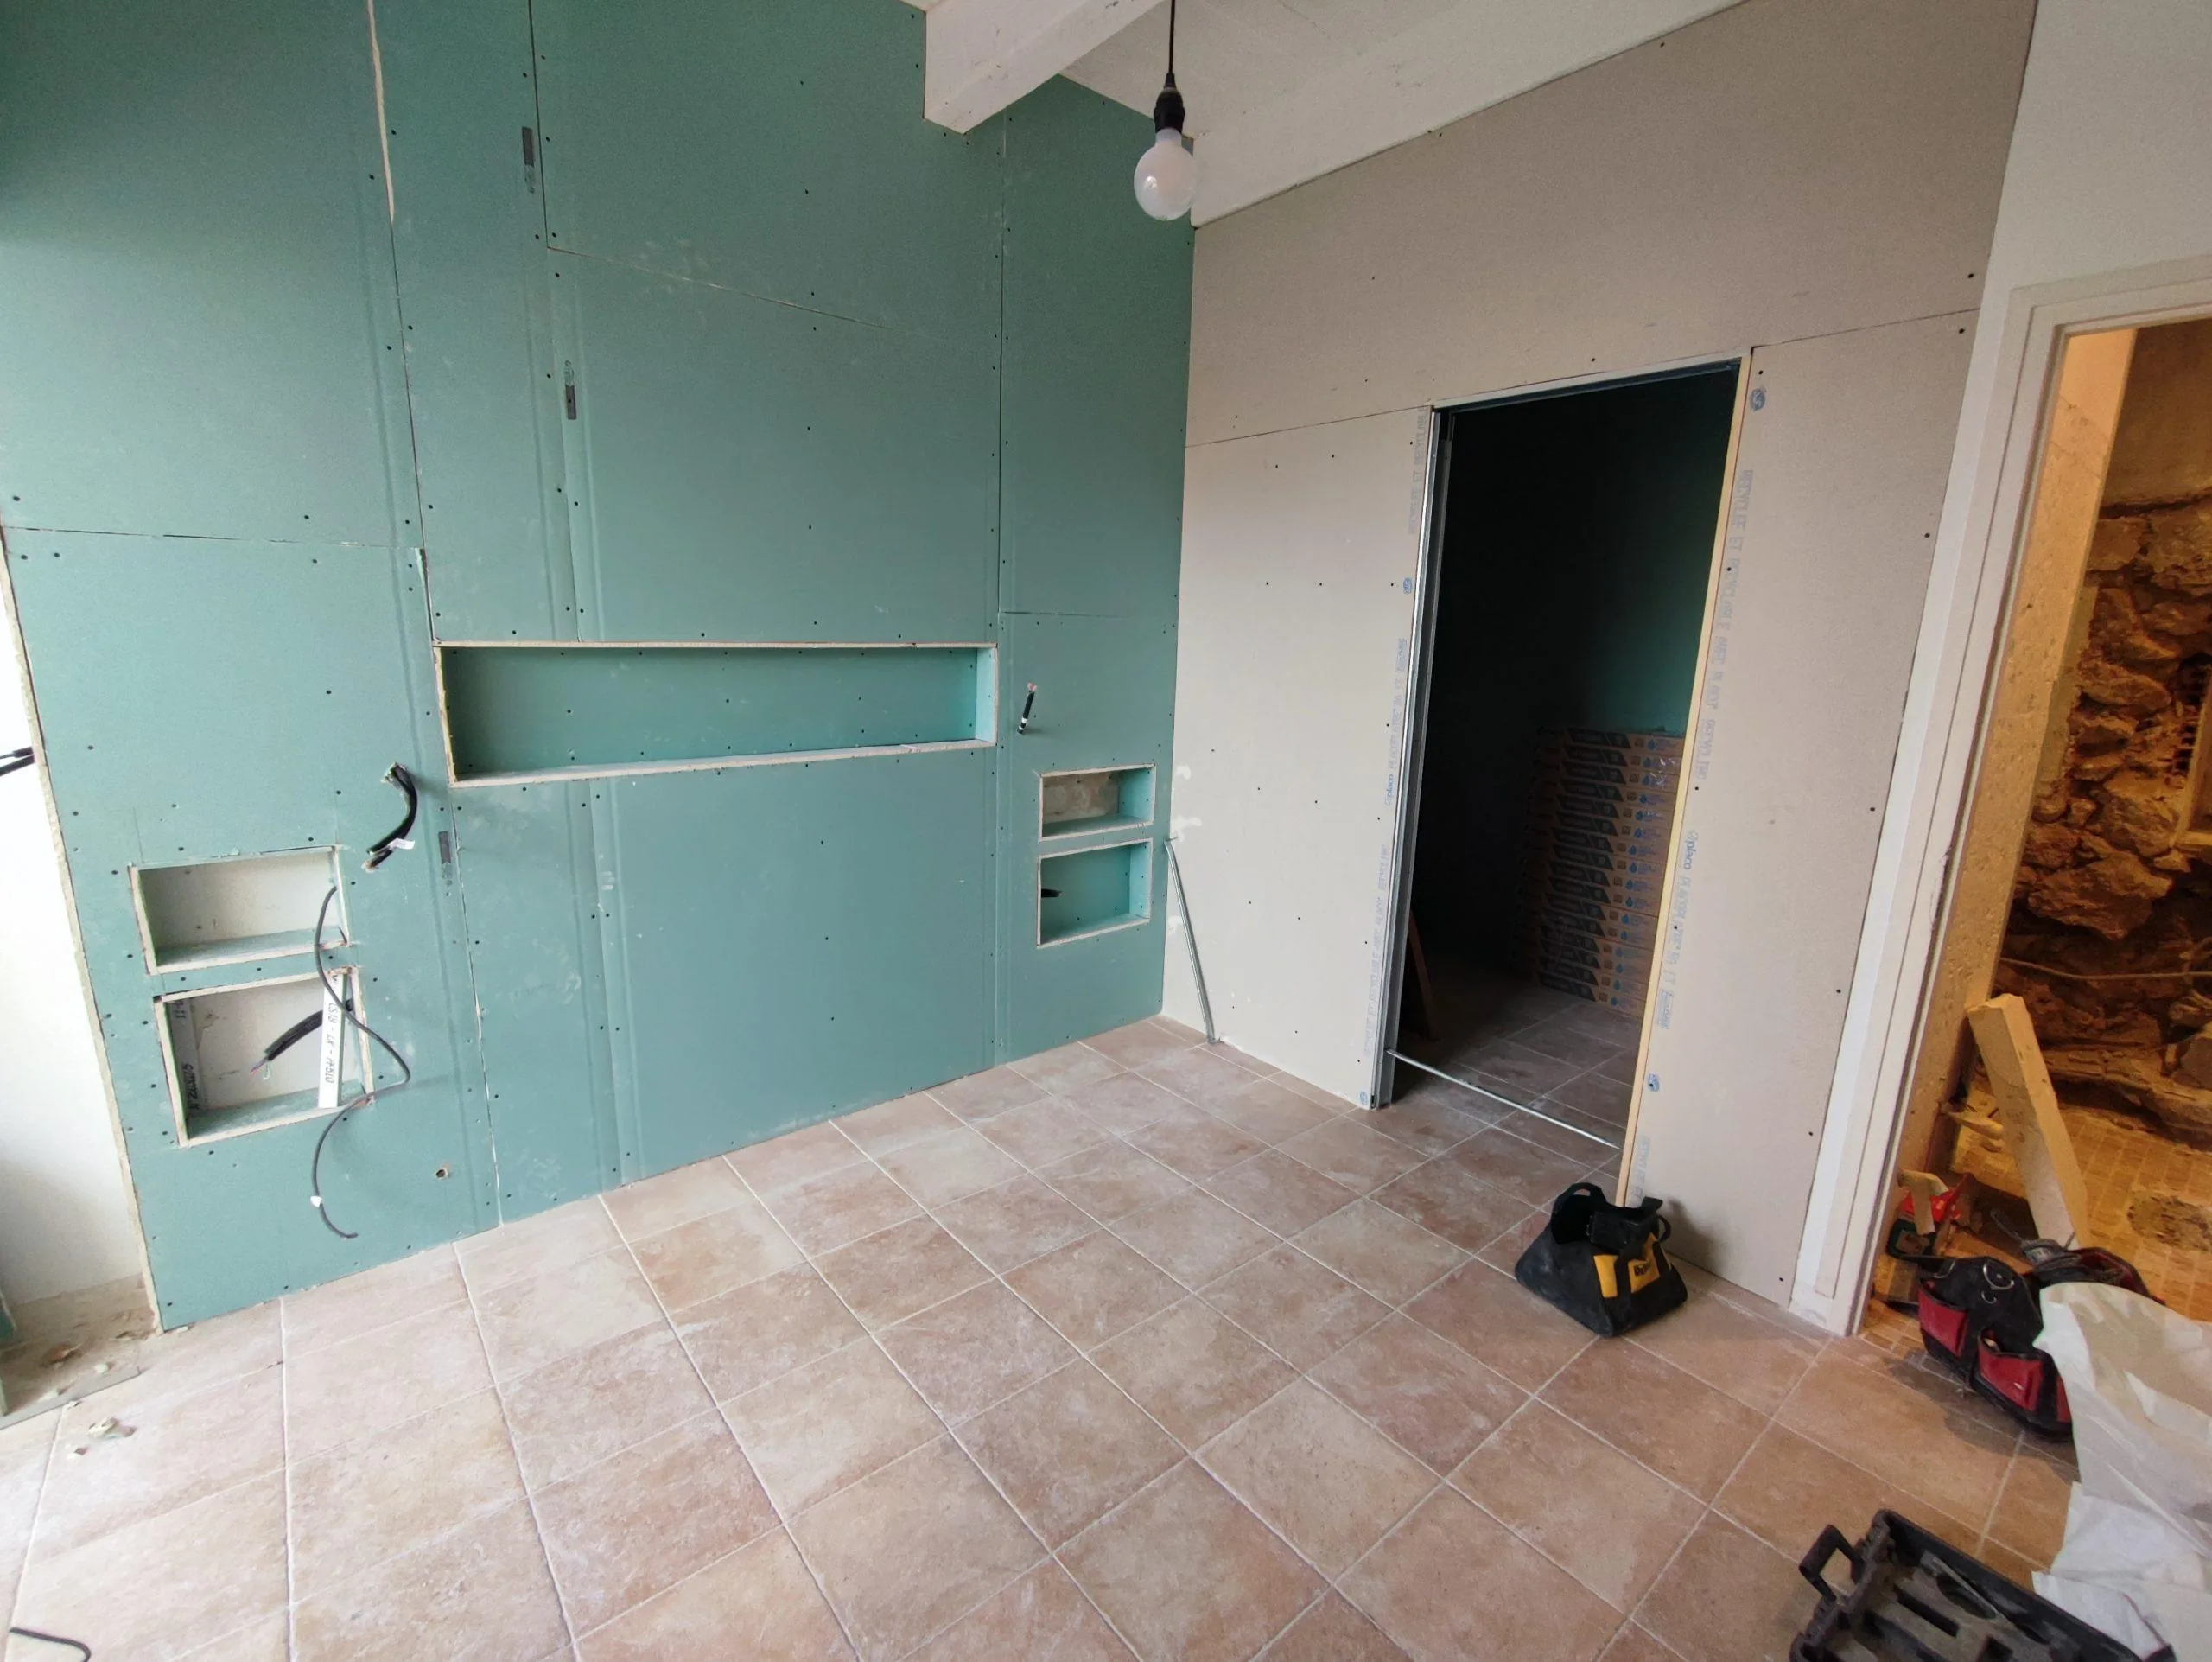
The closet partitions used galvanized-steel framing and moisture-resistant gypsum board. They were erected in week 2 alongside the start of the shower-room work, allowing the trades to progress without taking turns blocking one another.
The suspended ceiling and mechanical ventilation followed in the same sequence. Completing that secondary construction opened the way for finishing work, while the service routes remained coordinated with the new partitions.
Moisture-resistant board is not, by itself, a complete waterproof shower assembly. The wet-area details must belong to a suitable construction system. The case describes the materials used for the enclosure, not a universal instruction to rely on a board color for water protection.
Make three layout decisions before adding extras
First, establish a hierarchy: place the bed with its usable circulation, locate the shower room where services make sense, and integrate storage within the resulting arrangement. The aim is not to give the closet every spare centimeter at the expense of reaching the bed.
Second, test the boundary details against the actual construction. The owner’s preferred glazed pocket-door arrangement was not feasible here. A sliding door integrated into a custom plasterboard housing was developed to provide the needed use with a coordinated finish.
Third, decide how to treat what remains. Existing timber floor beams were retained, treated and painted, becoming part of the interior rather than an element automatically hidden. The 105 m² apartment study from sketch to primary suite shows related reasoning across a larger plan.
See our projects in video
Real floor plans and renovations explained step by step on the ArchiWorking YouTube channel. Watch how spaces are reworked before the works begin.
Weeks 1-2: removal, setting out and major partitions
The opening stage involved reviewing conditions with the trades, sharing plans, arranging removal and preparing the next operations. The existing bathroom was fully stripped. The closet enclosure and the headboard structure took shape.
This was when technical choices became physical dimensions. A later change is not literally impossible once a partition exists, but it may require reopening work and changing the sequence. Resolve the important positions before treating the new enclosure as finished.
The early stage was therefore not just demolition. Setting out, service decisions and coordination established what the later finishes would be able to cover.
Weeks 3-4: joints, first paint and flooring
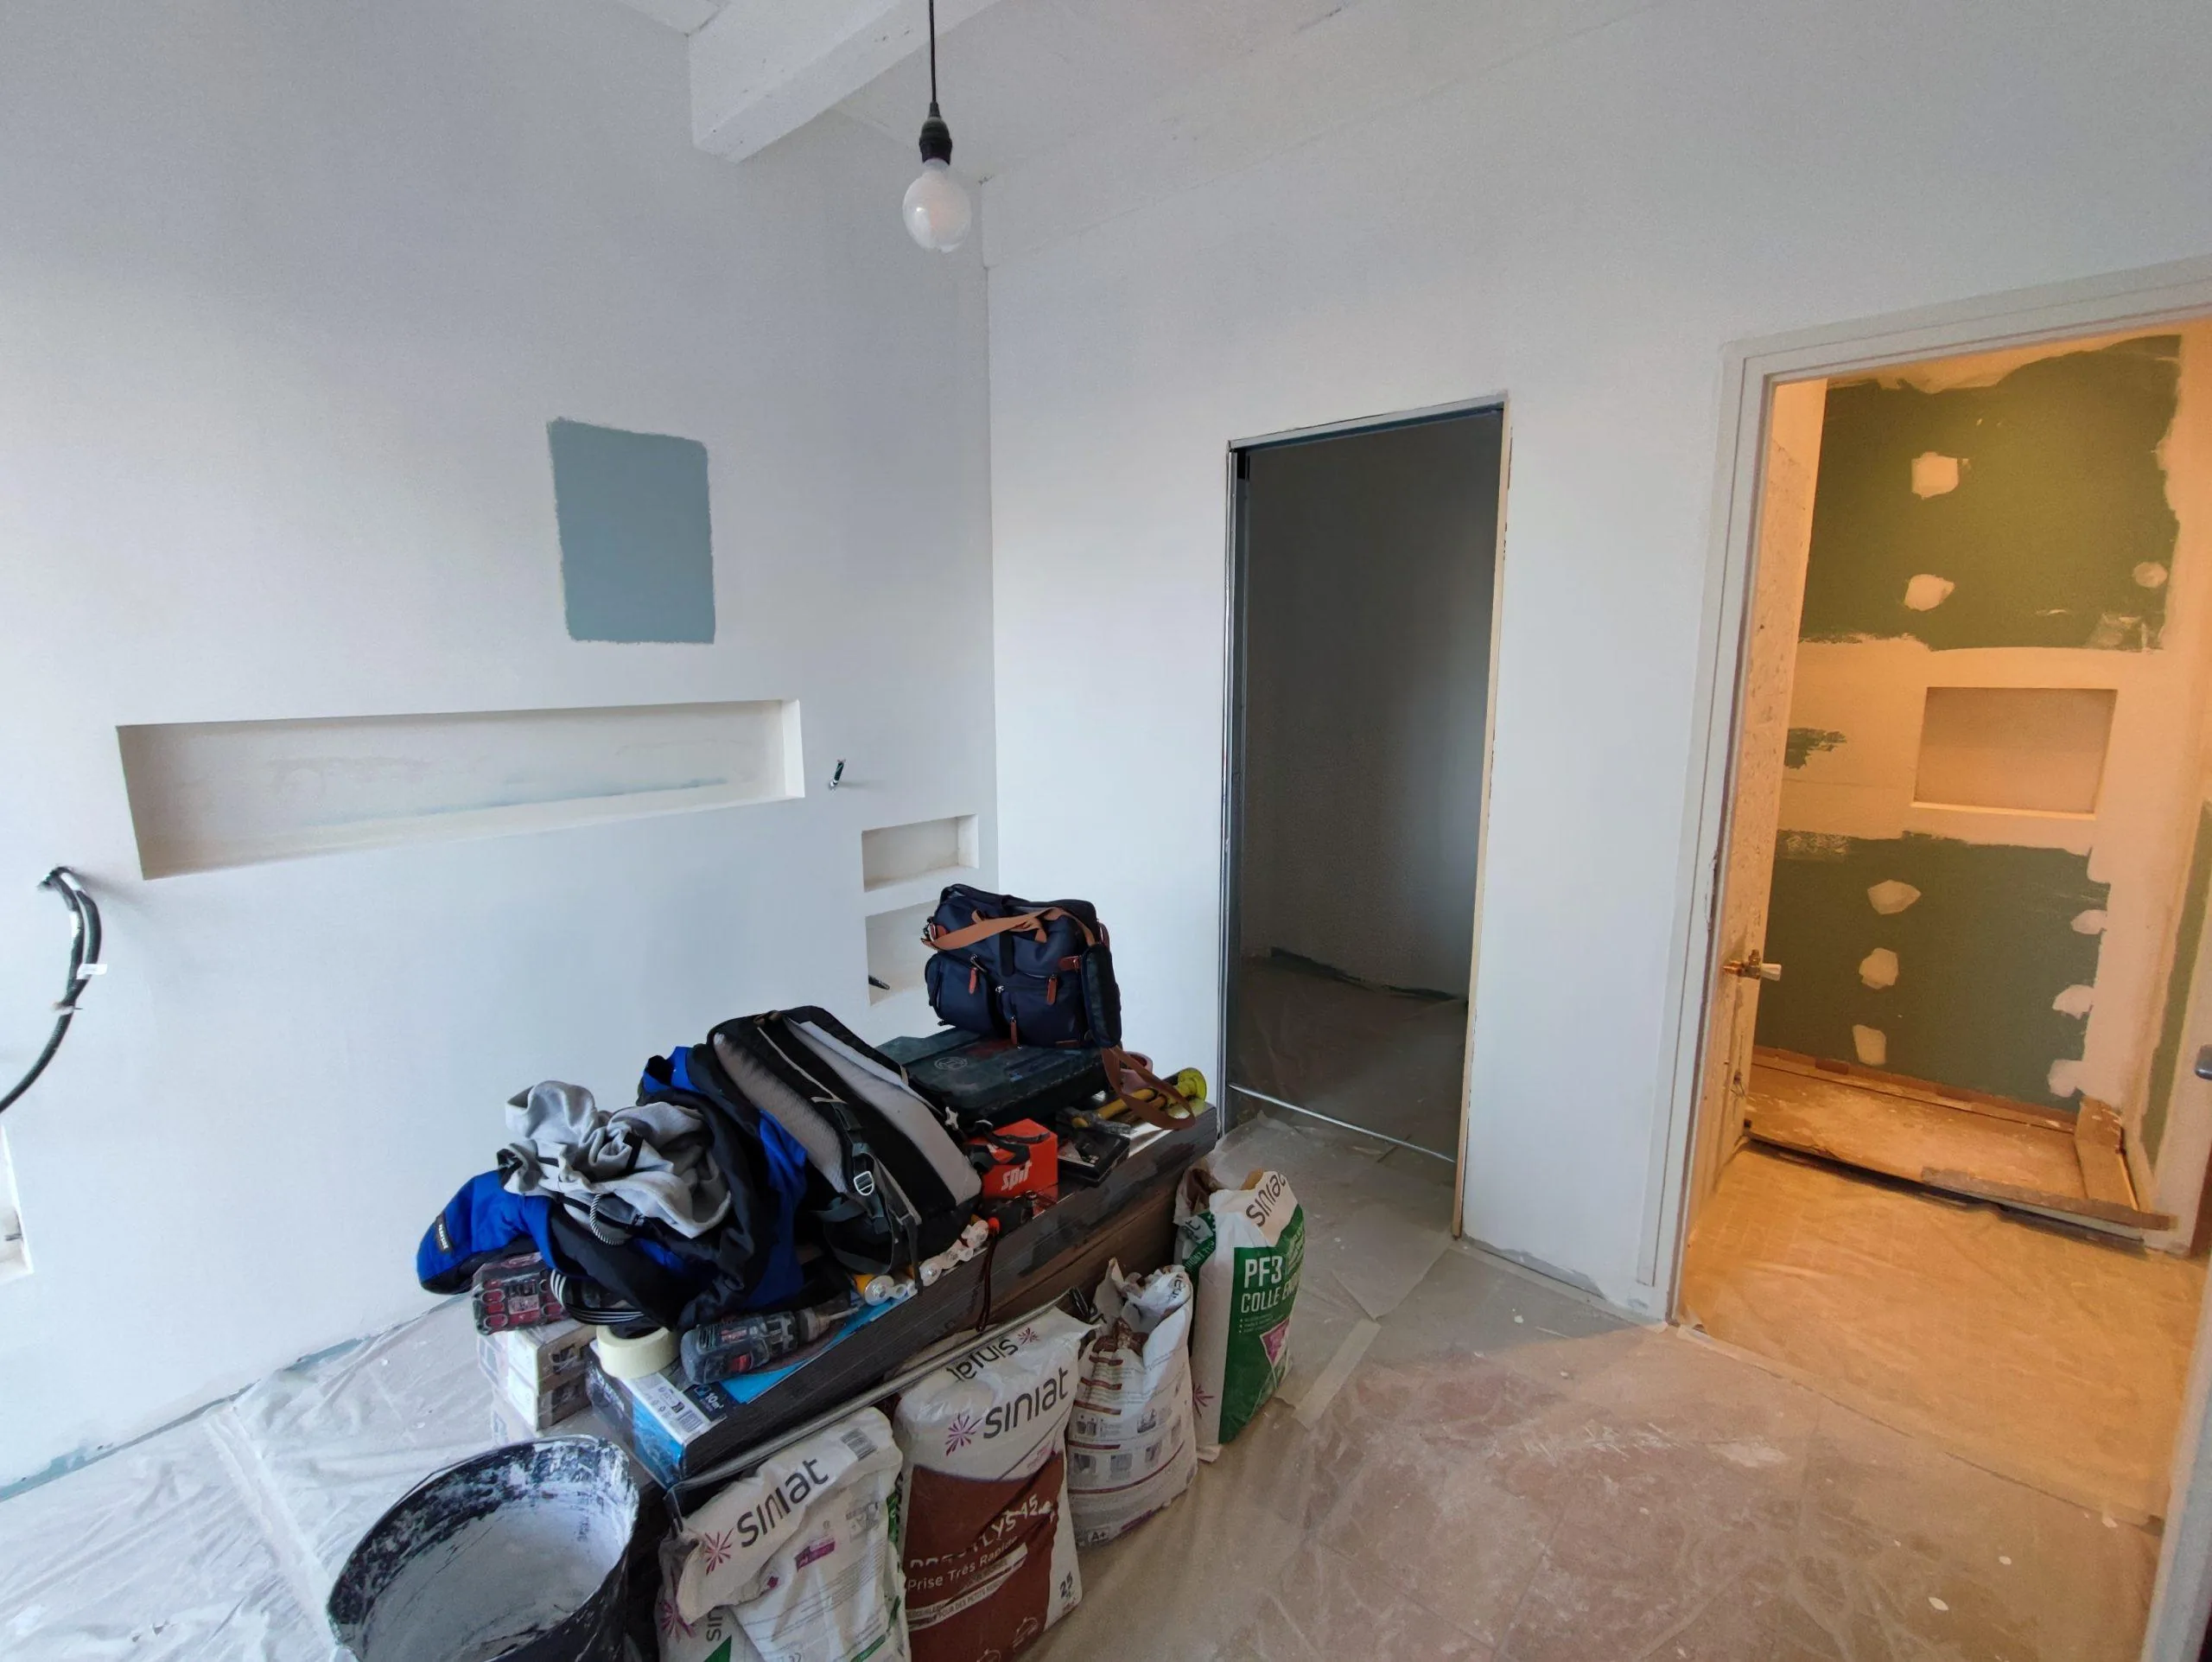
Joint treatment and sanding were completed on the partitions, followed by the first primer coat. The owner approved a color test before the main application, avoiding a whole-room color decision based only on a small printed reference.
The floor sequence included a vapor-control layer, underlay and oak-effect flooring in a staggered running pattern, described in French as pose à l’anglaise. These are the layers recorded for this project, not a universal build-up for every floor substrate.
Materials waiting for delivery were coordinated with other available work so the schedule could continue. Progress depended on managing dependencies rather than expecting every item to arrive in an ideal sequence.
Weeks 5-6: wall tile, bathroom fittings and a rework decision
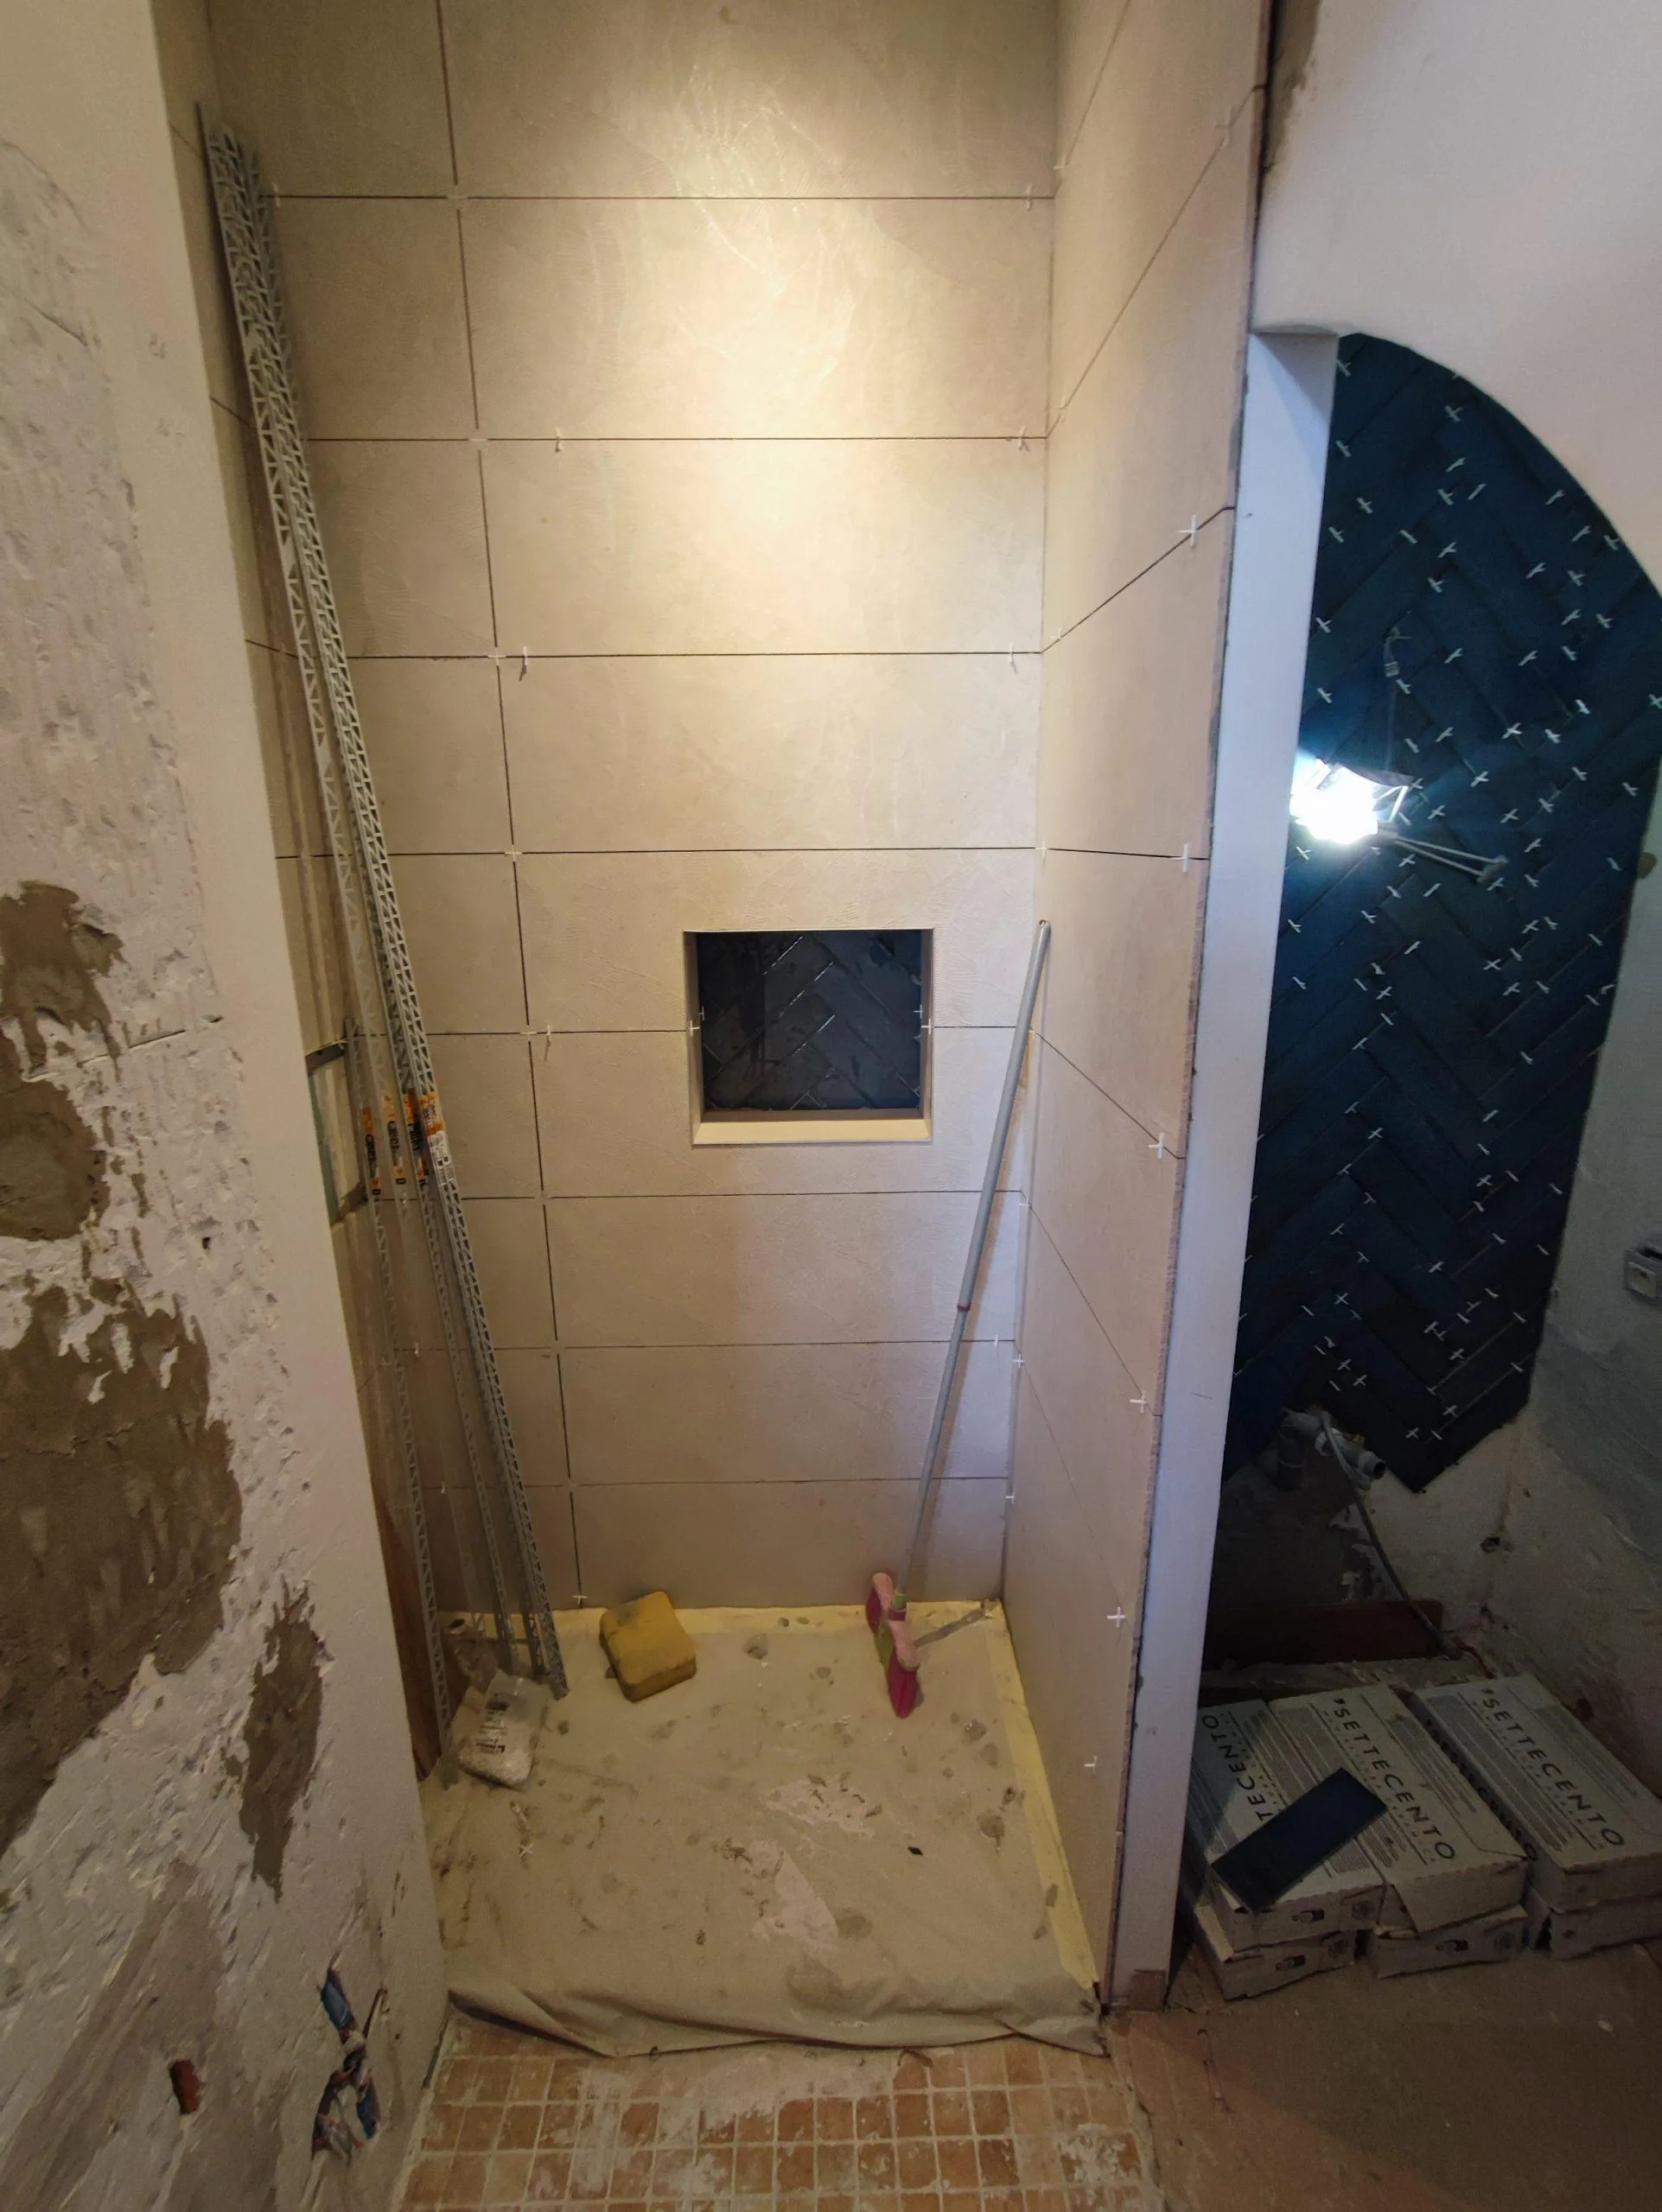
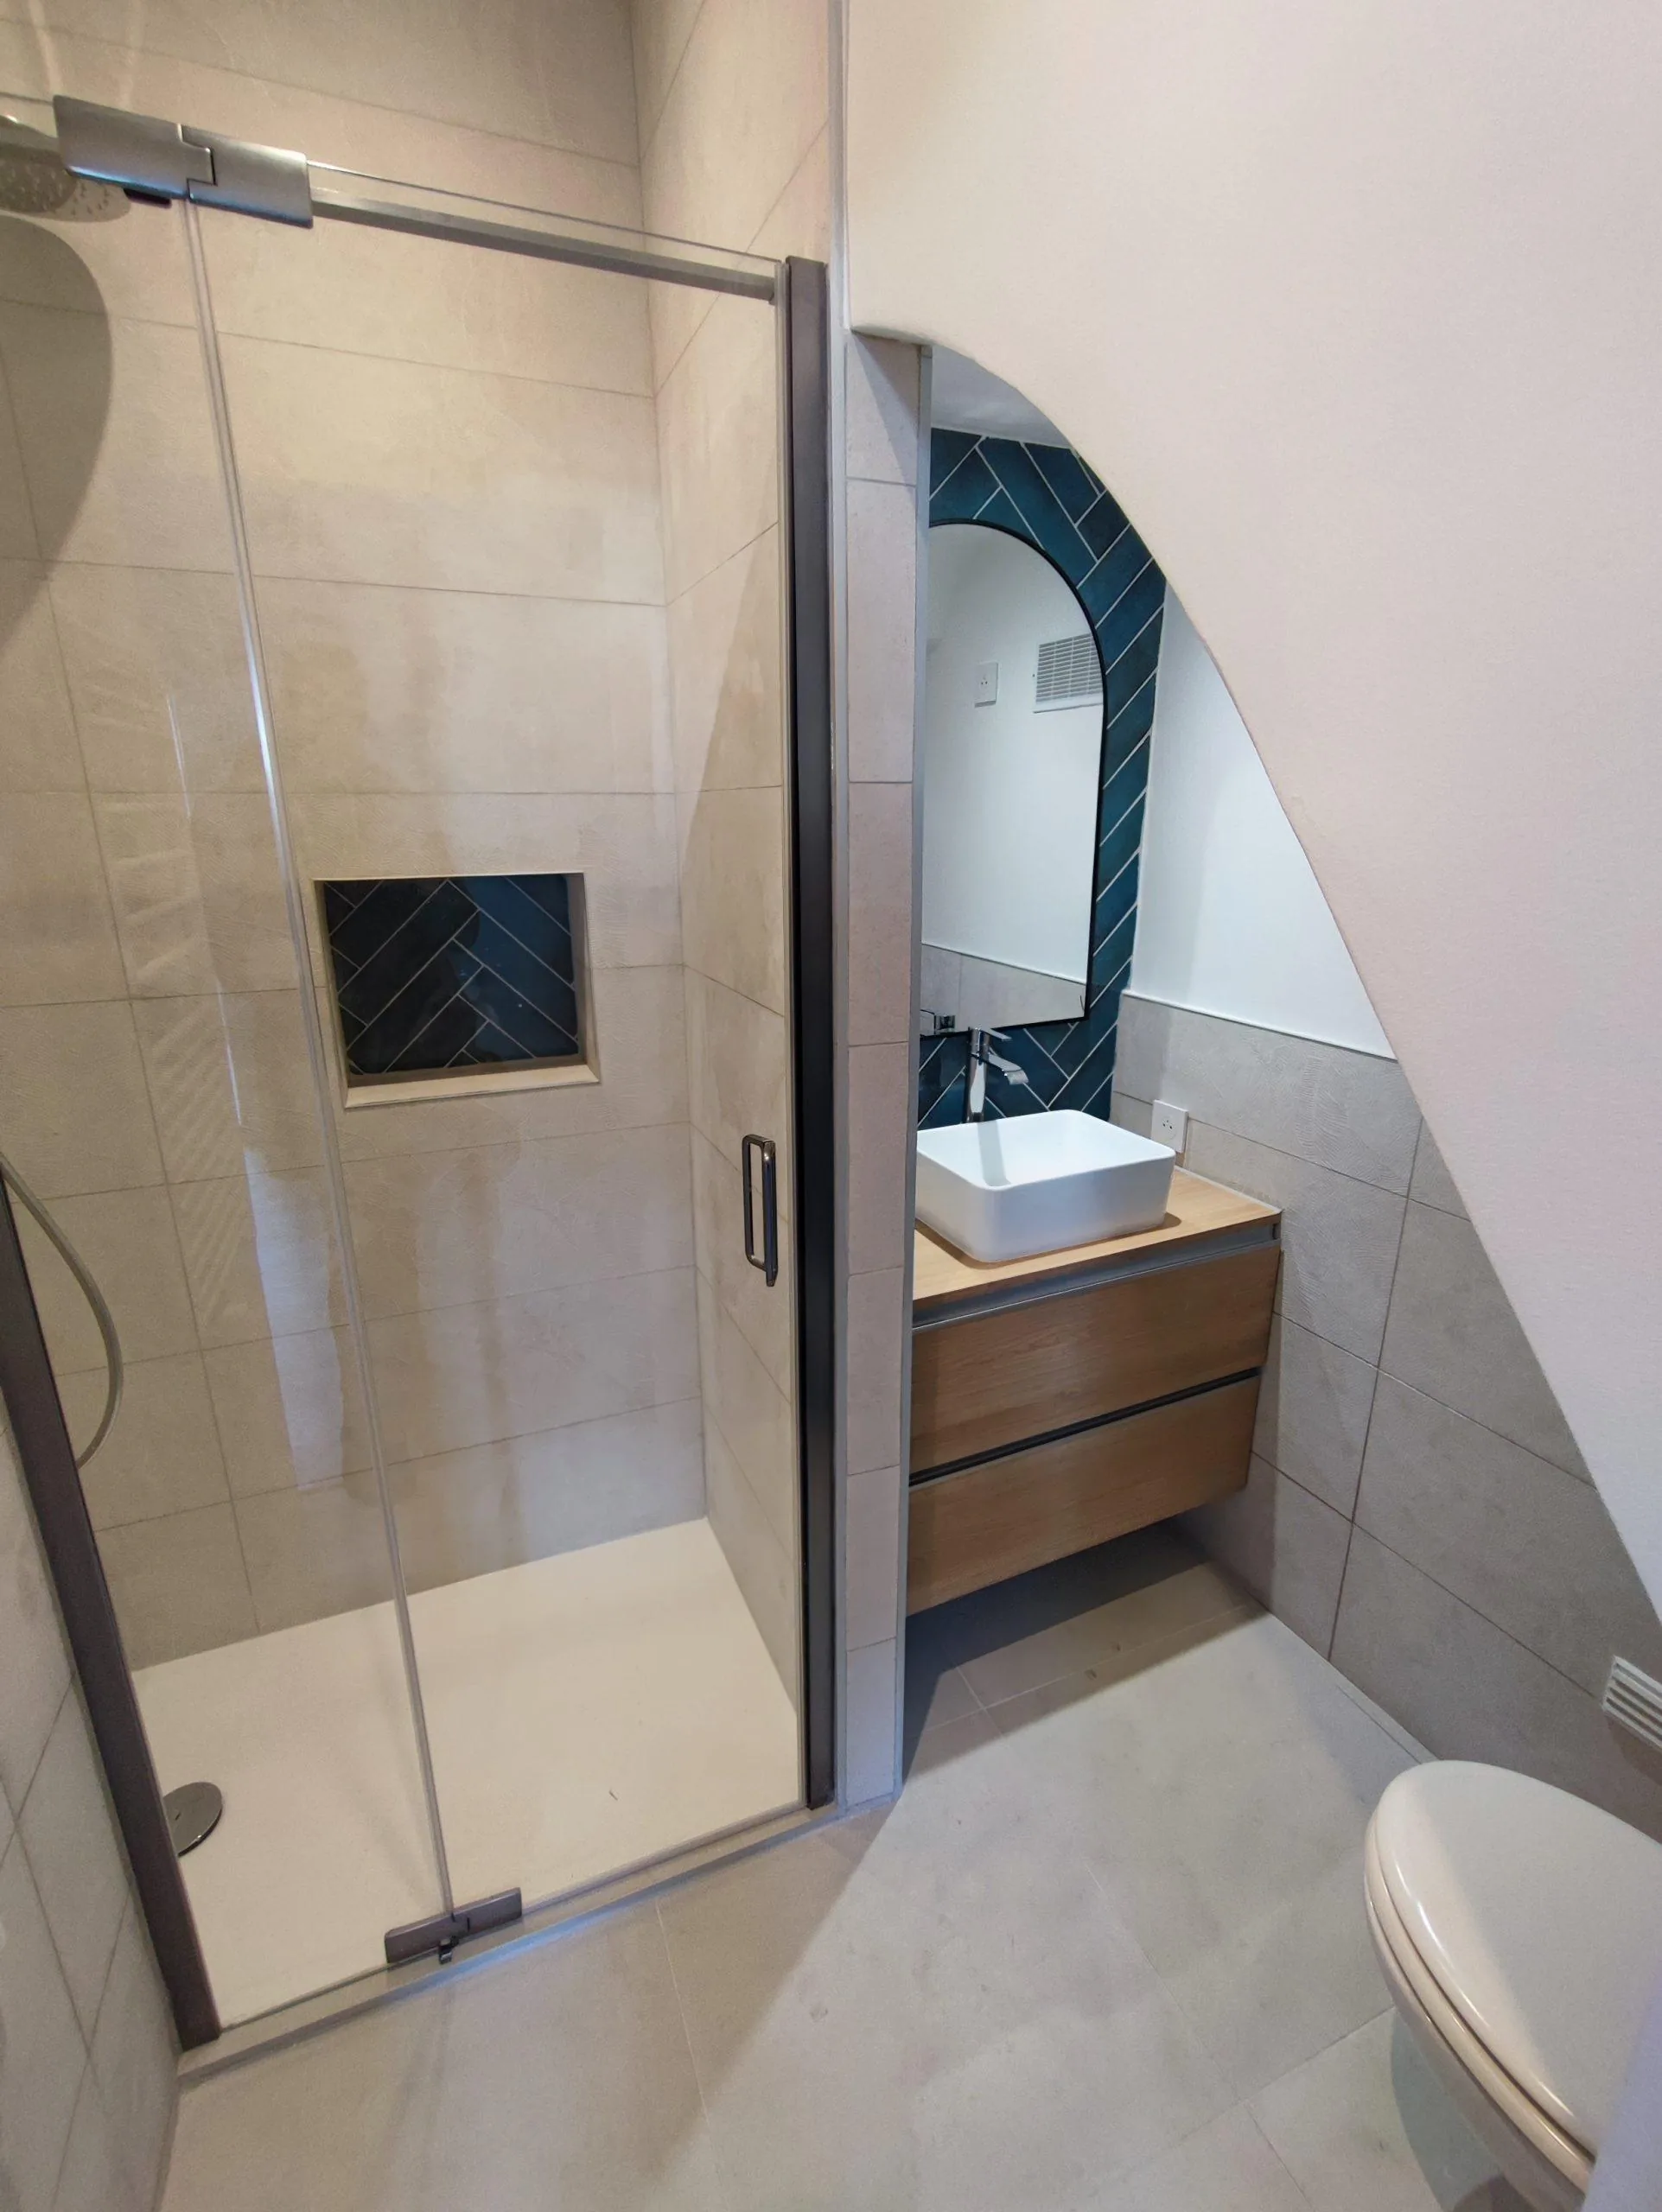
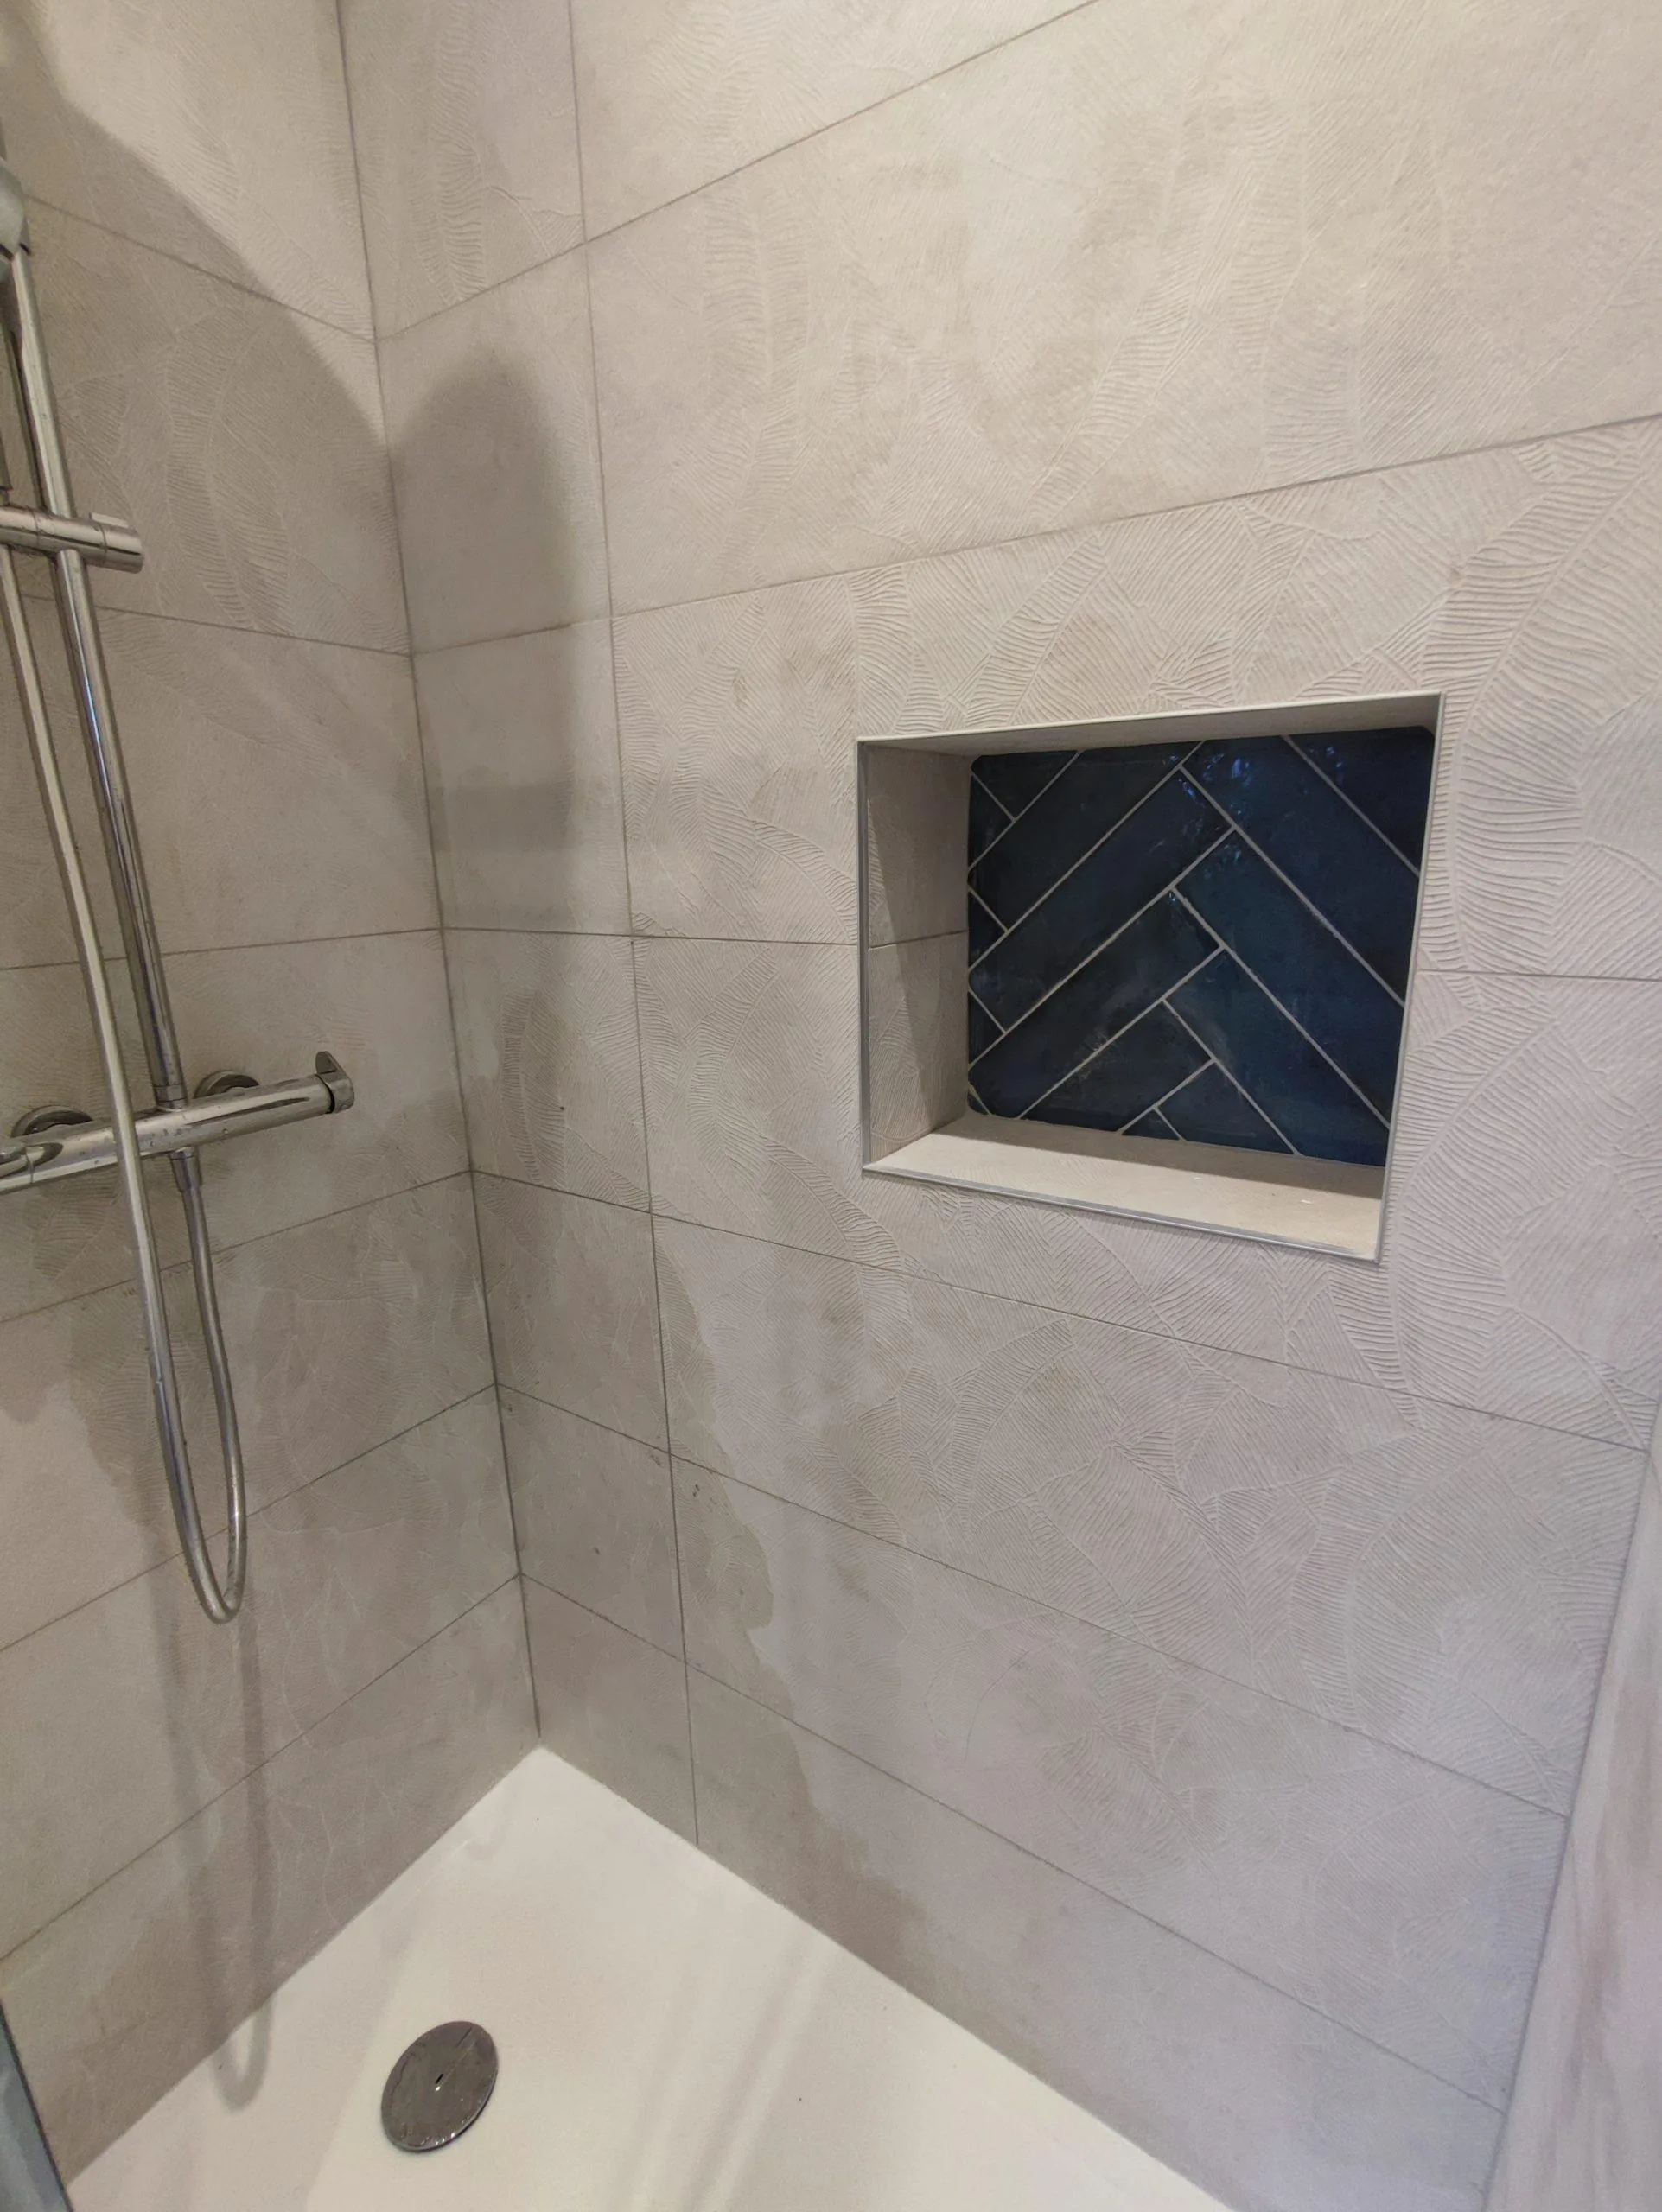
Bathroom wall tile and finishes progressed, including the niche and a herringbone arrangement at the vanity finish. In week 6, the owner noticed a color difference under raking light.
The tile was redone. The decision was possible because replacement material, trade availability and the effect on the remaining work could be assessed together. A reported appearance issue should be examined in its actual lighting rather than accepted or rejected automatically.
Constructive relations with the trades helped the rework proceed without conflict. That does not mean every tile complaint on every project can be resolved without time or cost consequences; it describes the conditions that made this particular decision manageable.
Week 7: storage, timber details and final fitting
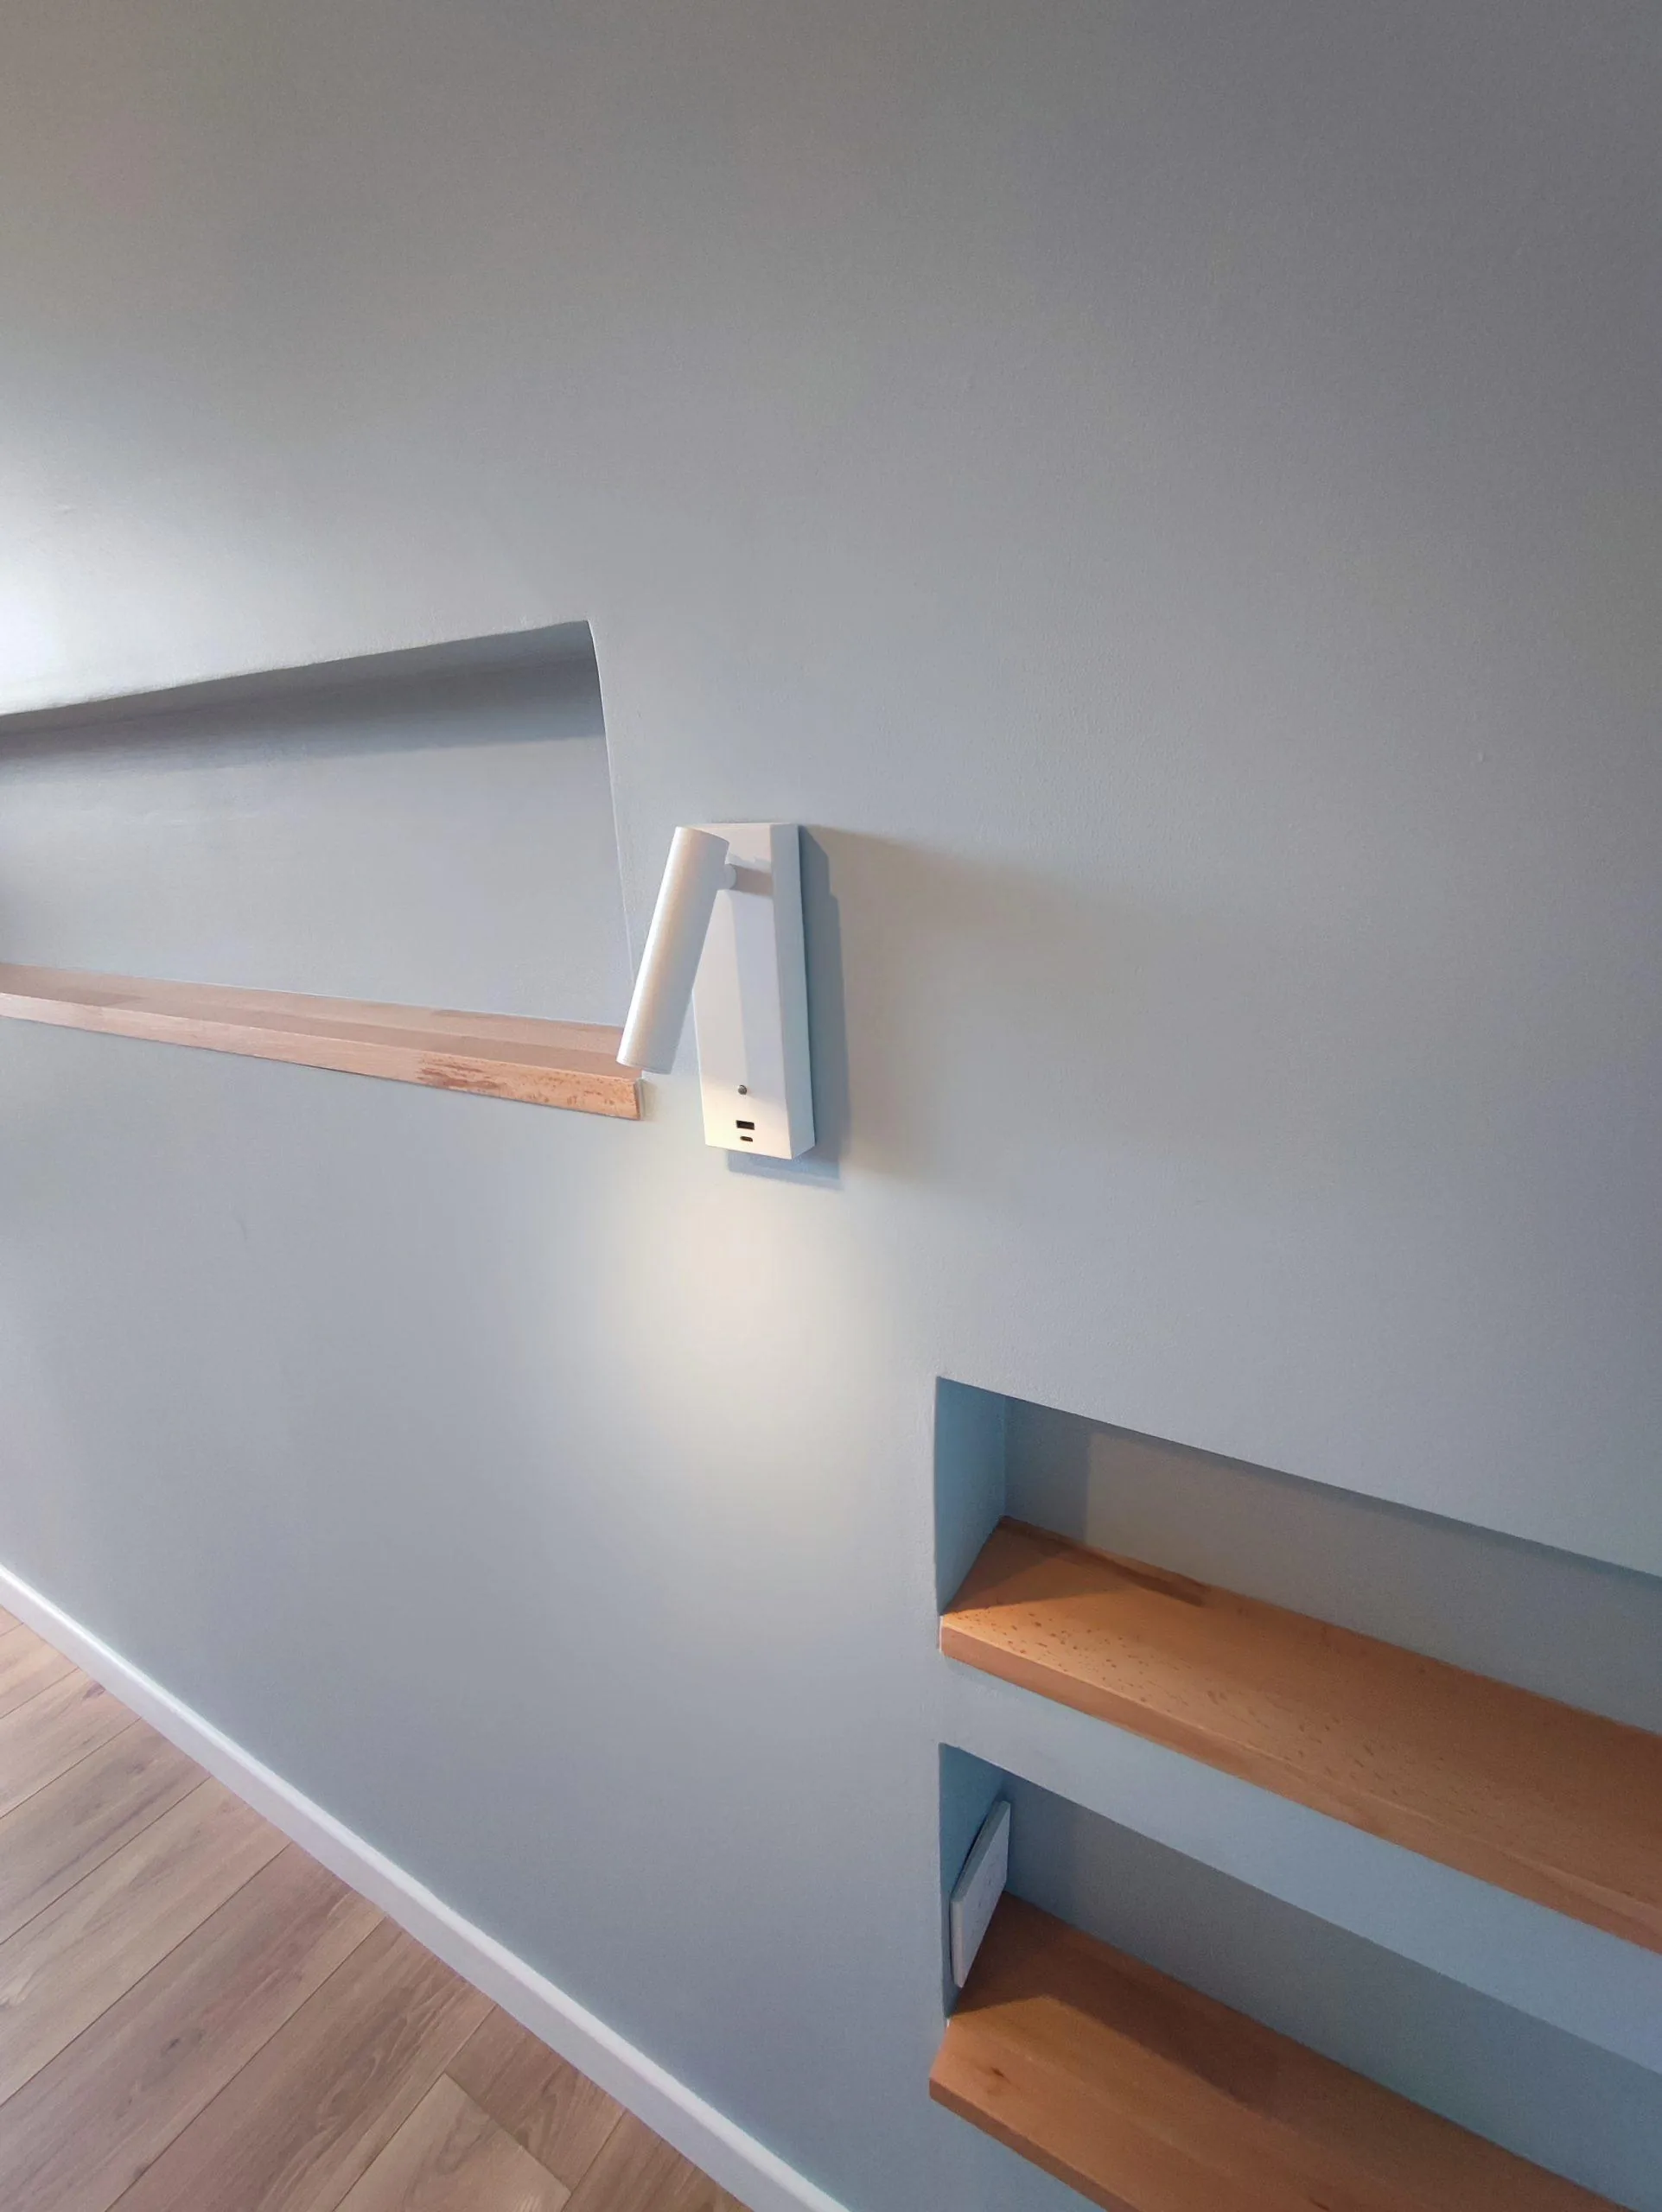
The closet was secured and the headboard niches received worktop material cut, sanded and varnished. The finish served appearance and durability rather than leaving the niche interiors as unfinished recesses.
The door was reworked with flooring material, corners received trim and the remaining tile details were completed. The bookcase was chemically anchored into the load-bearing wall to carry the intended long-term books and decorative loads.
Chemical anchoring is a detail selected for an actual support and load, not a guarantee that any resin fixing is suitable for any wall. The important point is that the furniture’s support was resolved as part of completion, not judged solely by its finished appearance.
Week 8: test, record and hand over
The shower screen was installed, joints completed and the shower equipment connected. Hot water, heating and drainage were checked before the room was considered operational.
Lighting, outlets and two-way switching were tested. The closet was finished, the sliding door adjusted, protective tapes removed and handover documents signed. Paint and joint touch-ups were identified to the contractor rather than ignored because the main work looked complete.
Handover was therefore a practical verification stage. An operational shower and a neat photograph were not the only completion criteria; equipment, movement and remaining snags needed attention too.
Keep the actual unexpected adjustments visible
The 8-week job required more than the tile replacement. The team dealt with a complete network intervention behind the old vanity, a sliding-door catching problem, an electrical outlet mistakenly filled by the painter and a vanity that needed trimming by 1 cm after plaster increased the wall thickness.
The heating system was also repositioned to improve circulation. These were different kinds of adjustment: hidden condition, dimensional change, coordination error and a refinement to use. They could not all be predicted precisely at the start.
None derailed the recorded schedule. That result came from assessing solutions and their dependencies, not from pretending renovation has no surprises. For the tile change, availability, the trade’s timing and the nature of the visual concern were all part of the decision.
Allow time as a project resource
The project guidance recommends a 15 to 20% scheduling contingency for unforeseen conditions. That is a planning allowance, not a promise that every renovation will finish within it. The real duration depends on the existing property, service work and coordination.
The lesson is to avoid committing every available day before the walls are opened. Margin gives the team room to resolve problems without automatically trading away quality or creating conflict between trades.
A coherent program, verified services and clear communication support the finished suite as much as its selected materials. On this job, the 30 m² area remained unchanged while the sleeping, storage and shower functions became one complete arrangement.
Questions about planning a primary suite
Is there an absolute minimum area?
Not from this case alone. The indicative 25 to 30 m² range must be tested against the actual program and geometry. The bed, storage and shower-room functions need to remain usable.
Can it be done without extending?
This project did so within 30 m². It depended on redistribution, retained structural elements and choices such as the alternative sliding-door housing.
Should 8 weeks be assumed for every project?
No. That was this job’s recorded duration. Existing conditions, supply, service complexity and coordination change the schedule; the recommended 15 to 20% allowance is a planning guide.
How are unexpected changes best handled?
Identify the real issue, compare feasible remedies with the trades, and consider time, cost and quality together. A workable solution is more useful than treating every adjustment as a failure of the whole project.